Code as a Liberal Art, Spring 2024
Unit 1, Homework 0
Due: Thursday, January 25, 10am
Note: In general, homework will be assigned on Thursday and due the following week on Wednesday evening, but for this week, since we're just getting started, and I hope this is a simple, fun exercise, I hope you can get it posted by tomorrow evening. Thanks and good luck!
Experiment in algorithmic thinking
-
Get a deck of playing cards and shuffle it well. Then, carefully sort the deck so that you have all clubs, then the diamonds, then the hearts, then the spades. Within each suit, the order should be A, 2, 3, 4, 5, 6, 7, 8, 9, 10, J, Q, K.
As you are sorting, pay careful attention to the specific steps that you are taking, or the rules you might be following. Perhaps take notes as you do so. When you are done, write an algorithm to sort a deck of cards: a set of steps that someone else could follow to sort a different, shuffled deck.
Part of the trick of doing this successfully is a balance between specific and general. Your instructions need to be specific enough that anyone could follow them by only making very rote, mechanical gestures without any sophisticated thinking, but they have to be general enough that the same set of instructions would work for any shuffled deck of cards. If you need to make some assumptions (about locations within your workspace, or other operations) you can, but be explicit about what they are.
Create a new folder in your Google Drive folder named "Unit 1, homework 0". Inside it, create a new Google Doc named "Algorithm" and put your algorithm in that. If you also wish to include your notes or any documentation (photo, video) of your process, please feel free — but do so in a separate file.
Preparing for our first technical lesson
Once you have that completed, try to get through as much of the below as possible. This will prepare you for our work in class on Wednesday. If you have any issues with any of this, don't worry. Feel free to email me and I can assist, and we can also try to use some class time working out any kinks.
-
Text editor. Before class on Wednesday, make sure to download and install the Visual Studio Code (VS Code) text editor onto your computer, which is freely available from code.visualstudio.com. We'll talk more in class about what a text editor is, but for now, suffice it to say that it is an application that you can use to create computer programs by typing text and saving it as a file.
After clicking "Download" on the above site, you should have a new file in your Downloads folder called something like
VSCode-something.zip. Double-click this file to create the VS Code application, and then drag that into wherever you keep applications on your computer. On Mac, this is typically the Applications folder. Like so: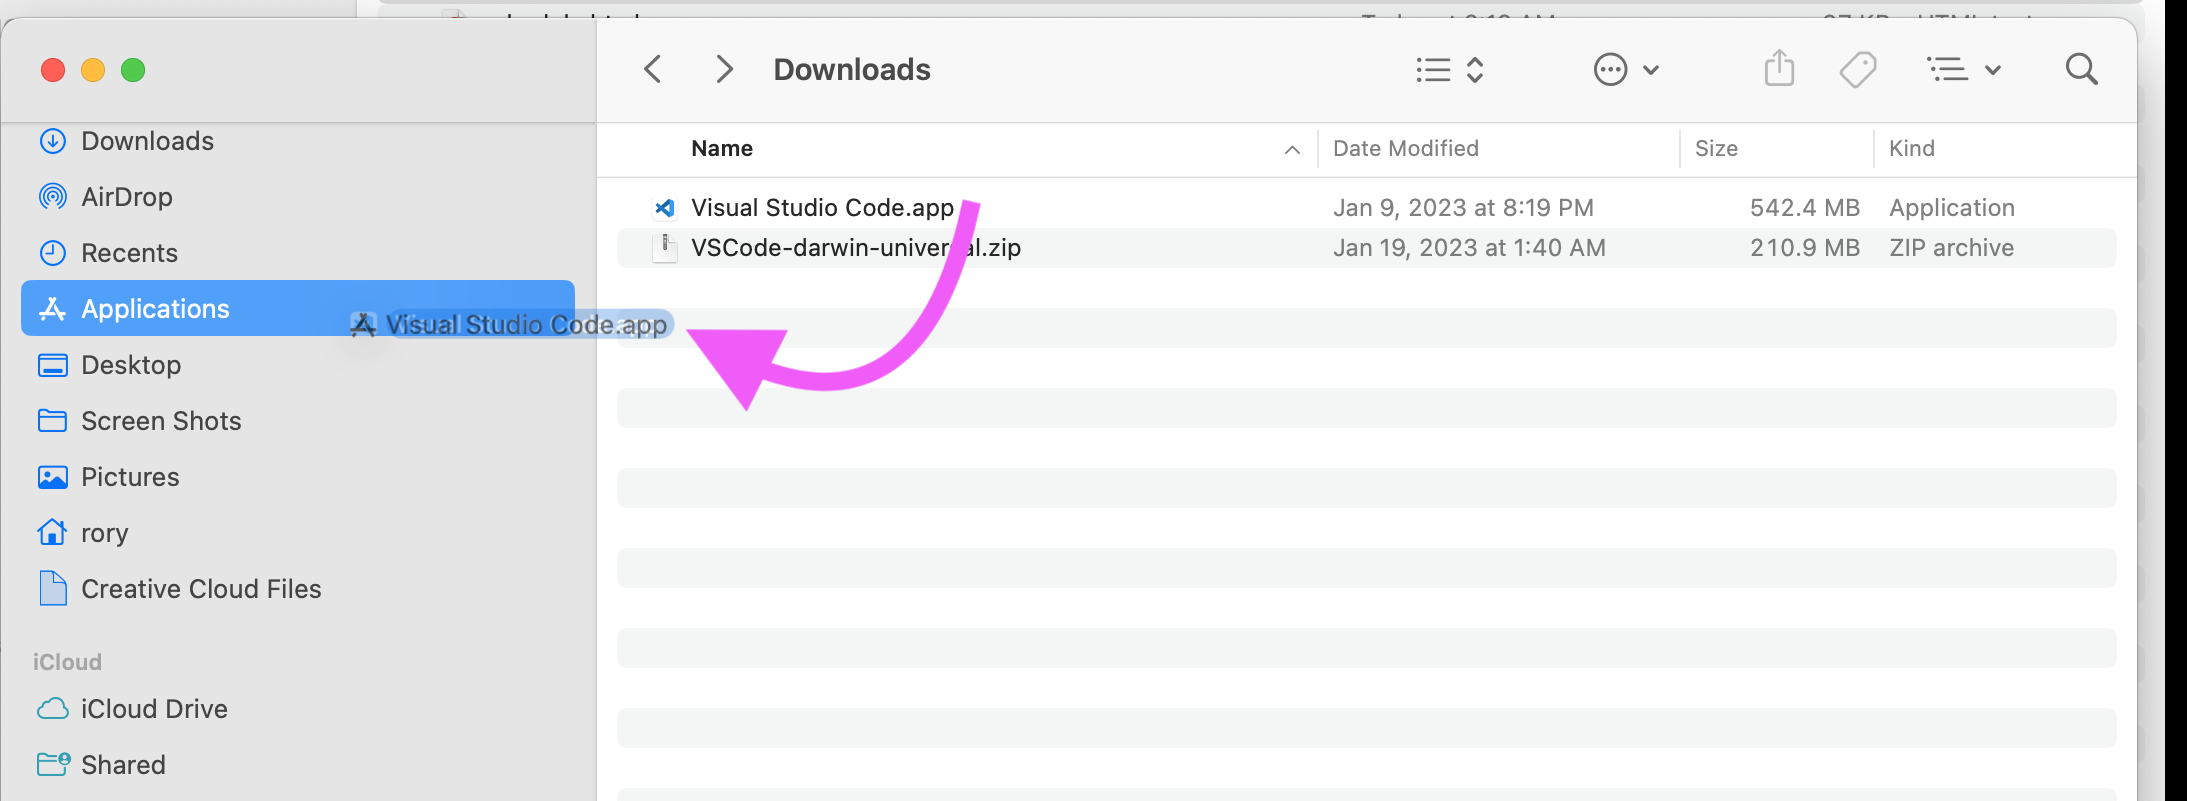 (Click to enlarge.)
(Sidenote: so that you don't get confused at some point in the future, I want to point out that Visual Studio Code is one product within Microsoft's wider Visual Studio brand and product line. The product known as "Visual Studio" has been around for over 20 years, was originally created for Windows desktop application development, and has since expanded to support other types of coding but mainly focused around larger, server-side, and desktop projects. Visual Studio Code is a newer, open source program designed for coding in many programming languages and is more suitable to smaller projects, even though it can also be used for larger ones as well.)
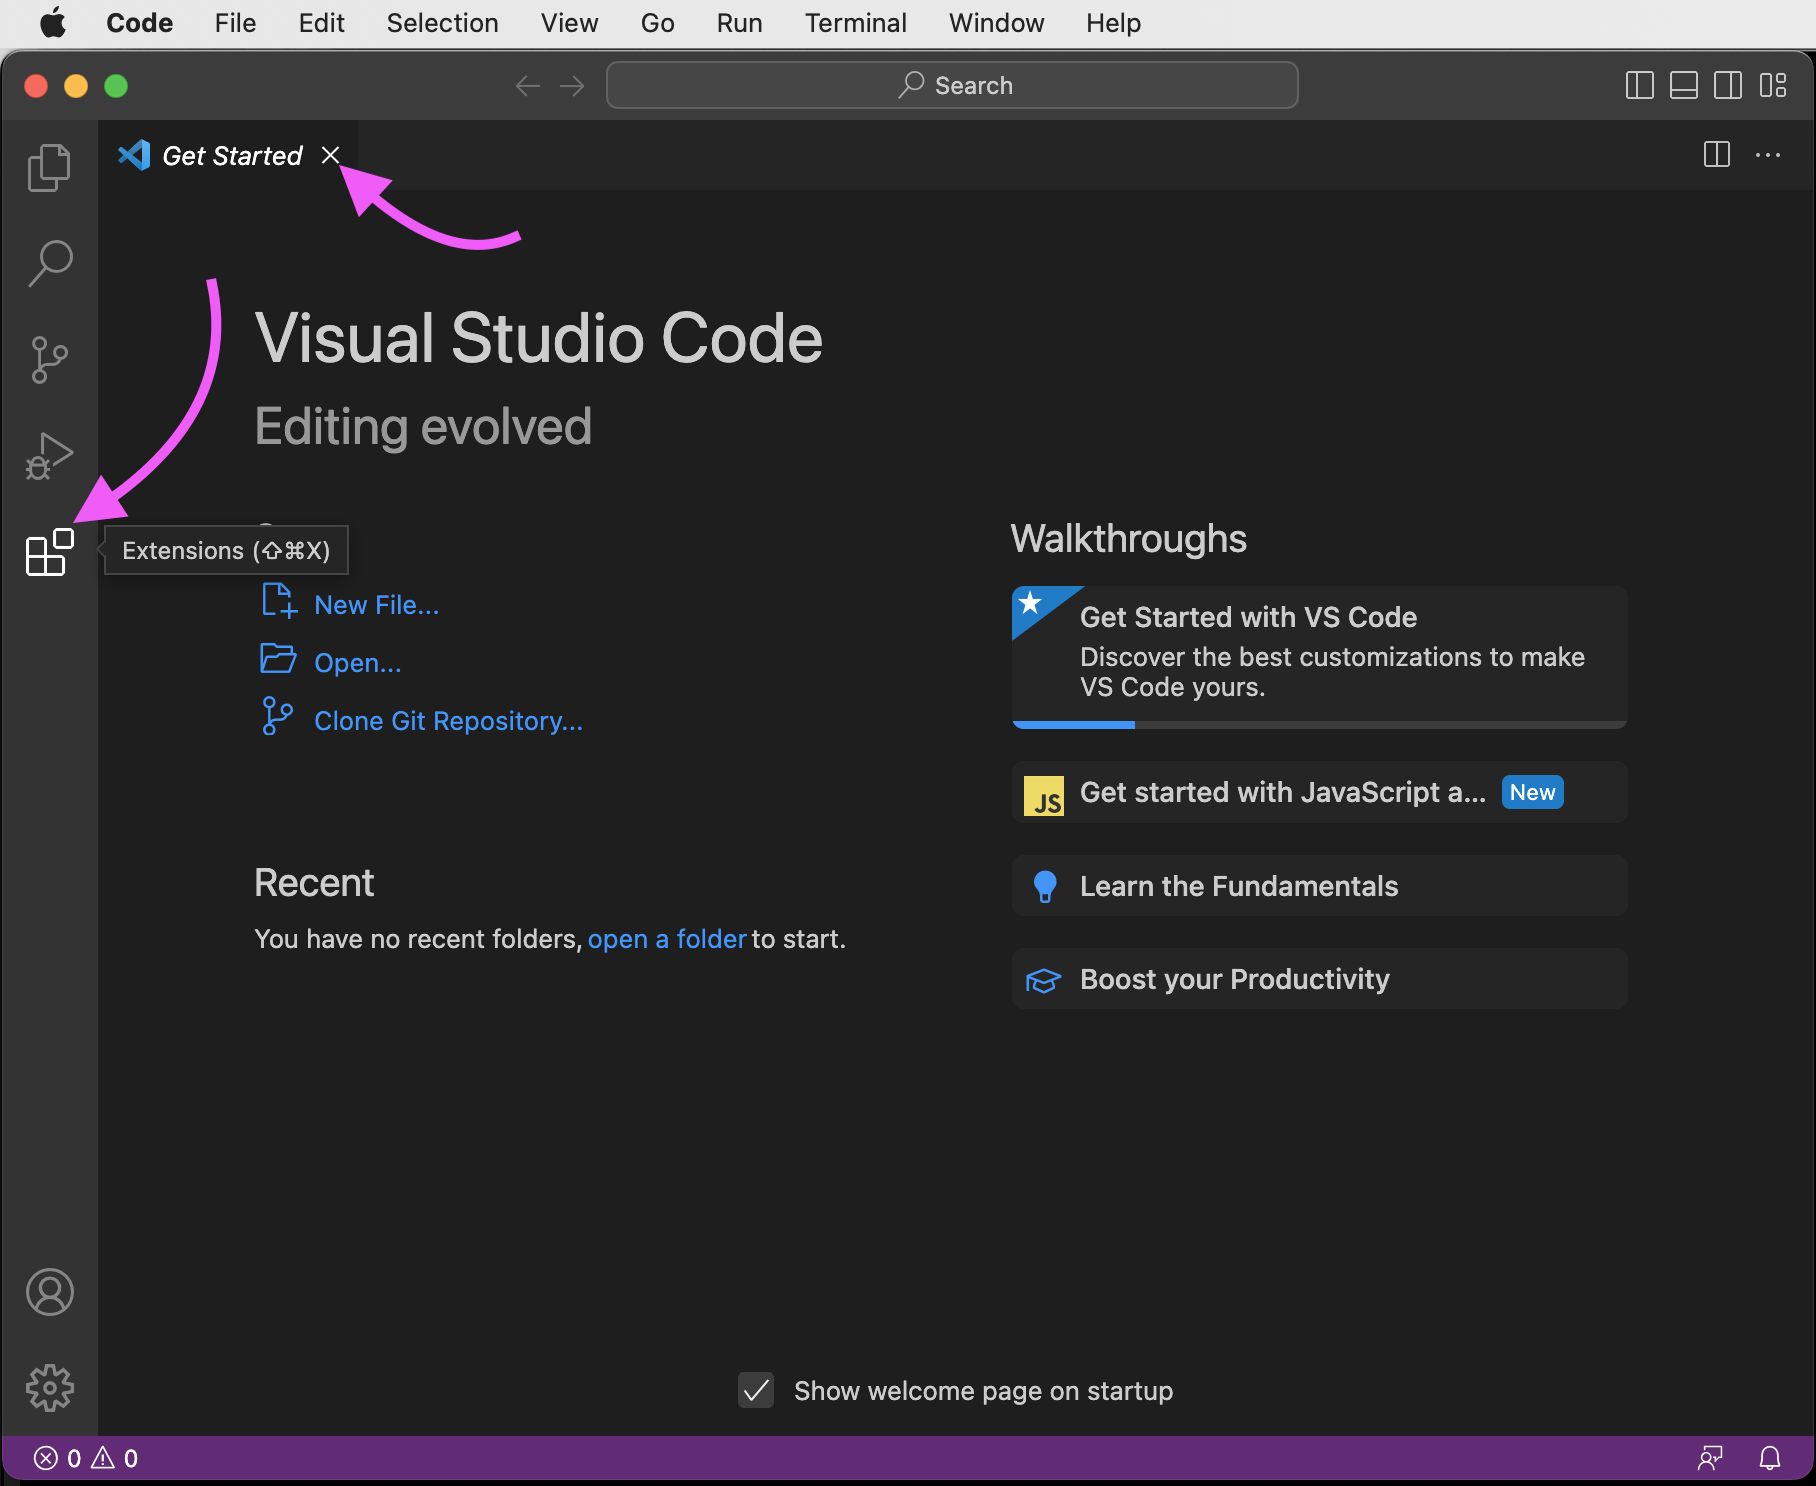
Next, find the application and double-click to open it. You should see something like this. You can ignore this "Getting Started" screen for now, so click the small "X" on its tab to close it. (You can easily get it back later if you'd like to see what it says). Then click on the "Extensions" icon. Like this:
 (Click to enlarge.)
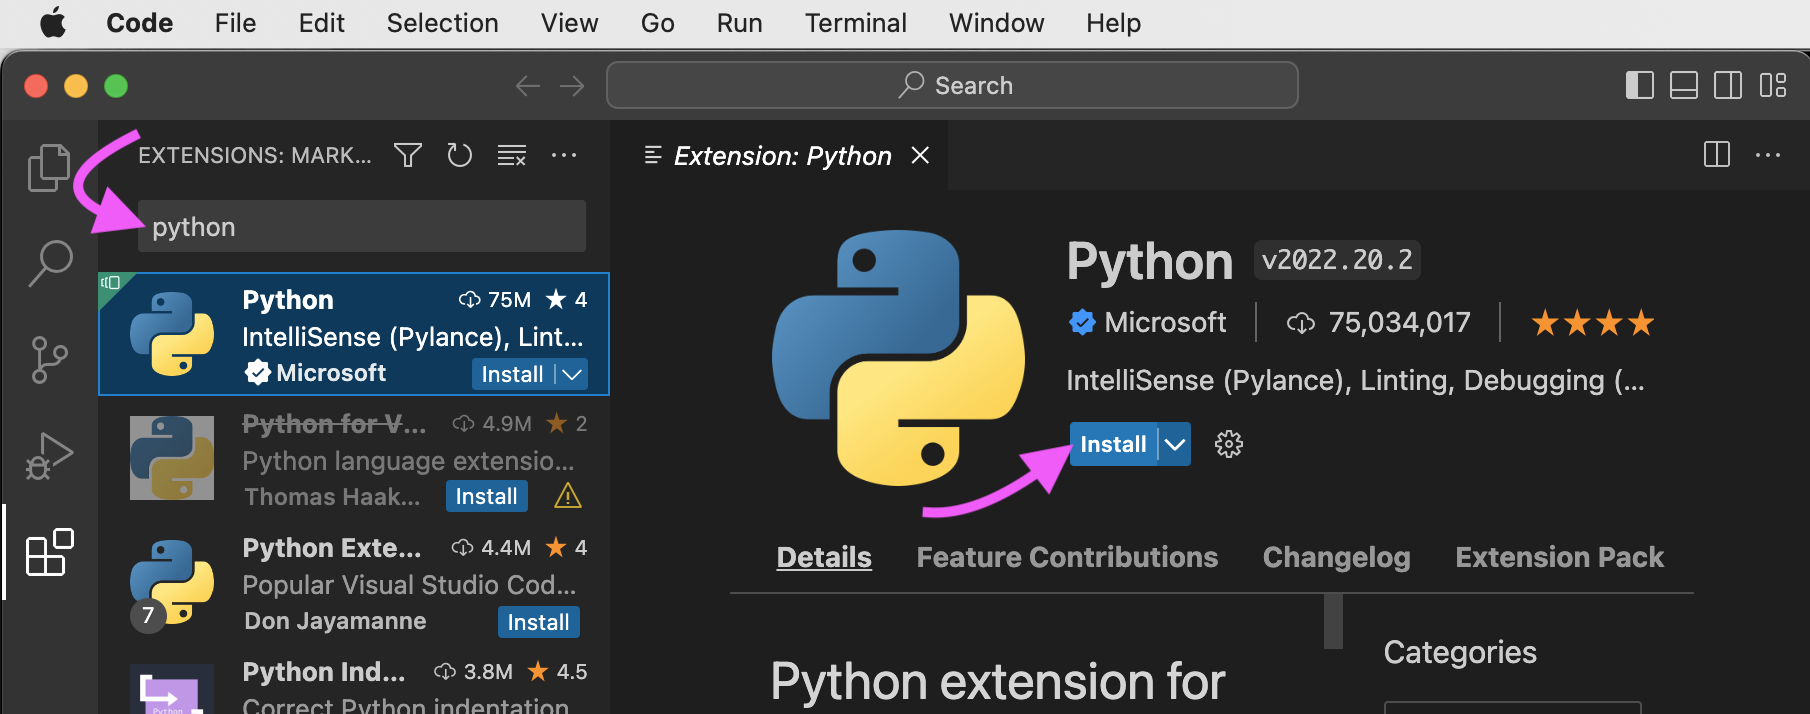
Next, in the search box type "python", click the first item (should say "IntelliSense") and then click "Install":
 (Click to enlarge.)
This should install everything you'll need to get started with Python development, and we'll talk about next steps in class on Wednesday.
-
Command line. We will be using the command line throughout the semester. Please take 25 minutes to watch this video which will explain a bit about what the command line is, why it exists, its history, and why we use it this semester and in the Code program:
- History of the command line (25 min)
Conveniently, VS Code comes bundled with a command line feature that helpfully lets you access this the command line within the VS Code interface.
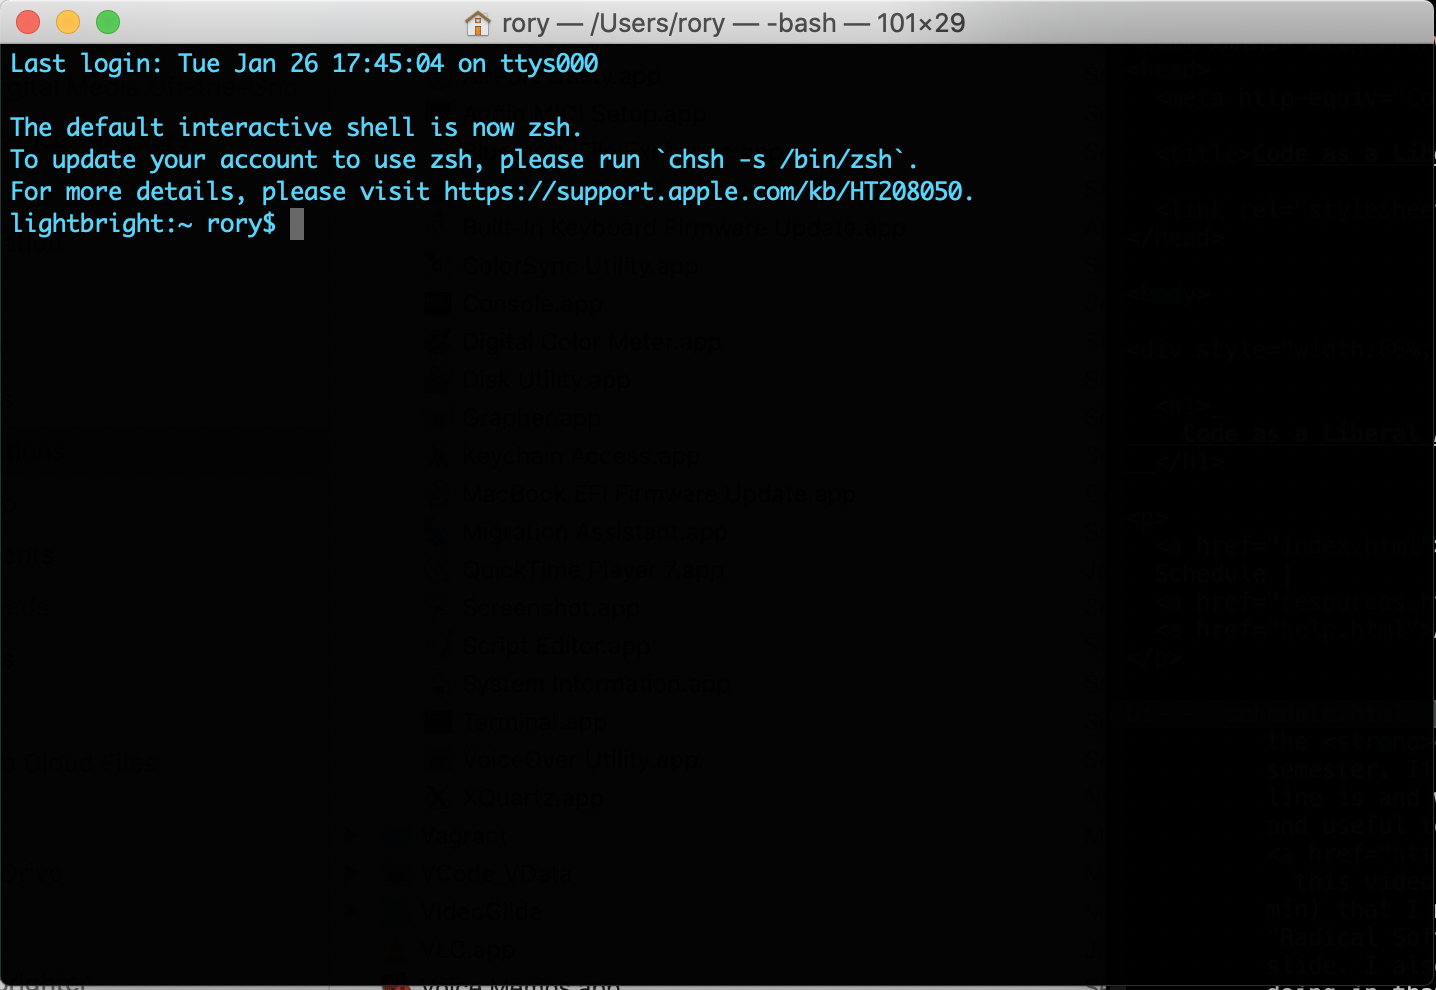
But you should know that the command line is a powerful tool that predates VS Code and that still exists on your computer outside the VS Code app. To understand this, take a moment to access the command line on your computer. On Mac, the easiest way is with a program called Terminal. Open up Finder, go into the "Applications" folder, look for a folder called "Utilities", and within that, find and double-click on "Terminal". Or you can use a Spotlight search (⌘-SPACE) and search for Terminal. When you open that, it should look like this but with different colors. (You can customize your colors in Preferences if you wish.)
On Windows, again, please reach out to me and we can work together to get you setup.
For most of the semester you shouldn't need to use this stand-alone command line in the Terminal app and can instead use the command line that is integrated with VS Code.
-
Python image library (known as Pillow). For the first unit we will be working with a Python library for maniupulating images called "Pillow". It gets its name because it is based on a prior project called PIL (Python Image Library). PIL was abandoned about 10 years ago, but some other developers continued supporting a compatible project, and the name is a reference to the original.
Let's install this library on your system within the VS Code command line terminal. Within the menu bar of VS Code, click Terminal > New Terminal, then click in the new Terminal window, type
pip3 install pillowand press ENTER:If you get a message that states something like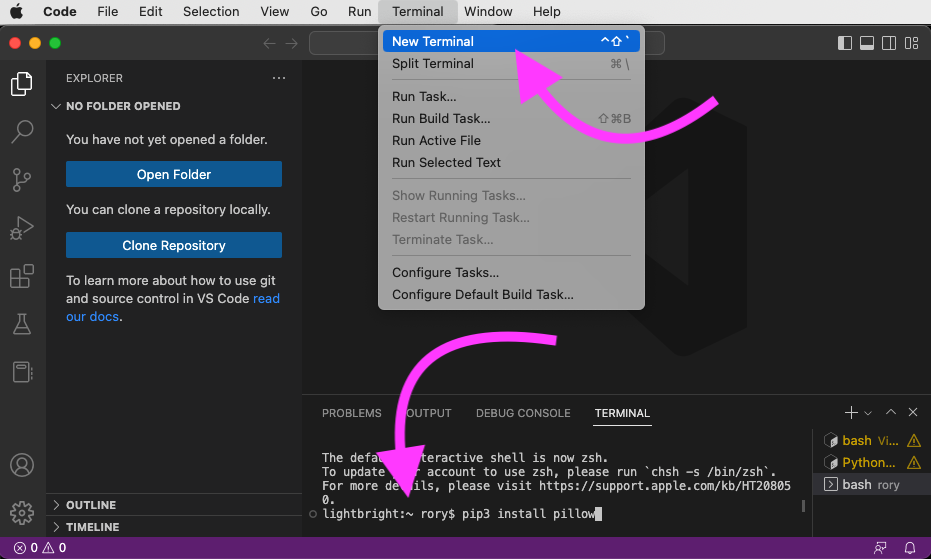 (Click to enlarge.)
Successfully installed
	  pillow-8.1.0
then you are ready to go.If you get an error stating something like "command not found", you may need to run
pipinstead ofpip3. (So the command would bepip install pillow.) But if that is the case, make sure that you are still working with Python 3 by runningpip --versionand look for some output that says something likepython 3.8. If you are confused or unsure, ask me or Viyan.) - Make a Github account (if you don't have one yet), follow the instructions on class help page, and send me a Gist. If you aren't having any problems with anything yet, that's great! Your Gist can just say "hi". This is just a test so you know how this system works, and so I can record your Github username for future reference.