Code as a Liberal Art, Spring 2024
Unit 3, Lesson 2 — Thursday, May 2
CSS and Multimedia
As we've been digging in to all this history (and pre-history)
of the web, I've been repeatedly saying
that hypermedia, also known
as hypertext, can probably be best defined
as documents, or pages,
connected together with links, and
incorporating not just text, but other multimedia such as images
(photos or graphics), sound, video, or other digital
objects. Last week we talked about the first steps of creating
hypermedia by creating HTML pages (plain text
files ending with a .html extension) that contain
images and links to other pages.
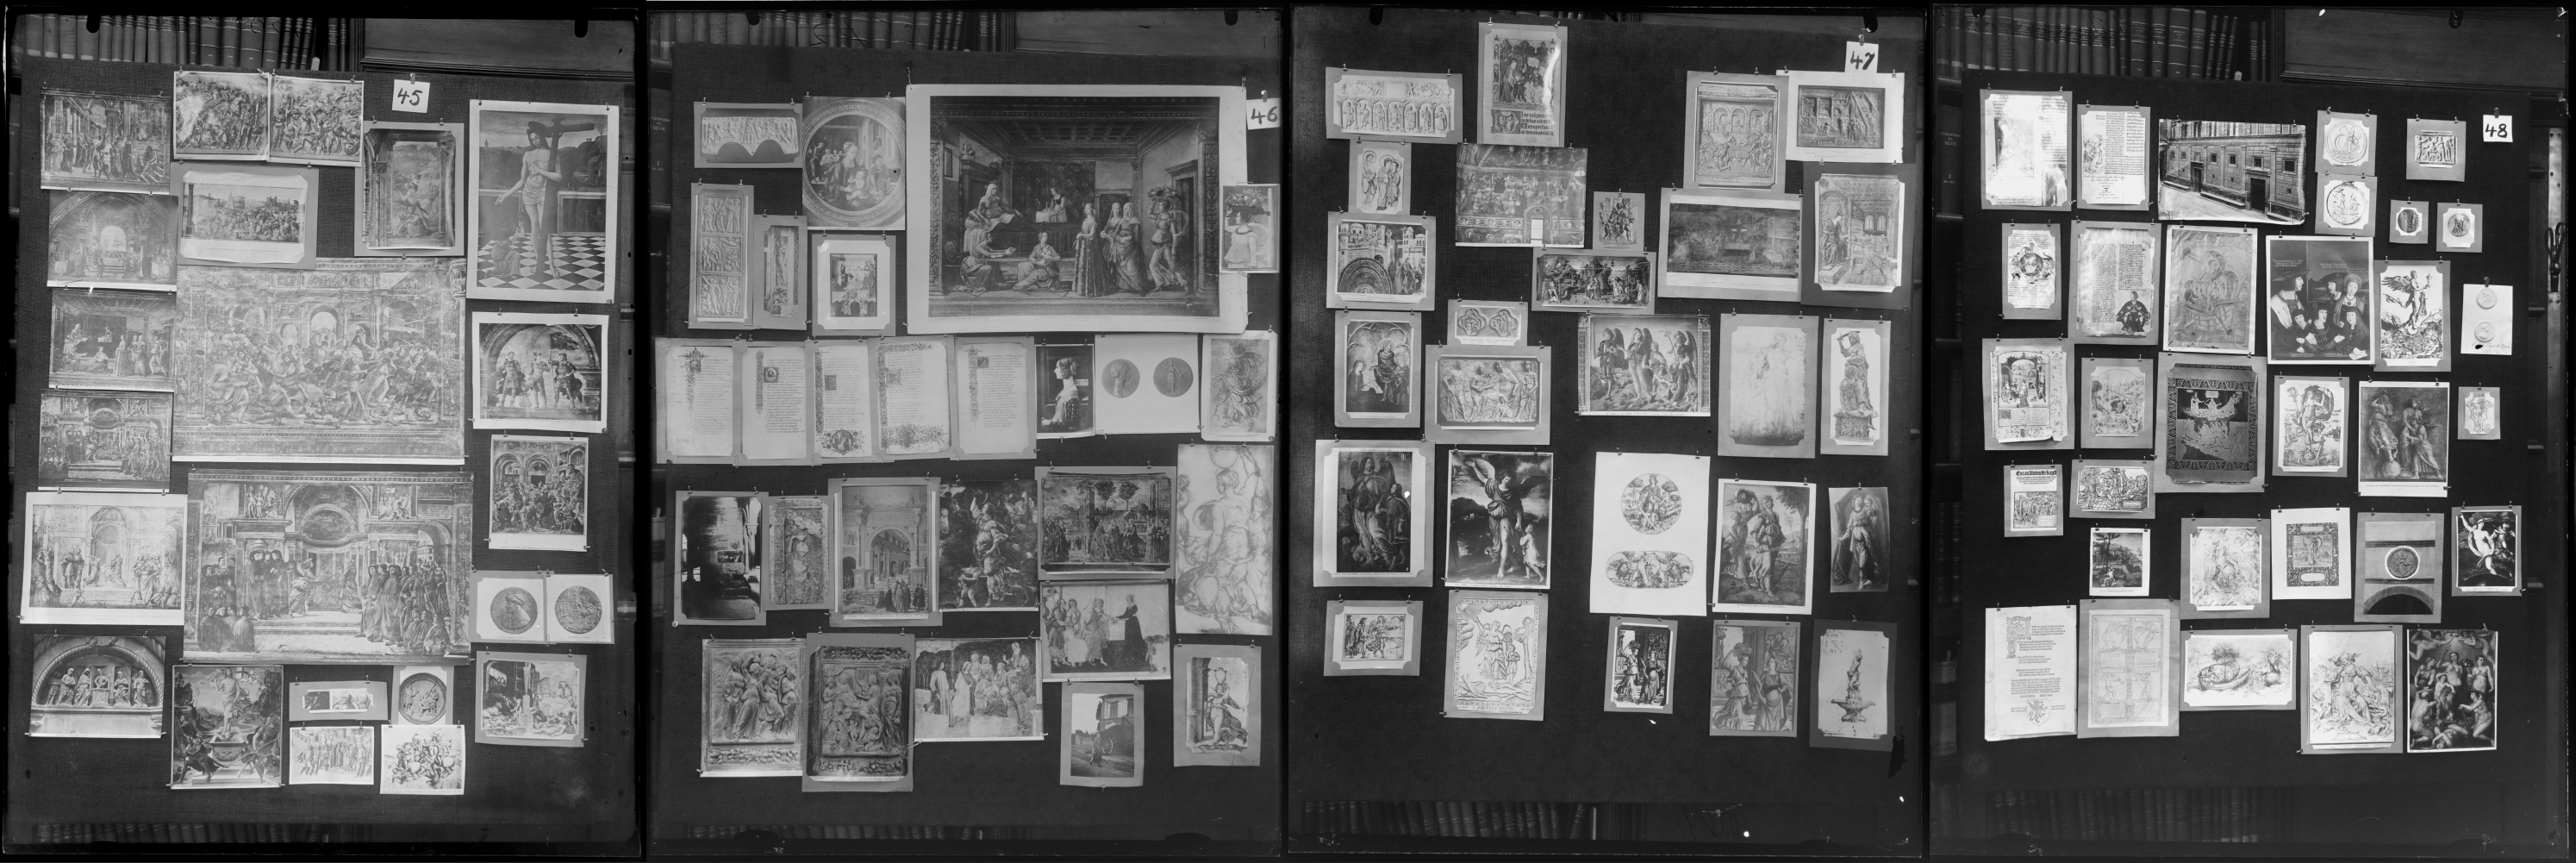 Panels 45-48 of Aby Warburg's "Mnemosyne Atlas": presented
here as an example of crafting a layout of images.
Panels 45-48 of Aby Warburg's "Mnemosyne Atlas": presented
here as an example of crafting a layout of images.
Refresher of some ideas from last week
Last class we started from the very beginning:
-
As with Python code, you create HTML and CSS files by editing them in a text editor like VS Code.
-
The most commonly used syntax element in HTML are left and right braces (also known as open and close braces):
< > -
The text that goes in between the braces is said to be inside the braces. This text is how you specify HTML tags.
-
Some HTML tags that we used last class include:
<html>,<head>,<body>,<h1>through<h6>, and<p> -
Many HTML tags require open and close tags, like this:
<p>Hello</p>. Note the close tag because it begins with a slash (/). We say that the text in between the open and close tags is inside the tag, or we say it is the content of the tag. So this example is a paragraph (pstands for paragraph) that contains the wordHello. -
The content of the tag is what the tag applies to. Consider, for example,
<em>Hello</em>. "em" stands for emphasis, which by default renders text in italics. This example looks like this: Hello. Today we will see how you can change the default appearance of a tag using CSS, in which case the modified apperance will apply to the entire contents of that tag. -
To include images, we use the
<img>tag, like this:<img src="spaghetti.jpg" />. Note that the image tag does not use a close tag, which is why it uses a slash at the closing brace. This tag uses an attribute, which is another keyword inside the tag, in this case,src. For images, that stands for source, and it refers to the filename of the image.Remember that the filename includes a relative path to this image file, starting from the location of the HTML file you are editing. So if the image is in the same folder, you can specify just its name; if the image is in a subfolder, specify that folder's name; and if the image is in a parent folder, use the
..notation to go "up" in the file tree. -
Lastly, to create a hyperlink, we use the
<a>tag, which stands for anchor. Like this:<a href="page2.html">click here</a>. The entire contents of the tag will be the clickable stuff that the user sees, and thehrefattribute is the name of the page that you are linking to, in other words, where the user will be taken to. -
You can put
<img>tags inside<a>tags, which will make the entire image clickable.
Table of contents
Table of contents for the topics today: (Click to jump down to the corresponding section.)
- Structure and content, versus appearance
- Example of HTML as structure
- A layout to work with
- Introducing CSS
- Multimedia
I. Structure and content, versus appearance
Some HTML tags (like <h1>
or <em>) affect the appearance of your
content. Other tags (like <p>
and <div>) don't really seem to have any
effect yet.
HTML was invented as a markup language for desrcibing documents and multimedia content. It was never really intended initially as something to implement very complicated user interactions and visual interfaces. Over time those features came to be added in, and initially they were added with new features of HTML itself. But people found this to be frustrating and inadequate. Recalling ideas from our Manovich, think about how digital media is so often biased toward modularity and reusability. People wanted HTML to implement these behaviors, so as HTML matured, with the adoption of CSS and HTML5, there has been development away from HTML tags that control the appearance of content, and toward these other types of tags that don't really seem to have any effect. You may ask: What is the purpose of an HTML tag that does not have any effect on the appearance of its content? The answer is that HTML tags are primarily used not for controlling the appearance of a document, but rather for specifying the structure of a document.
By structure I mean any of the components of a document that may have semantic or organizational significance. Think about a newspaper, for example: it has a title, a main headline, secondary headlines, articles with body paragraphs, maybe smaller blocks containing excerpts or teasers of other articles, etc. Or to take a simpler example, a basic report or article may contain: a title, a subheader, a byline, and sub-sections, each containing a section title and body paragraphs — perhaps the article also starts with a listing of all these sub-sections. A body paragraph may contain a list, or maybe an outline composed of a list where each item also contains its own sub-list.
In all of these examples, I am describing the structure of a document. This kind of structure is much more "freeform" in a way than the data structures that we were creating in unit 2. But they are considered structures in a different way, nonetheless.
Something to think about: what data structure(s) might you use if you were trying to implement a program that stored an HTML document in some way that you could operate on it?
Remember that because HTML tags can contain other HTML tags that the internal structure of an HTML document is like that of a tree.
(jump back up to table of contents)II. Example of HTML as structure
Here's an example of a snippet of HTML code that demonstrates
how you might use tags to create a document structure, and the
default appearance for this HTML code as defined by your
browser. This code also introduces the <ul>
and <li> tags, which indicate
an unordered list and a list
item, respectively. In an unordered list, items are
indicated with bullets. (HTML also offers an ordered
list, <ol>, which defaults to list
items being displayed with numerical indicators.)
Notice that I am using three <div> tags here
that are not visible on the right, but they are contributing to
defining the structure of this document.
<div> tags are used to indicate blocks, or
sections of content. In a minute we'll see how these can
function as things whose appearance you can control with CSS.
<body>
<h1>Autobiography</h1>
<h2>By Gritty Monsteur</h2>
<div>
  <h3>Past</h3>
  <p>
    I was born thousands of years ago
    in Monsterville.
  </p>
  <p>
    I come from a long line of monsters.
  </p>
</div>
<div>
  <h3>Present</h3>
  <p>
    I like:
    <ul>
	<li>ice skating</li>
	<li>the color orange</li>
	<li>doing pranks</li>
    </ul>
  </p>
</div>
<div>
  <h3>Future</h3>
  <p>
    One day I hope to be a hockey player.
  </p>
</div>
</body>
Autobiography
By Gritty Monsteur
Past
I was born thousands of years ago in Monsterville.
I come from a long line of monsters.
Present
I like:
- ice skating
- the color orange
- doing pranks
Future
One day I hope to be a hockey player.
 The internal DOM tree structure of this HTML snippet.
The structure of an HTML document can also add semantic
significance to its contents. Think about how you were
analyzing HTML documents when doing your web scraping
work. Web crawlers and web scrapers will often use HTML tags
that specify structure as ways to infer the semantic meaning
of a document. For example, something in
an <h1> will likely be a title or other
important keywords for the page, while <li>
tags will likely indicate some kind of listed information
which, depending on other context, could be names, dates,
prices, etc.
III. A layout to work with
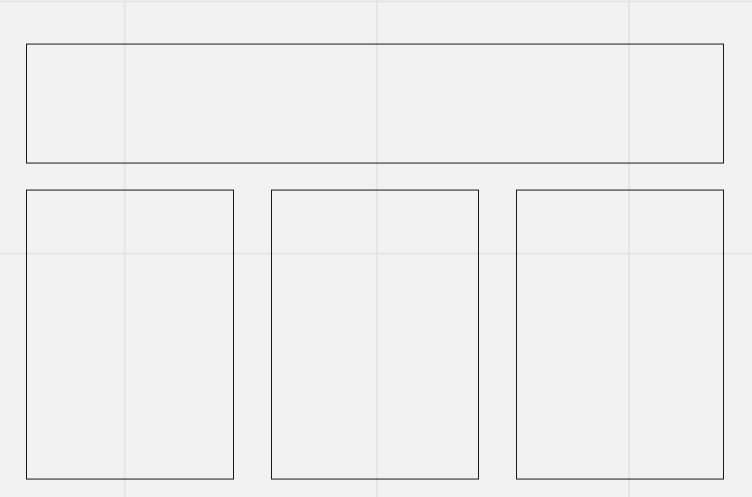
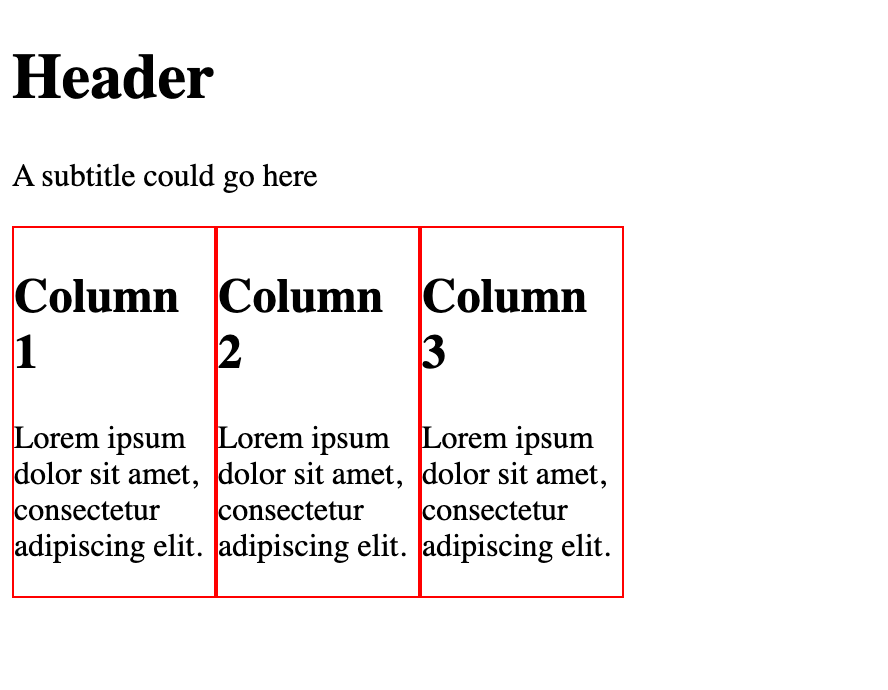
As we begin working with CSS, let's begin by working toward a page with this layout:
To get started, let's create an HTML file that defines a
structure that could match up with this layout. The below HTML
file starts with the
template that I've provided, and
uses <div>s to define four main sections of
this document. Create a new file in VS Code and copy/paste or
type this HTML code:
<!DOCTYPE html>
<html>
<head>
  <title></title>
  <link rel="stylesheet" href="">
</head>

<body>
<div>
  <h1>Header</h1>
  <p>A subtitle could go here</p>
</div>

<div>
  <div>
    <h2>Column 1</h2>
    <p>
      Lorem ipsum dolor sit amet, consectetur adipiscing
      elit.
    </p>
  </div>

  <div>
    <h2>Column 2</h2>
    <p>
      Lorem ipsum dolor sit amet, consectetur adipiscing
      elit.
    </p>
  </div>

  <div>
    <h2>Column 3</h2>
    <p>
      Lorem ipsum dolor sit amet, consectetur adipiscing
      elit.
    </p>
  </div>
</div>
</body>
</html>
(That funny gibberish is called "Lorem Ipsum", and is a very
common text that web designers and web developers use as a
placeholder text when building a website for which you don't yet
have the actual content. It is derived from Latin and meant to
simulate the look of English. You can read more and generate
chunks of it
at lipsum.com.)
(jump back up to table of contents)
IV. Introducing CSS
Now we can get started molding this HTML structure into the visual appearance and layout that we're working toward. We do this with CSS, which stands for Cascading StyleSheets. Where HTML specifies the structure and semantics of a document, CSS is deployed to control the visual display of that structure. As we've seen so far, most HTML tags have some kind of default appearance. CSS can be used to change and override any of these visual aspects. Any display properties that are not explicitly modified by your CSS code will fall back on the default properties for each tag, which are specified by your browser, and sometimes slightly different from one browser to another.
a. CSS Syntax
CSS code is comprised of a series of rules. The basic structure of a CSS rule is as follows:
h1 {
  color: red;
}
There are four main components to each rule:
-
The selector (in this
case,
h1): This targets which parts of your HTML document this rule will apply to. In this case, it will apply to allh1tags. -
The property (in this
case
color): This specifies the visual quality that is being affected by this rule. This rule is setting the color for all thoseh1elements. - The curly braces. These must always come in pairs.
-
The value (in this
case
red): Each different property has its own valid values. For color properties, CSS includes some predefined words that you can use, such asred,blue, etc. But you can specify any color you'd like using 6-digit hexadecimal notation that indicates the red, green, and blue components as:#RRGGBBwhere each character here can be a value between 0-9, or a-f. a=10, b=11, c=12, etc, up to f which equals 15. From 0 to 15 is 16 values, hence the name hexadecimal. (Think "hexagon".) If this is confusing, you can use a color chooser tool to select a color and copy/paste the hexadecimal (or just "hex") value.
Some other syntax rules:
- Like HTML, CSS ignores whitespace, so you could write rules all on one line if you wish, or space them out in a way that makes them more readable to you.
-
Comments are added with this notation:
/*
	  */
. This punctuation must also always come in pairs, can span multiple lines, and can be placed anywhere within your CSS code. For example:/* This is a multi-line comment about my first CSS rule. */ h1 { color: red; /* And this is a single-line comment. */ } -
One rule may specify multiple properties & values for a
given selector, in which case they each must end with a
semi-colon (
;). For example:h1 { color: red; border: solid 1px; }
b. Including CSS in an HTML page
There are three ways to include this CSS in an HTML page:
-
Inline. For any HTML tag, you can include an
attribute named
style, which can include CSS code. For example:<h1 style="color: red;">Header</h1>
As above, you can specify multiple properties / values separated with semi-colons:<h1 style="color: red; border: solid 1px;">Header</h1>
In this case, these rules will apply only to this one specific<h1>tag. No others.This is, in general, considered the worst way to apply CSS rules to your HTML. It is not general in any way, so if you want to apply similar styles to different tags, you have to copy/paste a lot of CSS code. Sometimes in limited cases though it can be a useful shortcut. But if you find yourself including a lot of CSS this way, switch to one of the below methods.
-
Internal. A better way is to include a big
chunk of CSS rules at the top of your document, in
the
<head>section using a<style>tag, like so: (This HTML is a snippet from the complete HTML file above, as indicated by the jagged border.)<head> <title></title> <style> h1 { color: red; border: solid 1px; } </style> </head>
This method is probably a little better than inline. It helps separate your tags specifying the structure of the document and the rules for how it is displayed. -
External. This is probably the best method. With this technique, you place all your CSS code in a separate file, which you reference from your HTML file.
To do this, create a new subfolder called
cssin your project folder, and within that, create a new file. I like to call my CSS filestyle.css, but you can call it anything you'd like, just make sure it ends in.css.Now, place your CSS rules in this file, and save it. The modify the
<head>section of your HTML file like so:<head> <title></title> <link rel="stylesheet" href="css/style.css"> </head>
c. Building our layout
Now that we have two files, a .html linking to a
corresponding .css, let's work on adding some
rules to create the layout we want.
To start, let's add a rule that will help us visualize what is
going on in our document right now. Add the following rule to
your .css file, hit save, and reload
your .html page in your browser:
div {
  border: solid 1px red;
}
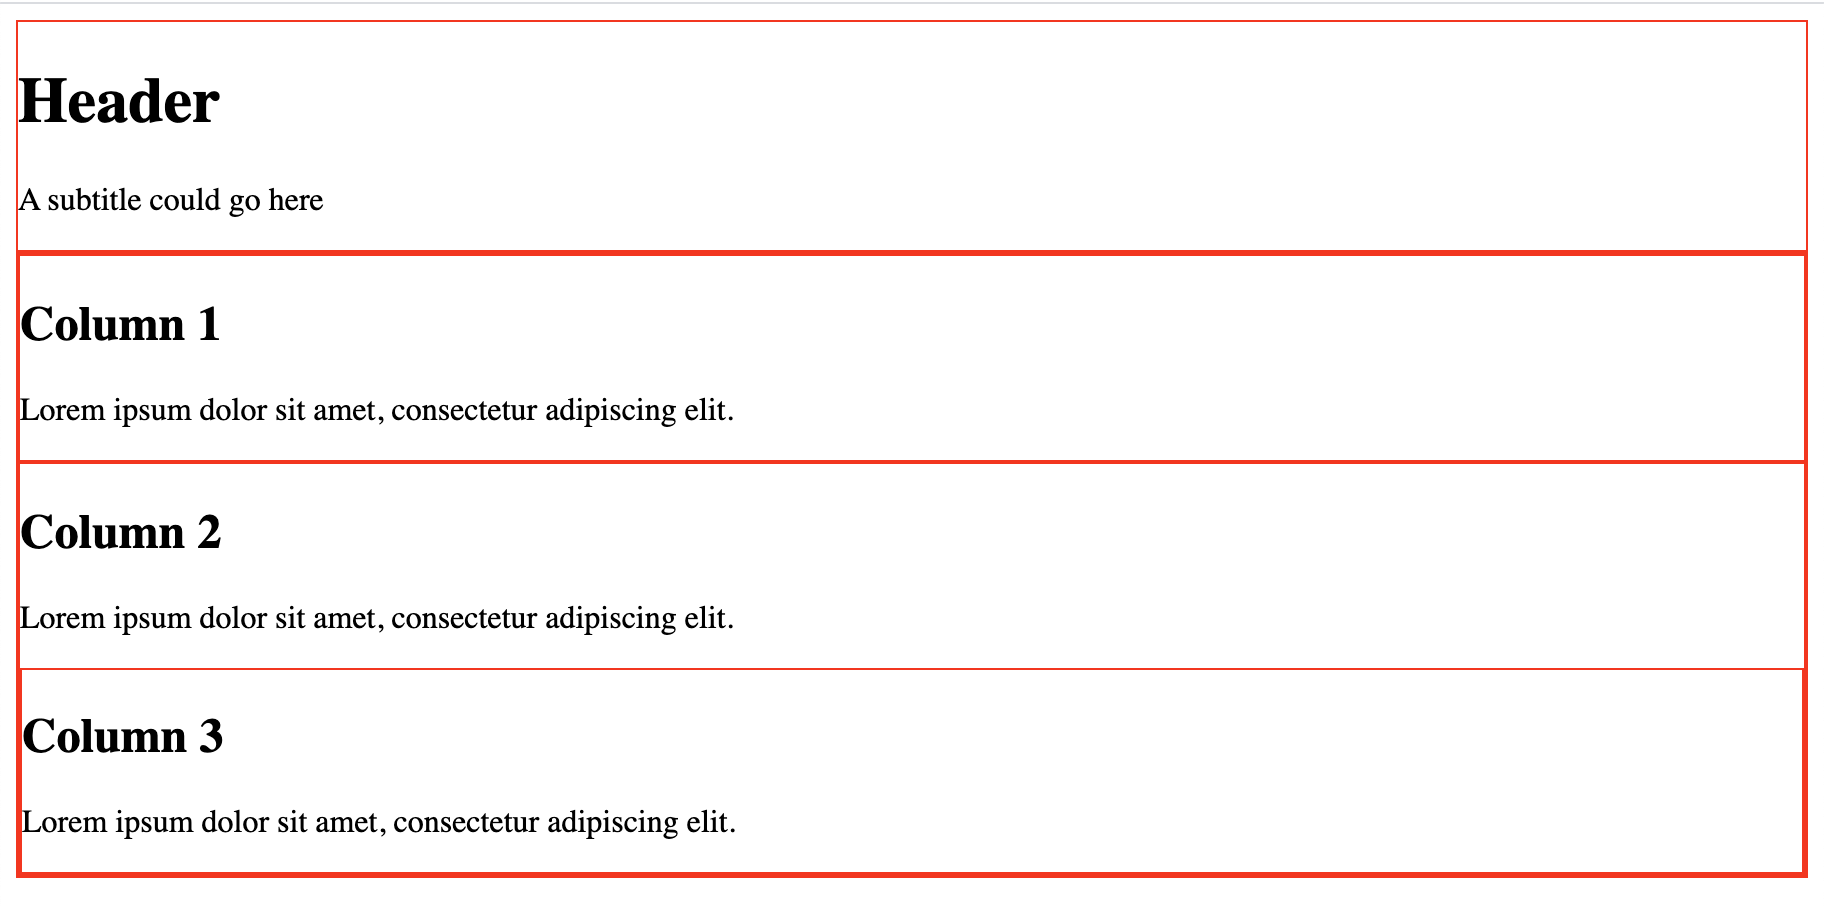
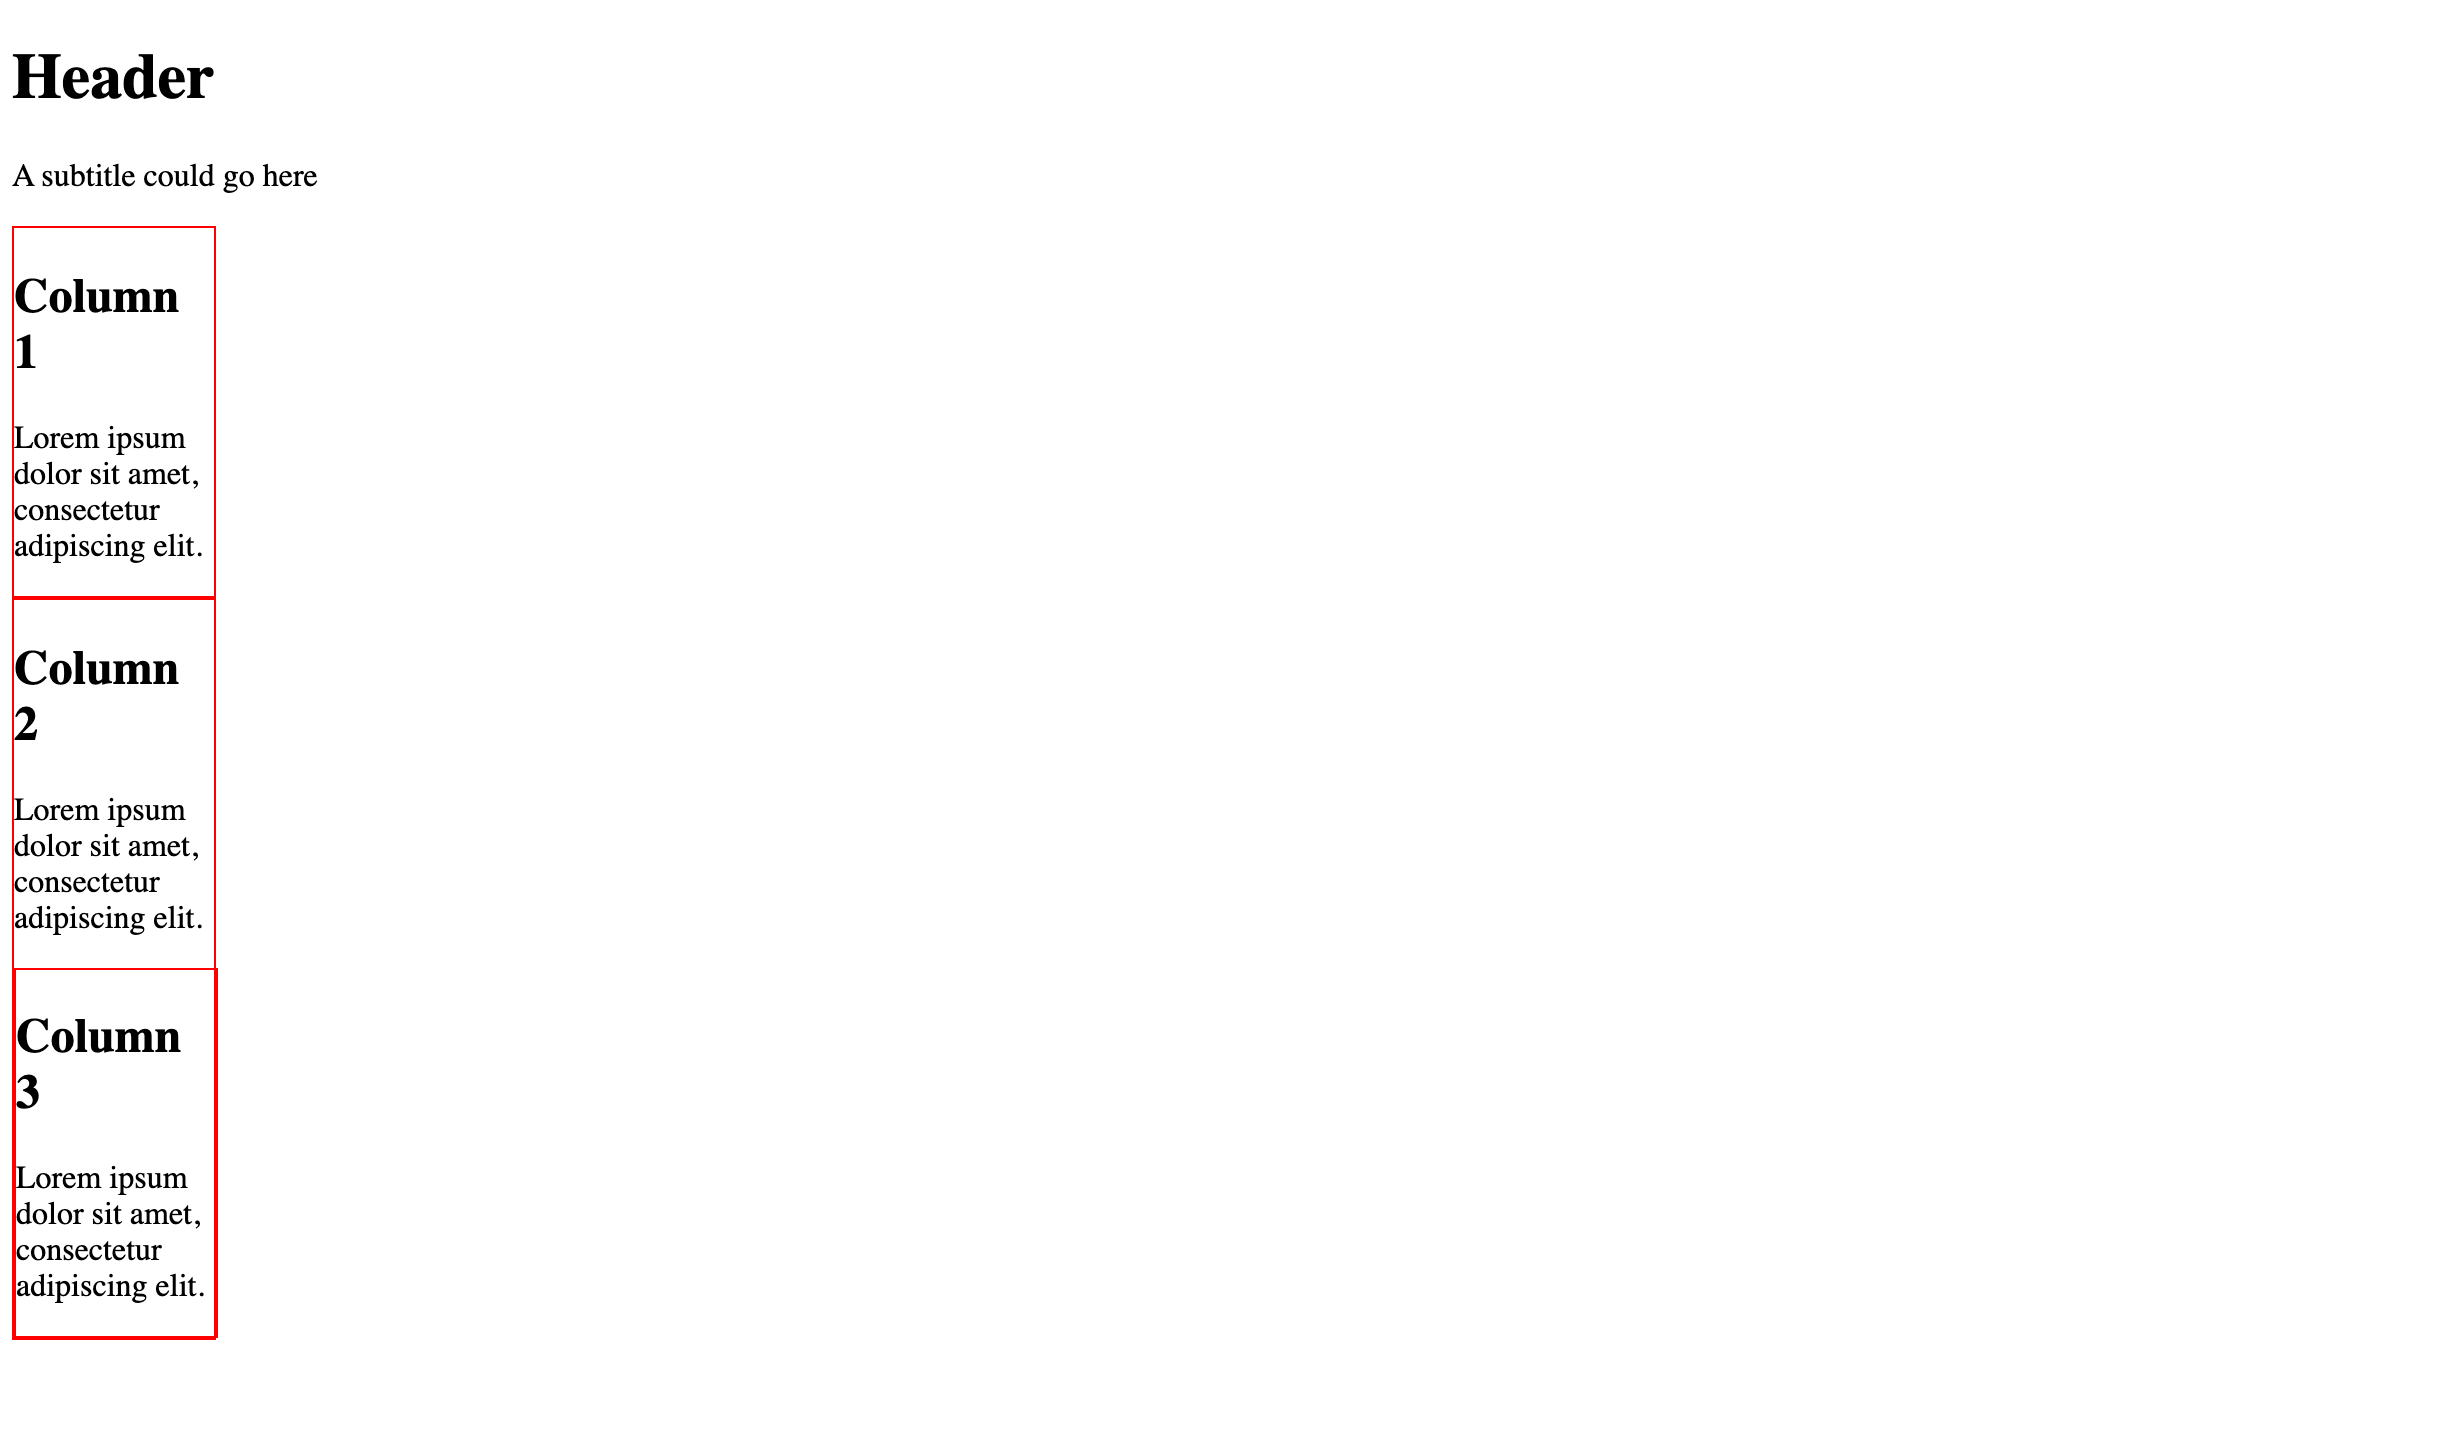
You should see something that looks like this:
To achieve the layout we want, let's try adding a new CSS
property to
our rule: width. This
is used (obviously) to set the visual width of an HTML tag on
the screen. Try this:
div {
  border: solid 1px red;
  width: 100px;
}
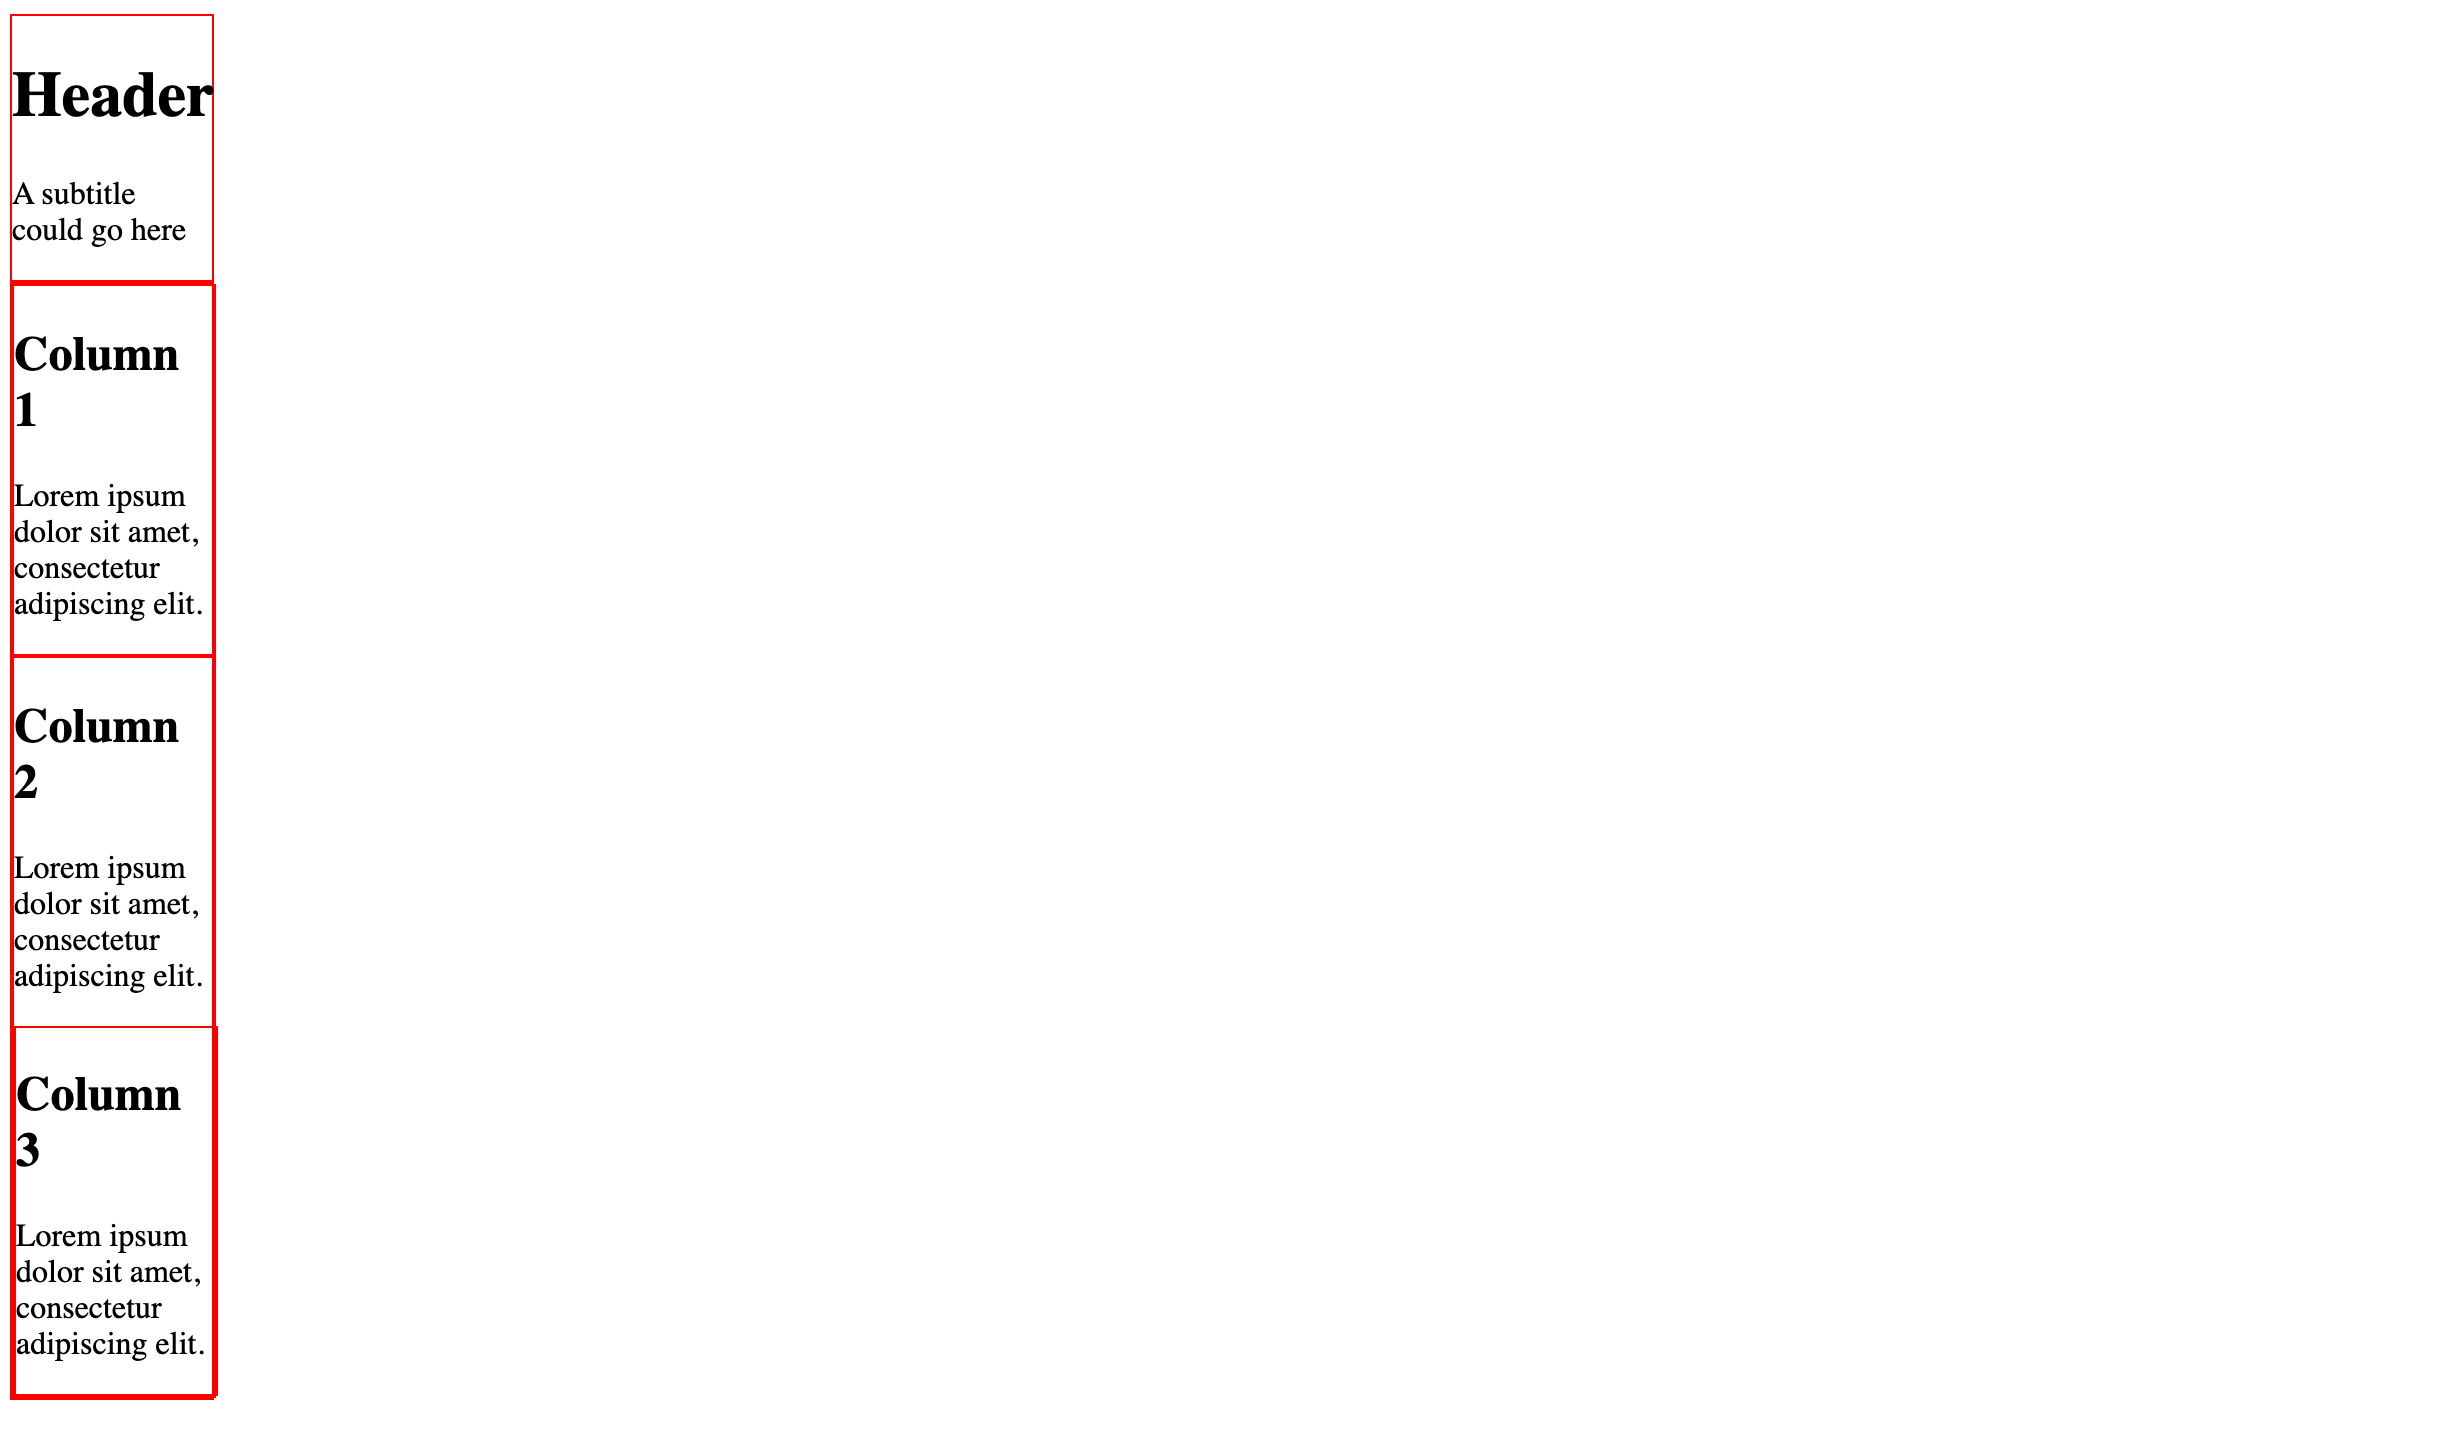
The values are specified in pixels here. Now you should see something like this:
We are applying this rule
to all <div> tags, but we only want
to apply it to the three columns. Fortunately, there are some
better and more specific ways that we can specify our selectors.
If you want to target a group of items on the page, you use an
HTML attribute called a class. On
the other hand, if you only want to target one specific HTML
tag, you can use an attribute called id. We talked
about this a little bit in unit 2. id would be used
if there was an ID number coming out of a database or an element
that we knew would always only exist once. Otherwise, you should
probably use a class. Doing so requires two steps:
adding the class to the tag in HTML, and adding it to your
selector in CSS:
<div>
  <div class="column">
    <h2>Column 1</h2>
    <p>
      Lorem ipsum dolor sit amet, consectetur adipiscing
      elit.
    </p>
  </div>

  <div class="column">
    <h2>Column 2</h2>
    <p>
      Lorem ipsum dolor sit amet, consectetur adipiscing
      elit.
    </p>
  </div>

  <div class="column">
    <h2>Column 3</h2>
    <p>
      Lorem ipsum dolor sit amet, consectetur adipiscing
      elit.
    </p>
  </div>
You target classes in CSS with a dot
. like so:
div.column {
    border: solid 1px red;
    width: 100px;
}
Now this will only target <div>
elements with the class column. If
you'd like, you could omit the HTML element to
target any tag with this class, like so:
.column {
    border: solid 1px red;
    width: 100px;
}
Your usage will depend on what you are trying to do.
Saving & reloading, you should now see this, which indicates
that your red borders are only being applied to those
three <div> items we classed
as column:
By the way, if you do want to use
the id attribute to target one
specific element, you would do it like so:
  <div id="item42">
    <h2>Column 1</h2>
    <p>
      Lorem ipsum dolor sit amet, consectetur adipiscing
      elit.
    </p>
#item42 {
    border: solid 1px red;
    width: 100px;
}
As you can see, you use a hash
symbol # in CSS to target
an id attribute in HTML. The value
here item42 is just an example value and
could be anything.
(jump back up to table of contents)
d. The box model
My narrow boxes are still stacked vertically. How to get them to spread out across the window horizontally?
This gets into a CSS topic known as the box model. Frankly, I find this very confusing. It is this kind of work that makes me feel like CSS coding is more of an art than a science and will often send me retreating back to the world of Python, with its more regular and reliable rules. But, plow on we must ...
The main idea is that each HTML element on the page has: a margin, a border, padding, and content. The CSS box model dicatates that you can specify the size, spacing, and appearance of each of these elements as a whole or individually for the top, right, bottom, and left sides.
Margin size is controlled with
the margin property, for which you can
specify one number or four numbers. Or you can specify the sides
individually as separate
properties: margin-top, margin-right, margin-bottom,
and margin-left. Similarly
for padding. The border
property has some additional properties you can set.
In CSS, when individual sides of boxes are targeted with four numbers, the order is always clockwise from the top: top, right, bottom, left.
 (Click to enlarge.)
I find W3 Schools to be a reliable source of information about
HTML and CSS coding. Read their article
on the
CSS box model here. That discusses borders and spacing
around blocks like <div>s. Also, take a look
at the article
for float
and clear.
The trick here is that CSS divides HTML elements
into blocks and inline
elements. Things like <div>
and <p> are blocks, while
things like <a>
are inline. By default, block
elements get stacked vertically, as if they are separate
sections of a document on a page, while inline
elements flow smoothly within a line, like words in a sentence,
or the styles you would apply to those words. If you
want block elements to flow left to right like
words in a sentence of text, you have to apply the property
called float. In this case, we'll give
it the value left, meaning that the
items should float over to the left, falling into place from
left to right:
.column {
    border: solid 1px red;
    width: 100px;
    float: left;
}
You should now see this:
(As you can probably guess, you could also
specify float: right; and get blocks
that start on the right and fall into place flowing from right
to left.
Try building on this and completing the layout as pictured above
by adding additional properties to your rule
for margin (adds space around the
outside of an element, indicated in pixels)
and padding (adds spacing internally
within an element, also in pixels). Look these up on W3 Schools
if you want to find an example. If you'd like, you can also
specify width in percent, which refers
to a percentage of the parent element.
If you would like to center the entire layout in the window, try adding the following rule to your CSS file:
body {
    width: 500px;
    margin: auto;
}

.column {
    border: solid 1px red;
    width: 100px;
    float: left;
}
You can adjust the value of
width to suit
your wishes.
(jump back up to table of contents)
e. Working with multiple pages
Perhaps the greatest strength of CSS is that you can write one
file of style rules and apply it to multiple pages. This allows
you to create a website with a uniform look, without having to
copy/paste style rules into many documents. It also allows you
to make an edit in your .css file (in one place)
and have that edit automatically take effect across your whole
site. To use this, simply reference the same .css
file from multiple .html files. In fact, for your
homework this week and your final project, I would like you to
only have one .css file that applies to your whole
site.
If you really need to target some specific items on one single page, you can put those in an internal CSS section (see above) or use additional classes to target what you need.
(jump back up to table of contents)f. Going further ...
There are so many more CSS properties that you can experiment with. I can't possibly explain them all to you in class one-by-one. I recommend that you explore the W3 Schools website. In particular, have a look at:
I also highly encourage you to take advantage of all of VS Code's features, and in particular its really great ability to auto-complete when working with HTML and CSS. Try starting a CSS rule, typing some characters, and seeing what possible properties and values are valid there. This can be a tremendous resource and a fun way to learn.

V. Multimedia
Adding multimedia such as audio and video files to webpages is actually not difficult. It works very similarly to adding images.
a. Adding audio to HTML pages
To create audio, first create another subfolder to hold these
files. I recommend you call this audio in your
website folder. This should be a sibling of
your css folder. This is what I recommend you do
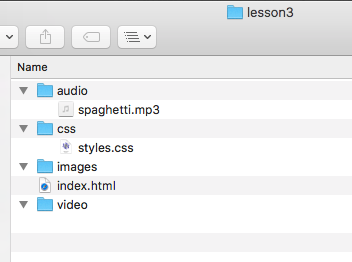
for all audio files for your work. So now, your website folders
might look like this:
Now you can add audio with the following tag:
<audio controls>
  <source src="audio/spaghetti.mp3" type="audio/mpeg">
  Your browser does not support the audio element.
</audio>
The text spaghetti.mp3 should be changed to match
the filename that you are working with.
The sentence that beings "Your browser" will only be displayed if the user's browser is not capable of playing this audio file. Feel free to change this text to anything that you'd like.
If you want the audio file to automatically start playing when the user visits your page, you should add the following attribute:
<audio controls autoplay>
  <source src="audio/spaghetti.mp3" type="audio/mpeg">
  Your browser does not support the audio element.
</audio>
If you want the audio file to play repeatedly as a loop, add the following attribute:
<audio controls loop>
  <source src="audio/spaghetti.mp3" type="audio/mpeg">
  Your browser does not support the audio element.
</audio>
If you want, you can feel free to use autoplay
and loop together.
b. Adding video to HTML pages
Adding video to a webpage is very similar to audio. First
create a folder named video in your website
folder, next to your css and audio
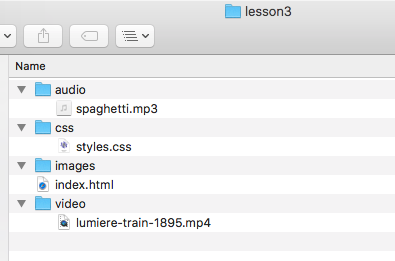
folders. Prepare your videos as mp4 files. Now
your website folders might look like this:
Now you can add video to your page with the following tag:
<video width="320" height="240" controls>
  <source src="video/lumiere-train-1895.mp4" type="video/mp4">
  Your browser does not support the video element.
</video>
Sometimes you can run into complicated problems with video file
formats, codecs, and etc. I believe .mp4 files
should hopefully be fine. If you run into any issues, pelase
contact me.
The width and height attributes will
determine the size of the video within your page, and you can
set these to any values you like. Note that if you specify
both width and height and the
dimensions are not proportionally the same as the video, some
distortion will occur. If you'd like, you can only specify
either width or height, and the
video will be scaled appropriately.
As before, the sentence that beings "Your browser" will only be displayed if the user's browser is not capable of playing video files, and you can change this text as you would like.
Also as before, you can use autoplay
and loop attributes. Additionally, you can use
a mute attribute if you would like the video to
play without any sound.
Homework
Continue all this in the homework assignment for this week.