Code Crafting, Fall 2021, Week 7
Week 7 — Wednesday, October 13 — Class notes
Code Crafting: Intro & Overview
Lecture on historical links between computational machinery and textile production techniques, as well as a collection of examples of artists exploring these links today.
We talked about the 1890 US Census, Herman Hollerith, IBM, punch cards, and their link to the Jacquard Loom. As well as artists and projects today including Ben Fino-Radin, Cat Mazza, the knitPro project, Greg Climer, Jeff Donaldson, Claire Williams, Craftivism, and the RailReed project. Slides here:
TurtleStitch
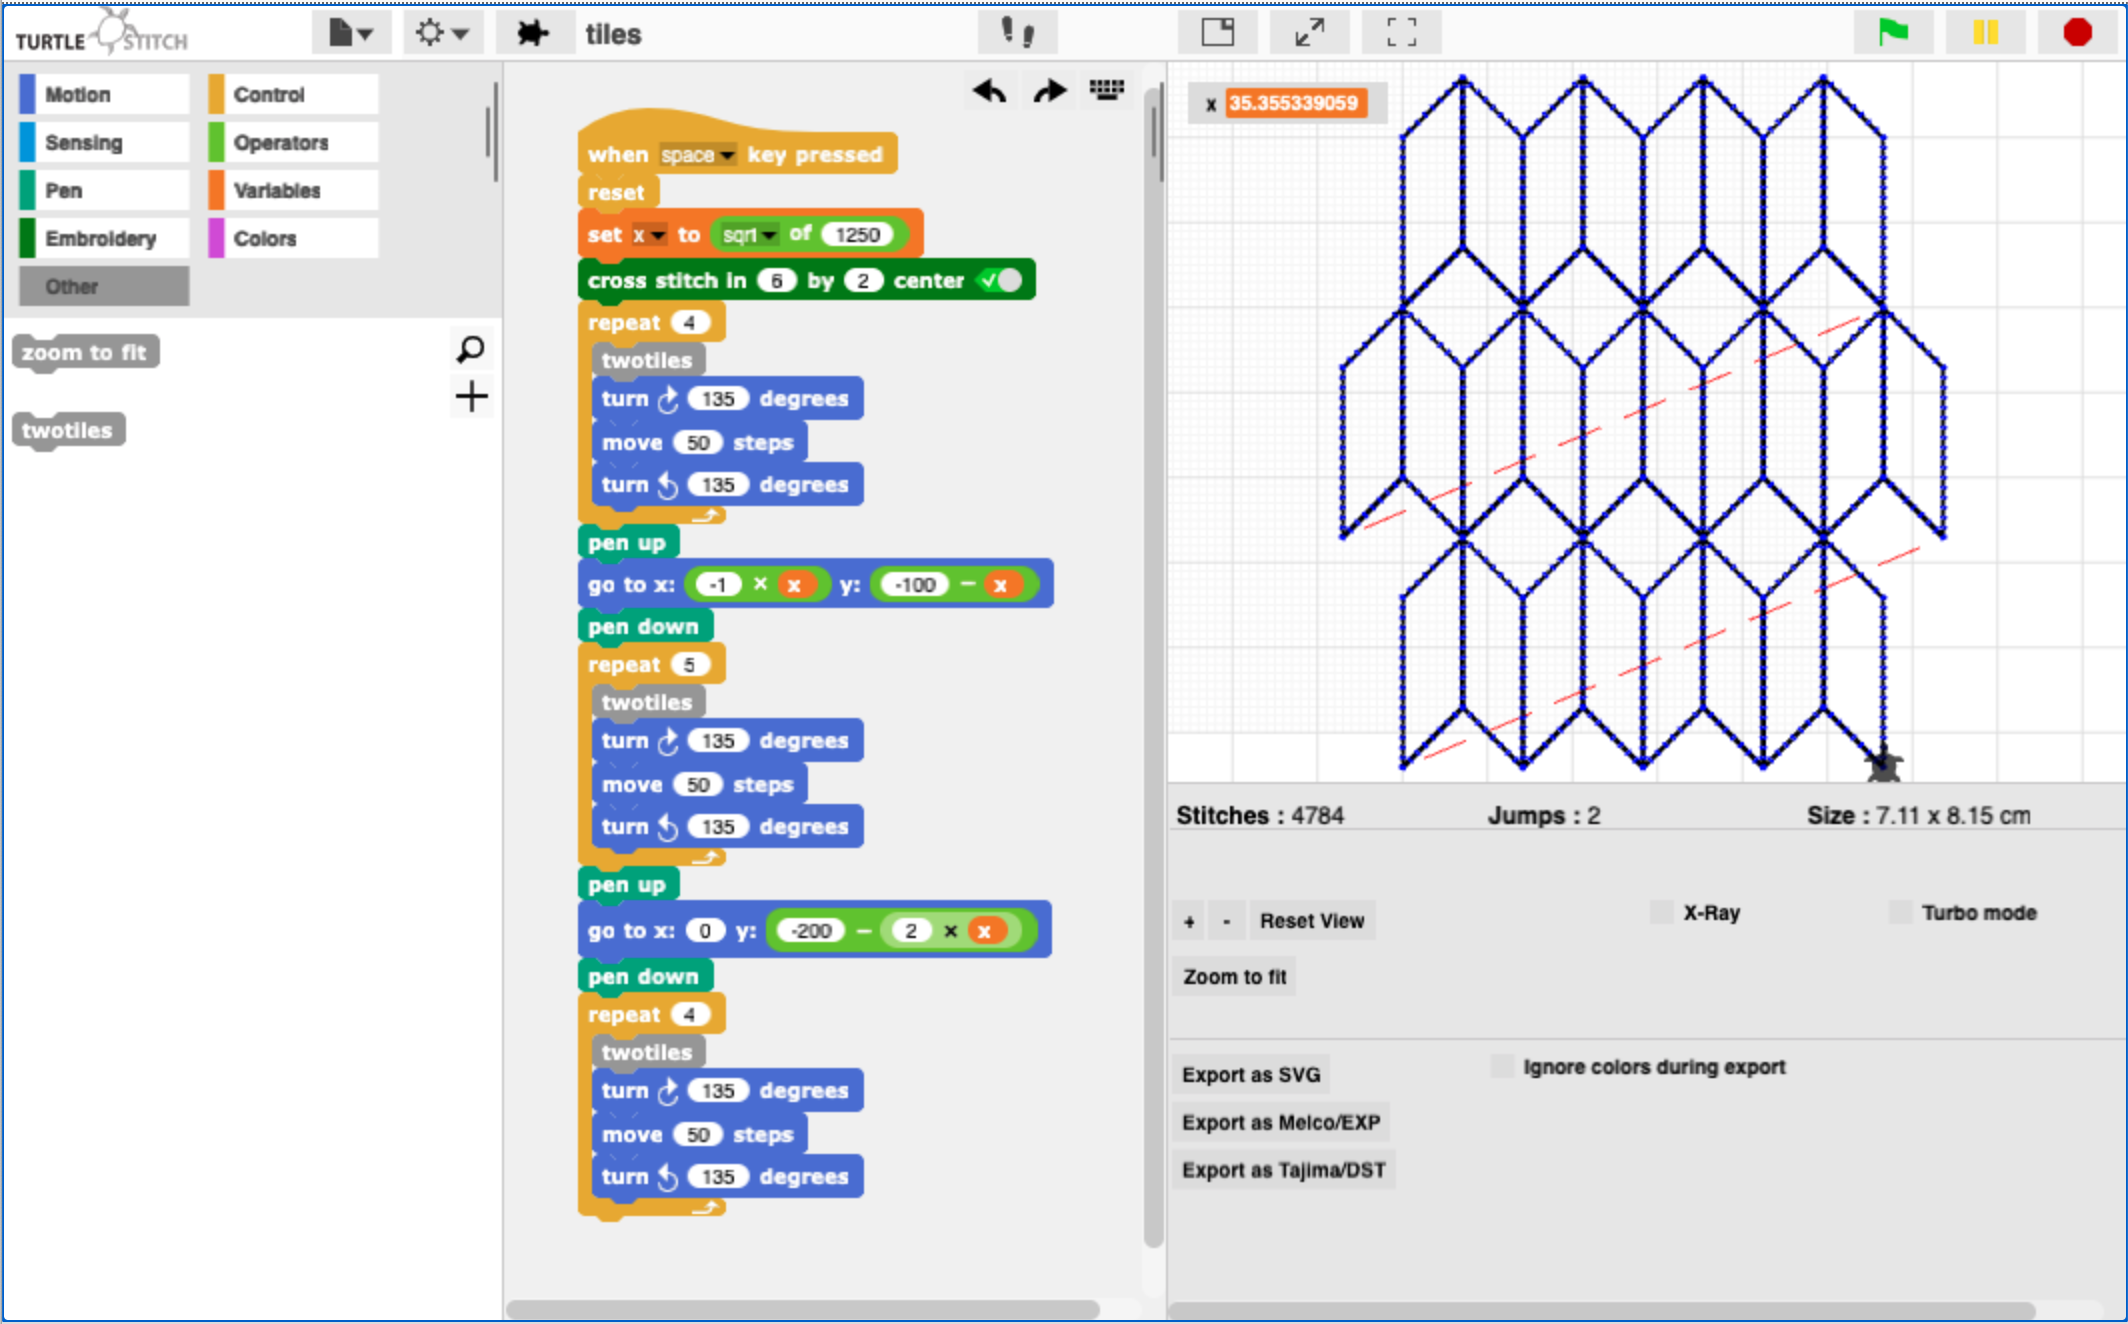
We briefly reviewed this example I created called "week07_iles". This example demonstrates how to create and use a custom block.
 A project showing how to use a custom
block. Click to
enlarge.
Creating this involved several steps.
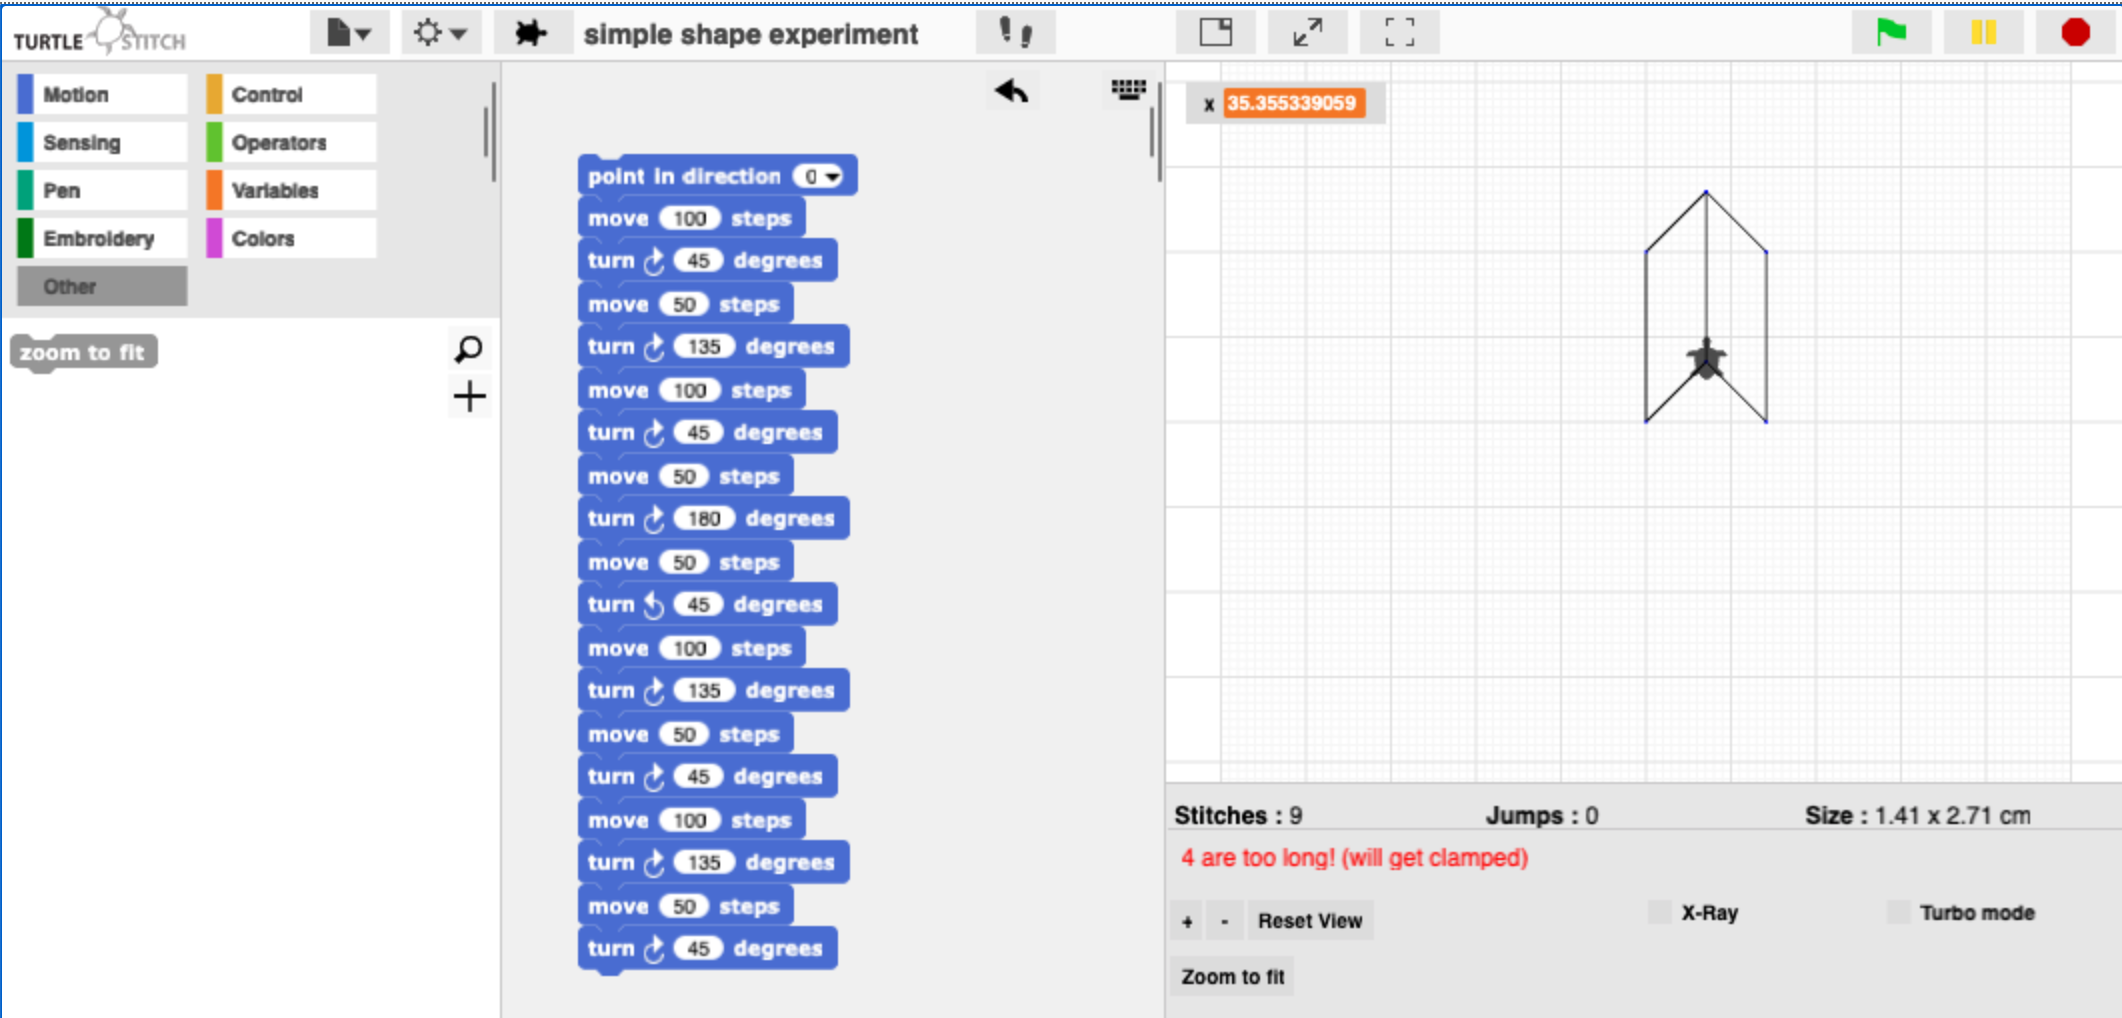
I. Experiment to create a small, reusable shape. I did this by experimenting in TurtleStich to create a small, simple pattern I liked:
 Experimenting before creating a block. Click to enlarge.
Here is
the exported .xml
project file for just this simple shape: simple shape experiment.xml.
If you'd like, you can work with my composition
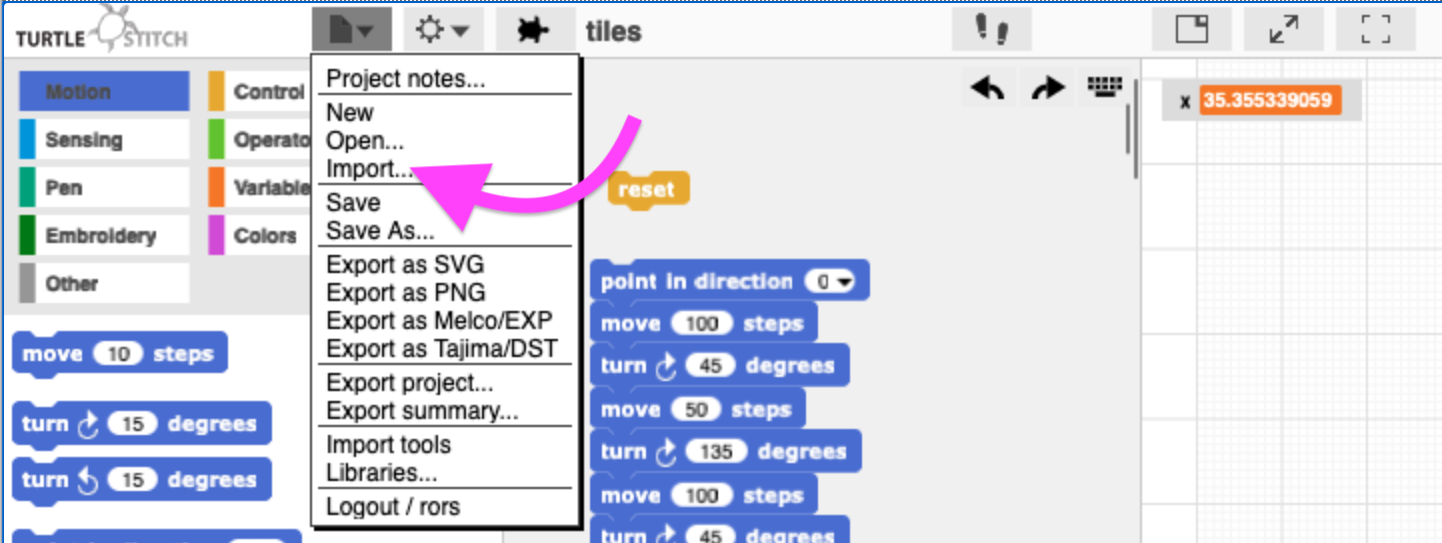
by importing this file. To do so: click that
link and save the file somewhere on your computer, start a new
TurtleStich project, click "Import", then navigate to
the .xml file that you saved and select
it.
 Importing an
 .xml project file.
Feel free to examine that for your own learning, but I think it'd be nicer if you experimented with something of your own creation.
II. Creating the custom block. Once you have a pattern that you like, that you'd want to work with (for example to re-use in some way), make a new custom block and move this code into that.
To do this, click the plus sign (+) in the left
column. This will default to creating a custom block in
the palette that you currently have
selected. If you'd like to create your block in
a different palette, first select
the palette that you'd like to add
your block to, and then click the plus sign
(+). (You can always put
your block somewhere else by selecting a
different palette in the "Make a block" window.)
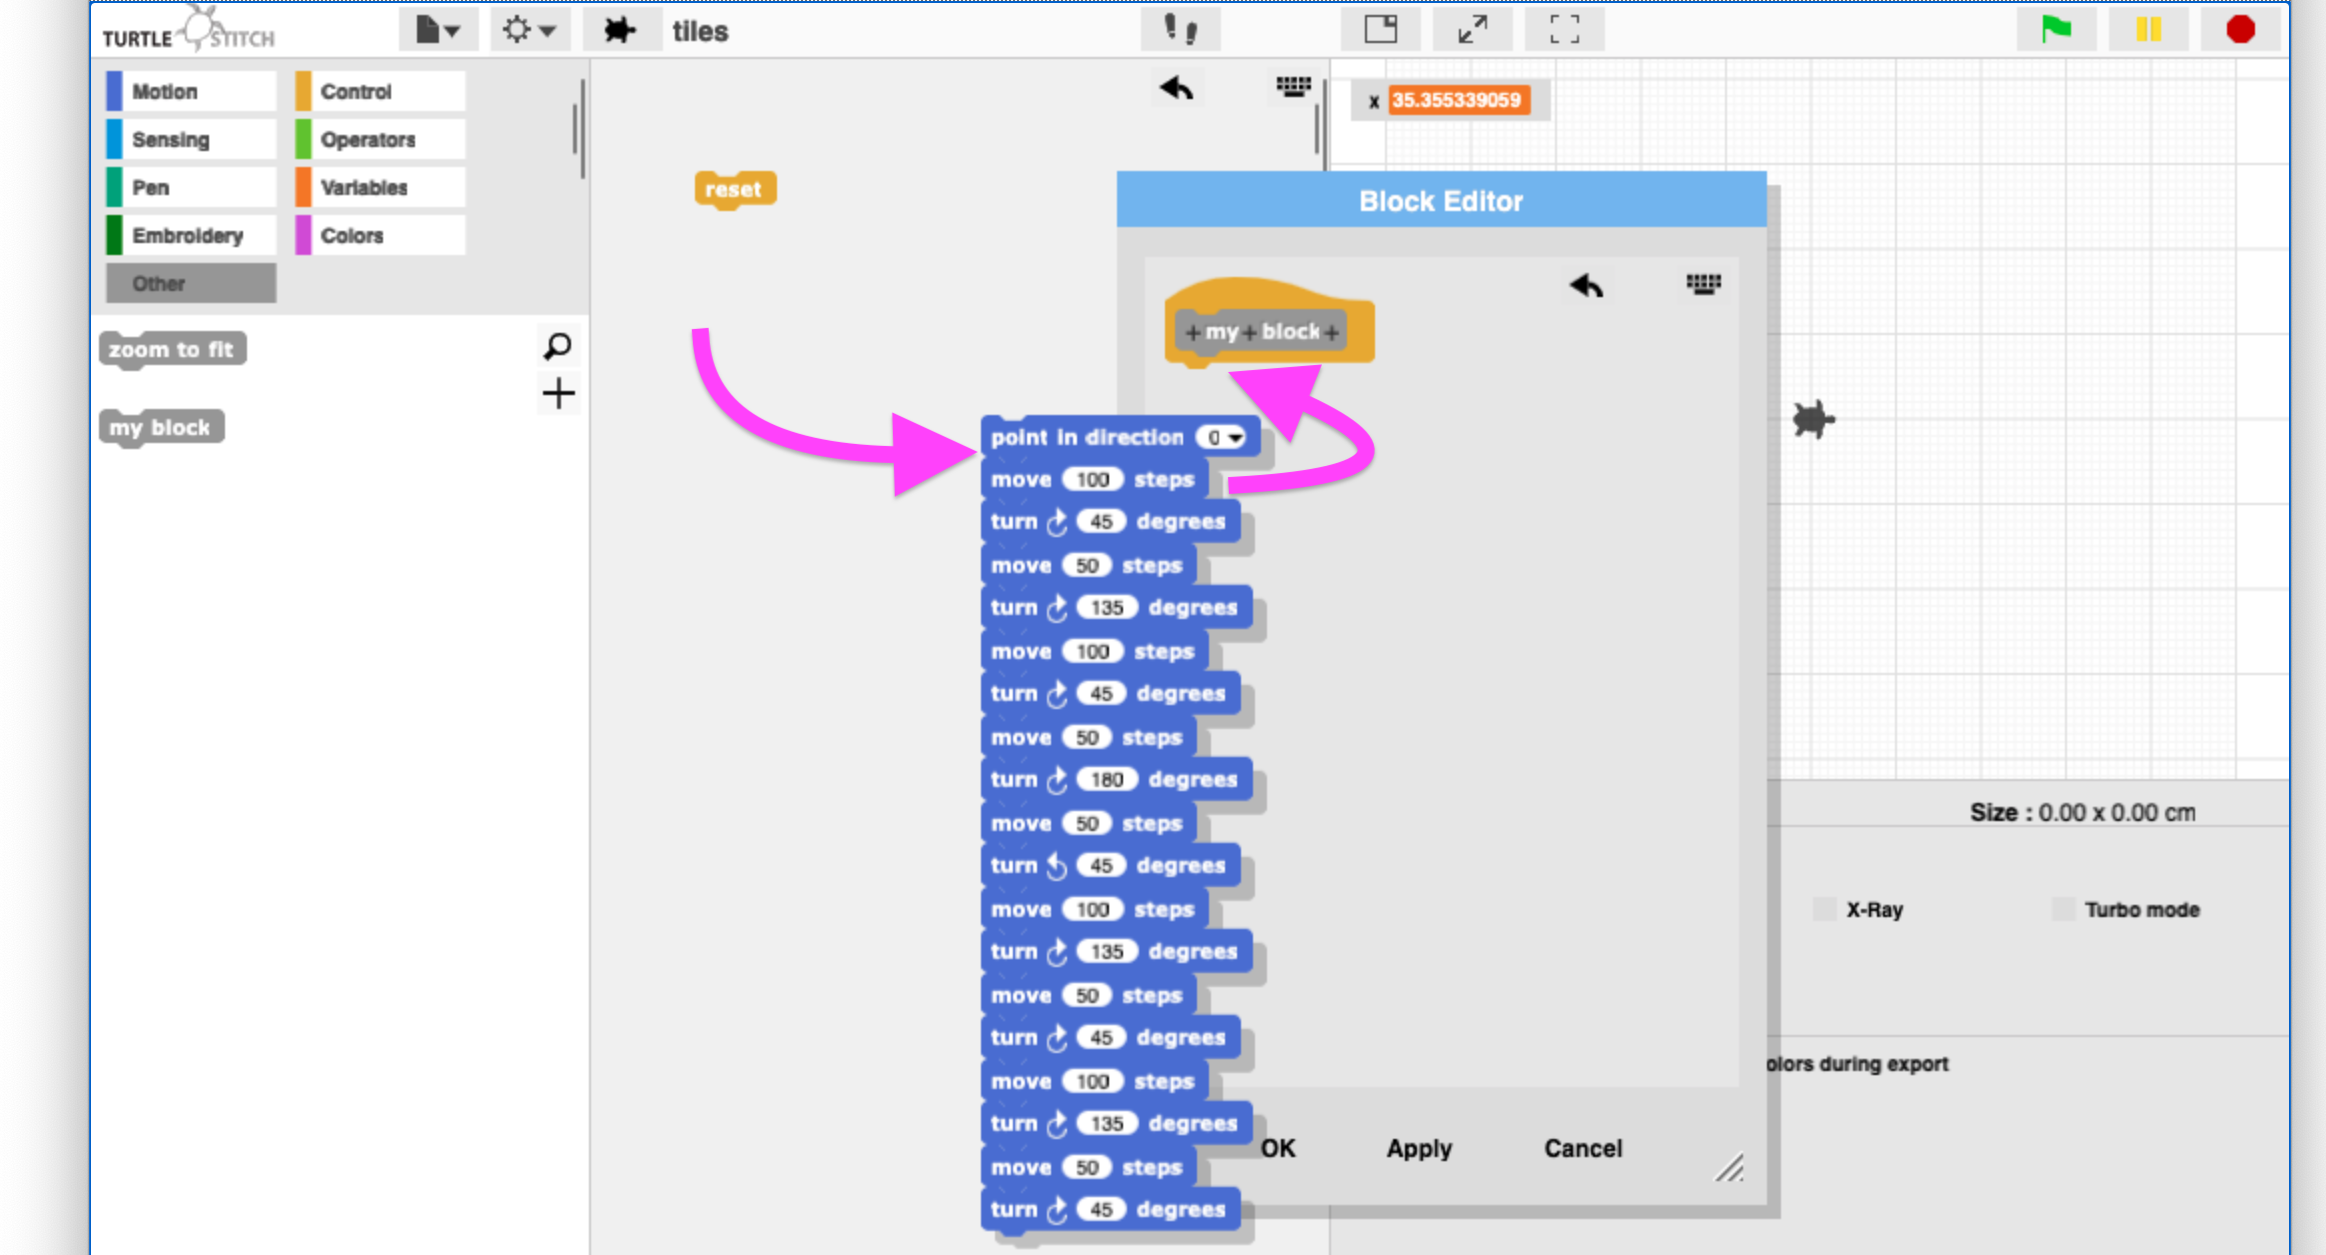
 Creating a new custom block.
For now, in the "Make a block" window, just
select Command. Later we'll talk about what the
other two options mean.
Give your block a name and click "OK".
Now, with the block editor open, simply drag all your work from the main scripting area into the block editor, and attach it to the yellow block with the name you just entered. Then click "OK". You've just made your own reusable custom block!

III. Use your block. Now experiment again to create a new composition, and reuse the block you just created. Simply select the palette where you created your block, and drag it into your work in the scripting area.
I recommend experimenting with putting your custom
block inside a loop. (Select
the Control palette
and select the repeat
10 block, changing 10 to whatever you'd like.) Make sure to turn
or move the turtle a little bit after
your custom block so it appears differently
each time.
See the image at the top of these notes to see how I created a script that uses loops with my custom block.
If you'd like to see my complete project with my custom block definition and the script that uses the block, you can import this project file: tiles.xml. For your homework I'd like you to create your own work to do this.
Homework
There are two parts to the homework for this week: a reading and a coding exercise.
-
Read the following text and post a response
in the
reading response document. Instructions & a prompt are
included there.
- Lev Manovich, The Language of New Media, Prologue and chapter 1
-
Create a new TurtleStich project that includes a custom block, as well as code that uses that block at least three times.
Save your work into your TurtleStich account, and make sure that your name and a link to your TurtleStich account is listed in the TurtleStich User Names Google Doc.
Please note: Just to be clear, both parts of this assignment are due for everyone in class to complete by Tues, 8pm. I'll be reviewing your work and we'll discuss your reading responses in class.