Project 2
Today in class I’ll distribute the project 2 assignment (and a concise version as a mini-zine) and we will discuss the details of that.
Background reading (optional)
We won’t dedicate an entire class session to sustained discussion of the below three texts, but if you are interested in zines and similar forms of off-line information circulation networks, you might be interested to take a look. The first article, as the title says, gives a brief history of the zine form itself. The second article discusses samizdat, a type of media and a set of practices for circulating prohibited texts throughout the USSR. These were texts duplicated using photocopier machines and distributed through semi-clandestine practices. The third piece discusses El Paquete Semanal (“The Weekly Package”): gigabytes of digital data that circulate through Cuba in person-to-person transactions involving external USB drives. El Paquete is a kind of workaround: a solution to the problem of a lack of reliable internet bandwidth in many parts of the island, and in this sense is an offline network, not dissimilar from zine circulations, even though it is comprised of digital data. Themes of a kind of digital divide here are a good segue into the topics that we’ll read about for next week.
- Chloe Arnold, “A Brief History of Zines”, Mental Floss, November 19, 2016
- Serguei Alex Oushakine, “The Terrifying Mimicry of Samizdat”
- Nick Parish, “Inside El Paquete, Cuba’s Social Network” (Mar 8, 2018)
What is a zine?
It’s easy to picture a zine and to conjure an intuitive idea of what a zine is, but a more precise definition is surprisingly tricky to articulate. The core principle of zine culture is that a zine (short for fanzine, derived from magazine) should be self-published, and so in this sense they share a strong link with samizdat, the concept discussed in the second article linked above. Samizdat literally translates as “self-published”. Zines are publications that are produced, published, and distributed by their author(s), however, nearly all these rules can be compromised in various ways. Zines are often traded by their makers in circulation networks of various forms, but zines are also often distributed or sold in stores, both online and off. When we think of a zine, a clear aesthetic probably comes to mind – black and white, photocopied, cobbled together with sharpies and scotch tape – but zines can also exhibit higher production quality, or even be produced by a commercial printshop, both on- or offline. And while zines have traditionally been print publications, nowadays they can exist in digital forms, again, both on- and offline.
So what is a zine then? Probably the most robust definition would be to say that a zine is something that feels like a zine to its creators and audience. When a zine emerges from production and distribution techniques to which we feel that we also have access, we can relate to the producer and feel like the produced object is part of a cultural field that “we” are producing “ourselves.” So perhaps a zine is simply a zine if there exists a community that identifies that publication as emerging wholly from the community itself. This definition of zines is highly situated: it embraces a subjective aspect and depends on the position of the person doing the identifying, and their relation to the object. This definition accommodates the many and varied formal qualities of zines, and also points toward how a zine that fulfills all those formal qualities might still not qualify as a zine if it does not emerge from producers that are of the audience for which it is produced – for example when an object with zine aesthetics might be produced as part of a corporate, commercial viral marketing campaign.
Zines are a prominent object within the DIY ethos and maker cultures that we’ve seen in off-the-grid contexts this semester. I have a collection that I can try to share though Zoom, but am not able to scan them all. If you’re looking for more zines and zine culture in NYC, you can check out Printed Matter and their annual art book fair, the Interference Archive, Bluestockings bookstore, as well as other book and zine fairs, both here and around the world.
And there are also many, many, many great zine collections in libraries and archives all over.
An example
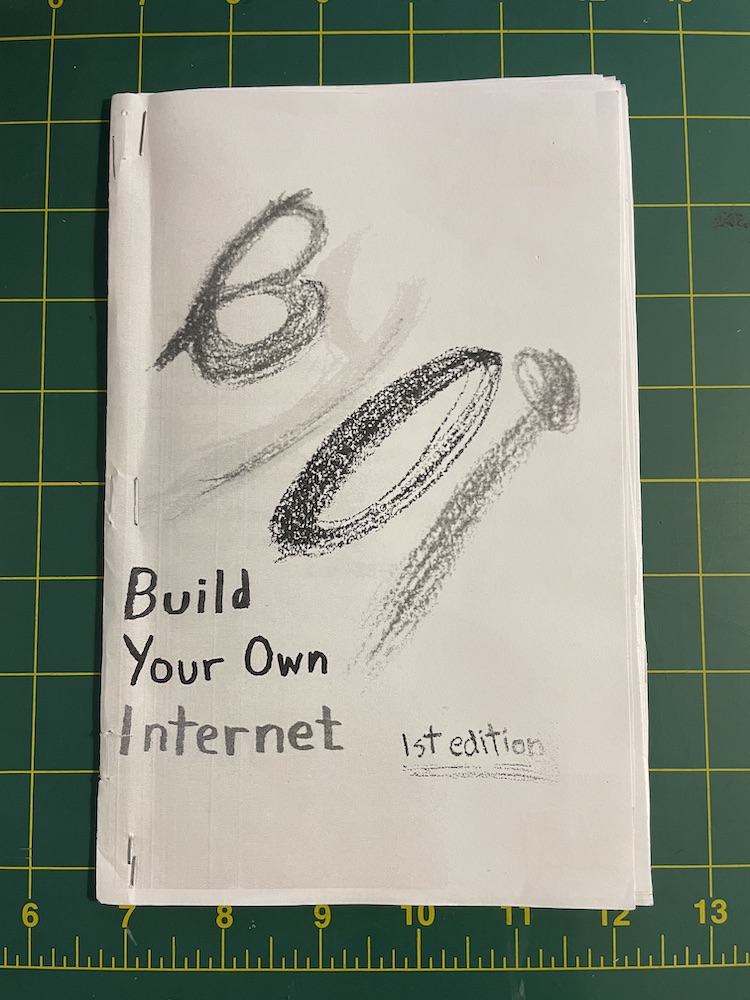
I’ve mentioned that some of the themes for the final part of the semester involve wirelessness and various techniques at off-the-grid communication, including mesh networks. I’ve already shared some photographs from a project in Oakland called the People’s Open Network, so I thought you might enjoy seeing a zine that they created to publicize their work, and to do outreach within their community: Build Your Own Internet, 1st edition.
Workshop
For the hands-on portion of our workshop day today, we’ll discuss some zine production.
Zine culture is most commonly associated with an embrace of DIY aesthetics and practices, so I’m asking you to work with those types of assembly, publication, and distribution methods for this project. Certainly there are comparative affordances and limitations between low tech and higher tech, digital production techniques. But as we’ll be focusing on the “off-the-grid” aspect, we’ll be publishing without digital tools. I assume you will likely end up printing out textual matter from digital copies, using digital computers and printers. But let’s focus our zine construction and assembly on non-digital methods.
Starting blank
When you are working on zines during this unit of our semester, either in workshops or for your final product, begin by first creating a temporary assembly of your zine structure with blank paper, then crafting your zine by writing, drawing, gluing, or taping your materials directly onto these blank pages. For your final product, you should pay attention to design concerns about layout and the representation of the structure of your material with visual hierarchy like appropriately-sized textual headings, perhaps even a table of contents, glossary, or index. For today, as a sample to test the process, you can simply draw or doodle, or collage in some objects from other printed matter.
For this step of the assembly process, you shouldn’t yet use any permanent materials in your binding, like gluing pages. Bookbinding of course is the process of assembling pages into a book with a cover, a spine, etc. Don’t do any permanent binding until you have duplicated copies of your pages. Until then, assemble your zine as a kind of working draft that can be easily disassembled when ready to duplicate.
“Mini zine“: With the “mini zine” format that we talked about in class, working with a temporary assembly is easy. Since this technique only contains printed matter on one side of the page, and since it is only bound by folding, you can easily assemble a blank version, add in your materials, and unfold to make copies.
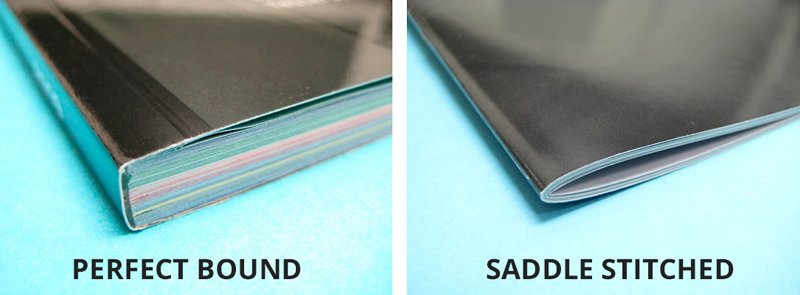
Saddle stitching: The other format that I recommend for you to consider is what we might call the “standard zine”: 8.5 x 11 inch pages (or A4) folded in half along the shorter side. Of course you can use other paper sizes if you you’d like. To create the binding with this format, you will fold each sheet in half, nest them within each other, and attach staples along the fold to make the spine of the booklet. This technique is called saddle stitching because it was more traditionally done by actually stitching along the spine. Feel free to experiment with actually stitching your binding! Many students have done this in the past and it can have really nice results. You can use any type of string, thread, or twine that you might have access to. But again, don’t staple or stitch yet! First create a temporary assembly of your blank pages and attach them using paperclips or something that can be easily removed.


When you are happy with your completed saddle stitched zine, remove the paperclips and “publish” by creating duplicates, making sure to create double-sided copies. Then you can fold, reassemble, and permanently bind the duplicates with staples or other stitching.
Perfect binding
Another common binding technique is known as perfect binding. With this method, you needn’t worry about imposing pages and printing on half sheets that will be folded together. Instead you simply create a stack of double-sided pages, dip one side (the spine) in binding glue, and wrap that in a cover. The easiest way to do this iw to visit a local print shop and ask for a perfect binding. You would simply bring a digital or hardcopy version of a stack fo sheets and they will reproduce for you and bind with glue and an optional cover.
I ask you to avoid this method for this class, focusing instead on the hand-made, do-it-yourself ethos of assembling the zine yourself. Of course, if you wish to experiment with a DIY perfect binding, that would be great!
Commercial printing / zine services
And of course, there are many, many web-based business now that will offer printing services for you. (CafePress, Lulu, Zazzle, Moo.) Those can be very useful for other zine projects you may wish to take on. But again, for this project for our class, we’ll stick to hand-made, DIY.
Lab notebook task
For your homework in follow-up to this workshop, create a test zine: either two mini zines, or a saddle stitch made from two sheets of paper. Assemble your zine with blank pages. Then fill your zine with drawings, doodles, notes, collaged clippings from other printed matter, or anything you’d like. This is just a sample to experiment with assembly. When you have that, disassemble the zine, find a photocopy machine, make two duplicates, then assemble & bind them: for saddle stitched this will mean staples if you can manage, or actual stitched string; for the mini zine, experiment with taking your two zines and attaching them together, back cover of one to front cover of the other, either with glue, staples, or tape.
Please create a lab notebook for this workshop as you did for Unit 1. Put it in a new folder in Google Drive. Include some pictures of your process including at least one in-progress and one of the finished assembly. Use your notes to try to think of some linkages back to Markee’s presentation or recent course concepts. Add some comments about how your experiment turned out and what you might make sure to do differently next time.