[ Links open in: same window | new window ]
Radical Software
LCST 2234, Spring 2026 (CRN 16616)
Rory Solomon
Project 2, Review of the Basics
Table of contents
- Accessing device as USB storage
-
Updating the
ATTACKMODE - Hardware device spoofing
- Basic workflow
- What keys are available?
01. Accessing device as USB storage
Your device will hopefully show up as a USB storage device when you first plug it in. If it does not, you'll have to pry open the case, and right after plugging it in, press the little button. That should then make sure it shows up as USB storage. But unless you update theATTACKMODE, you
will face this problem when you unplug and reinsert the
device.
02. Updating the ATTACKMODE
The device has two possible attack modes:
acting as a USB storage device (STORAGE), and
acting as a keyboard (HID, for human input
device).
When your project is in development, you will probably want the device to always be in both modes. That is because the device has to show up as a USB storage device for you to upload new code onto it. And while your project is in development, you will probably be wanting to update, re-upload, and re-test your code quite a bit.
When you have the project ready to go, you will definitely want
it to be in HID attack mode (so that your script
will run on the target machine), but you may or
may not also want to have it in STORAGE mode,
depending on the nature of your attack.
To set the attack mode of your device, use the
Ducky Script command ATTACKMODE. This should be the
first line of your code file (although putting it after
any REM comments is OK, and probably actually a
good idea).
To turn on both modes, use the following command:
ATTACKMODE STORAGE HID(jump back up to table of contents)
03. Hardware device spoofing
See Tutorial
1, section 02 for discussion of hardware device
spoofing. To summarize that, in order to (hopefully)
prevent the keyboard identification popup that sometimes occurs
when you connect your device to a new target machine, you will
want your device to spoof its identification to look like a
normal USB keyboard (which hopefully will not prompt for
identification). To do that, add two device IDs to
the ATTACKMODE command. So this should probably be
the first line of code (possibly after REM
comments):
ATTACKMODE STORAGE HID VID_05AC PID_021E
If you want to learn where those arbitrary device codes came from, click through the above link and read the Hak5 article linked there.
(jump back up to table of contents)04. Basic workflow
The basic workflow that you will use as you work on this project will be:
- Connect your Rubber Ducky
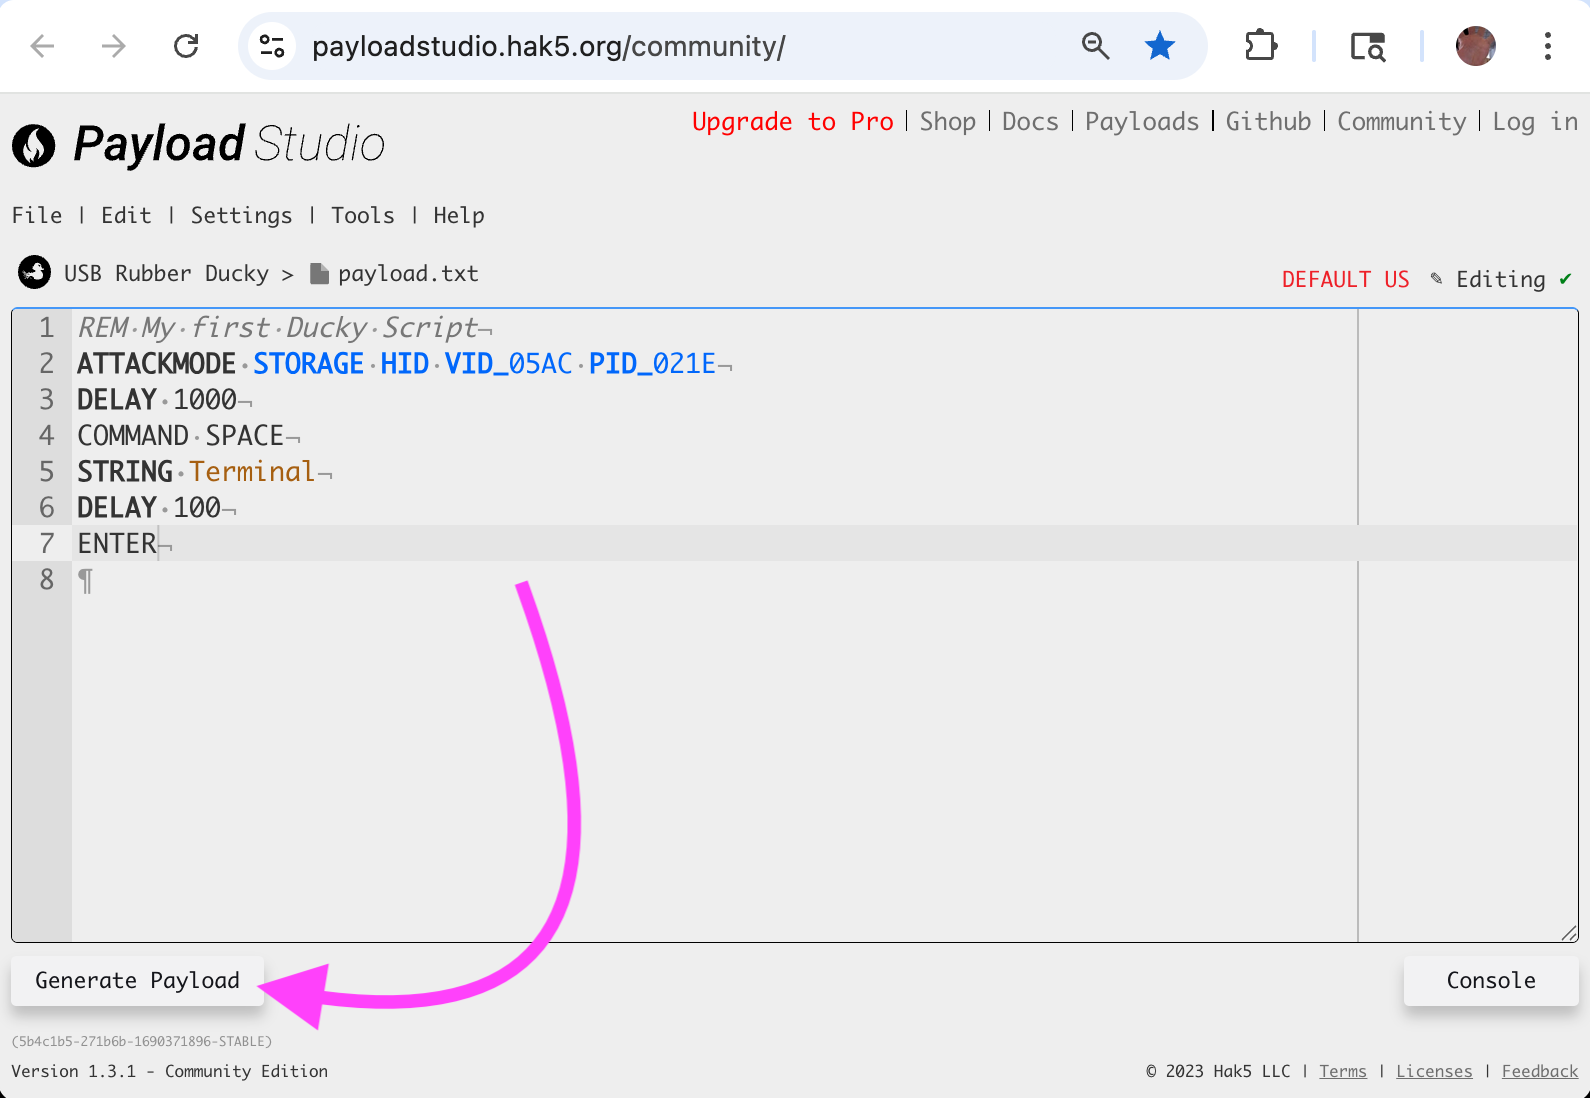
- Edit code in the Hak5 Payload Studio
-
Click
Generate Payloadto compile your code and produce andinject.binfile -
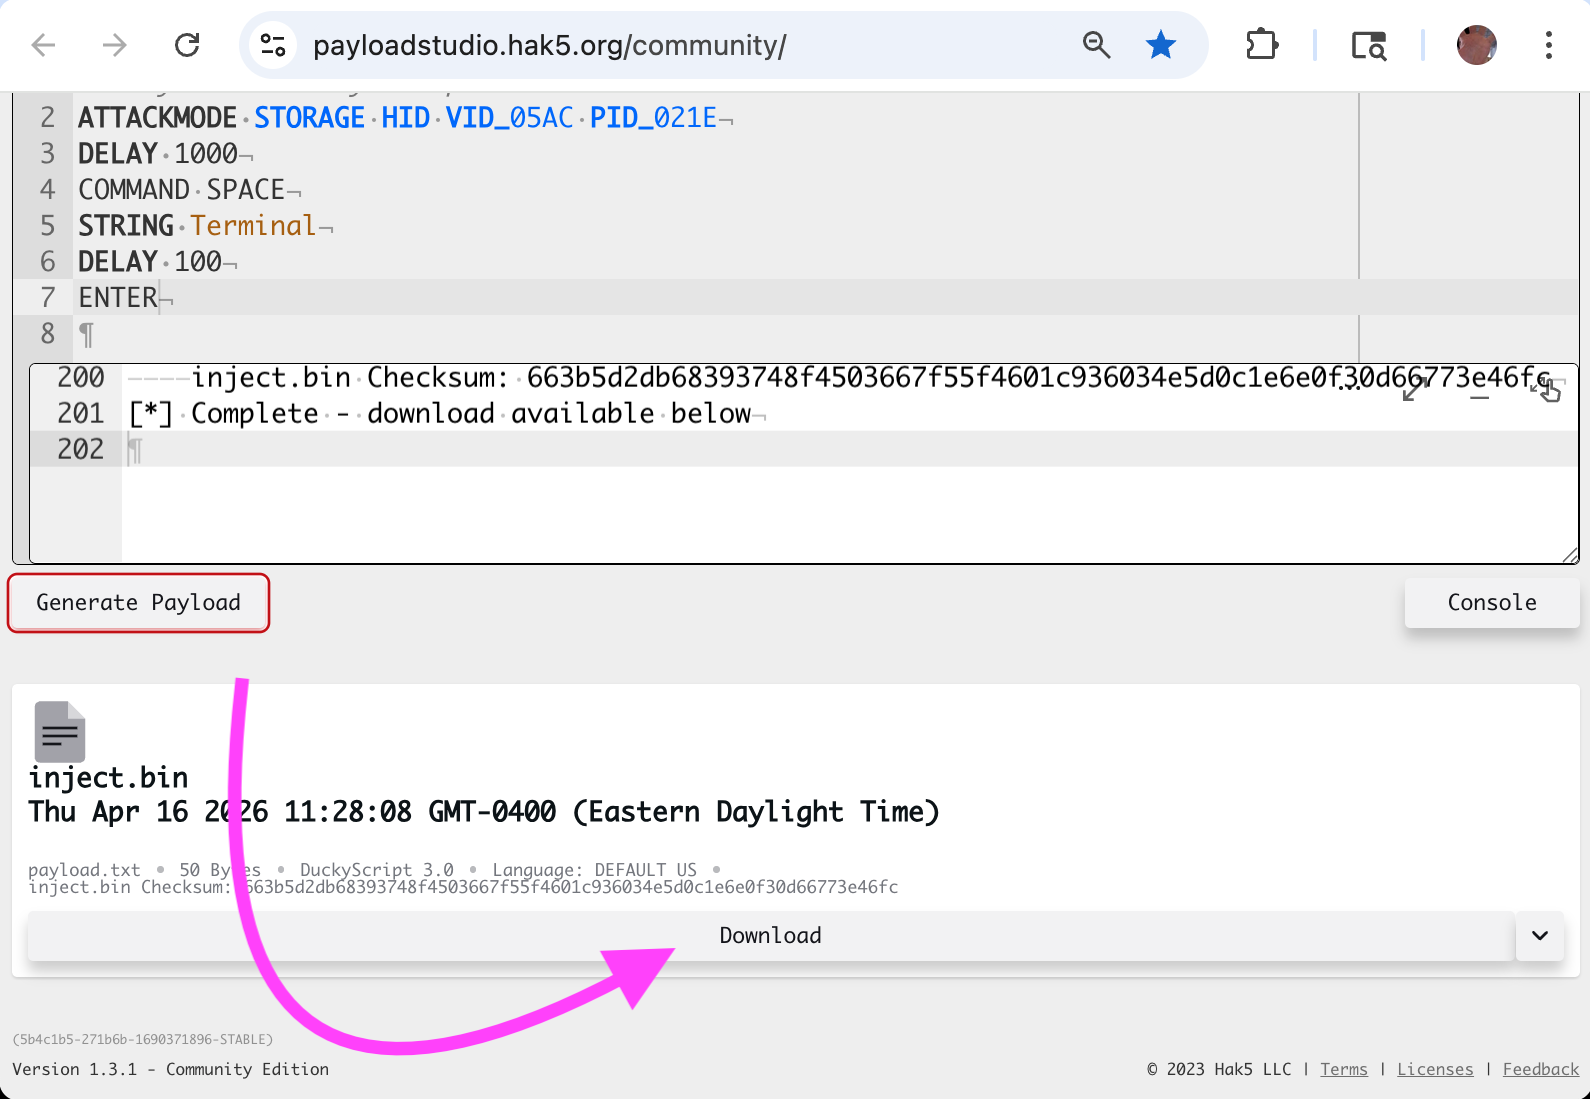
Click
Downloadto save the newinject.binfile to your computer -
And finally, copy that file to the root folder of your
Rubber Ducky device acting as USB storage. If prompted, you
should
Replacethe currentinject.binin that location. -
At this point, you should probably
delete
inject.binfrom your Downloads folder (so that next time you download it, you don't get awkard filenaems likeinject (1).binor similar).
At that point, you should be able click eject, remove the device your computer, and connect it to a target machine (your own laptop or a different one) to test your attack.
The Payload Studio is a web-based IDE (integrated development environment for the USB Rubber Ducky, which you can use to write Ducky Script, the custom scripting language developed for this device. Payload Studio is available here:
payloadstudio.hak5.org/community
You can find the Generate button here:
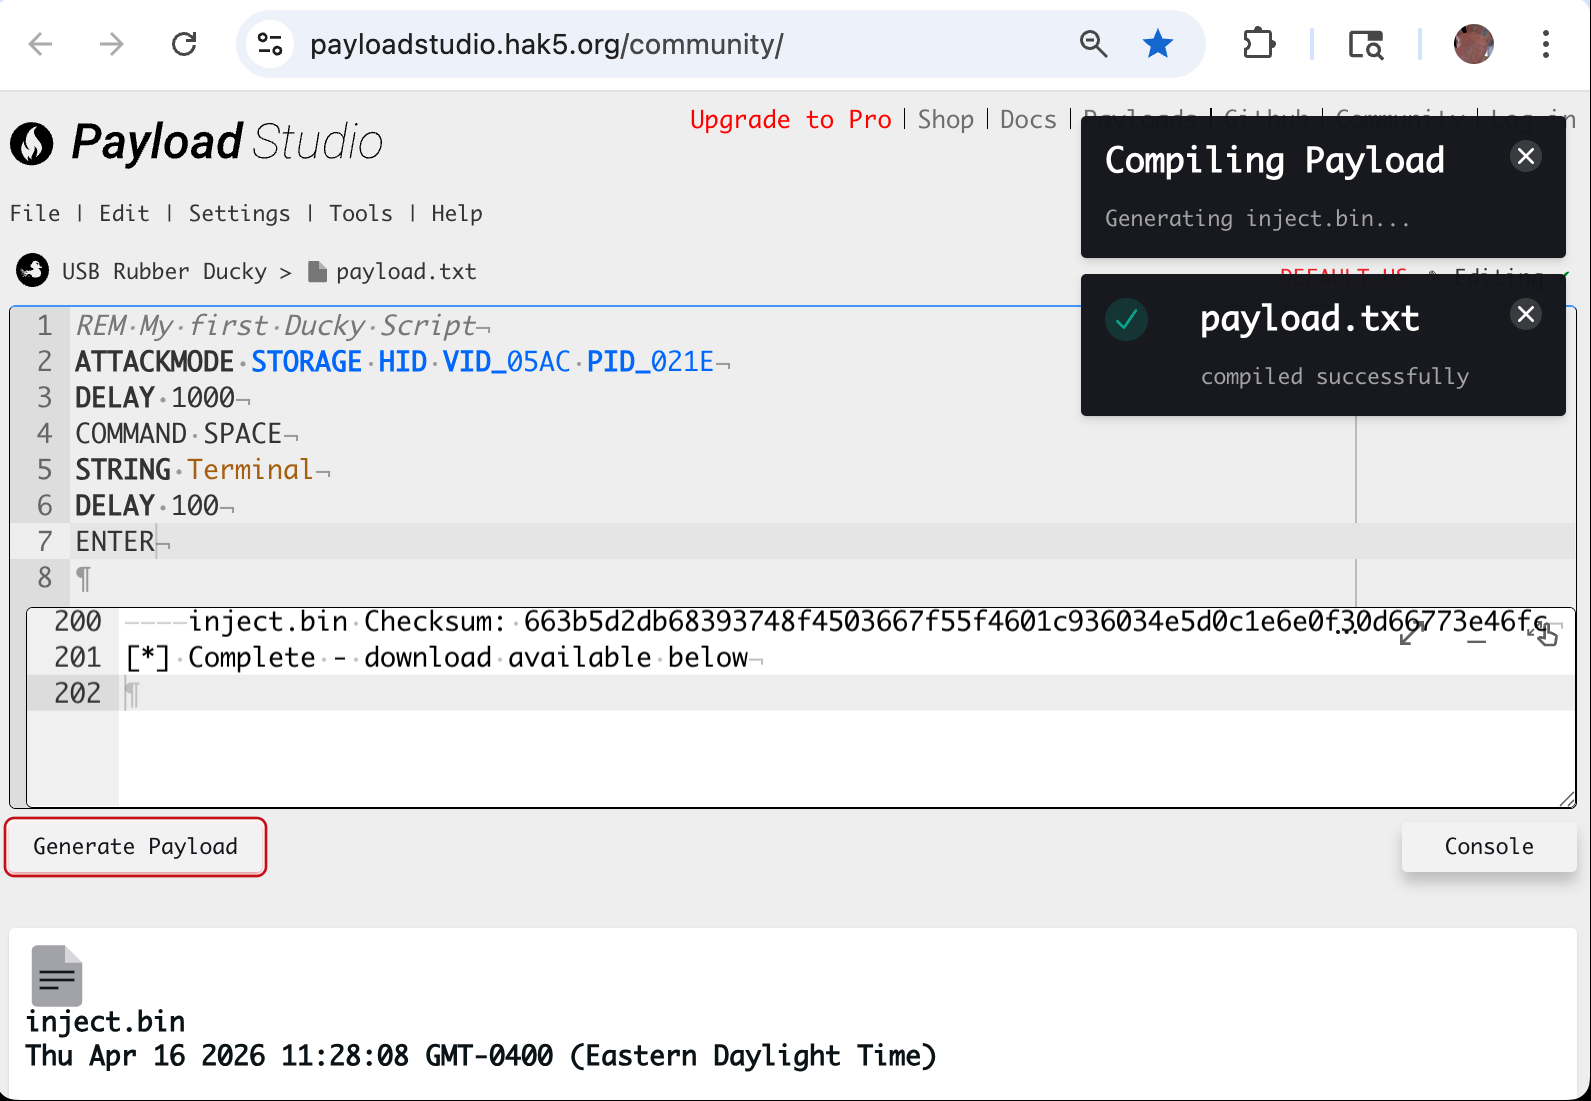
After clicking Generate, you should see
something like this:
After compiling is done, you should be able to find
the Download button here (you may need
to scroll down):
05. What keys are available?
I would advise you to read the Hak5 documentation page titled Keystroke Injection. This discusses what keys of the keyboard are available to you, and how to use them.
That page explains that you can use all alphanumeric keys, as well as all puncuation.
You get your device to simulate typing these keys with
the STRING
command, explained
here. STRINGLN is essentially the same as that,
but ends each set of characters by also
typing ENTER.