Code as a Liberal Art, Spring 2024
Unit 1, Lesson 3 — Thursday, February 8
Table of contents
Topics today: (Click each to jump down to the corresponding section.)
- Background: Experiments in digital formalism
- Some comments on theory & practice
- Homework review
- Variability: User input via the command line
- Images in Python
- Wrapping up & homework
I. Background: Experiments in digital formalism
Today's lesson builds really nicely on our Tuesday discussion. Recall that for Tuesday's class, we read and discussed texts that considered what we're calling formal properties of digital media. Today we will be working with coding techniques that afford you the opportunity to experiment with these formal properties by manipulating digital objects with computer program code.
In particular, we're going to experiment with code that illustrates a few ideas from what Manovich called the five principles of digital media: digital objects as numerically encoded, modularity in the form of re-usable files and chunks of code, transcoding from one file format to another, and the easy variability of digital objects. In the background will be ideas from Kittler about encoding, and ideas about glitch techniques.
 A slide from our Tuesday discussion, listing what Lev Manovich
calls the five principles of new media. We will be
experimenting with some of these formal properties of digital
machinery today in our coding exercises below.
A slide from our Tuesday discussion, listing what Lev Manovich
calls the five principles of new media. We will be
experimenting with some of these formal properties of digital
machinery today in our coding exercises below.
This week and next will also offer you opportunities for creative expression through code. With these techniques you'll be creating code to generate a variable range of creative possibilities, rather than producing digital objects yourself. In this sense, we can start thinking about algorithms as automating some aspect of creative production.
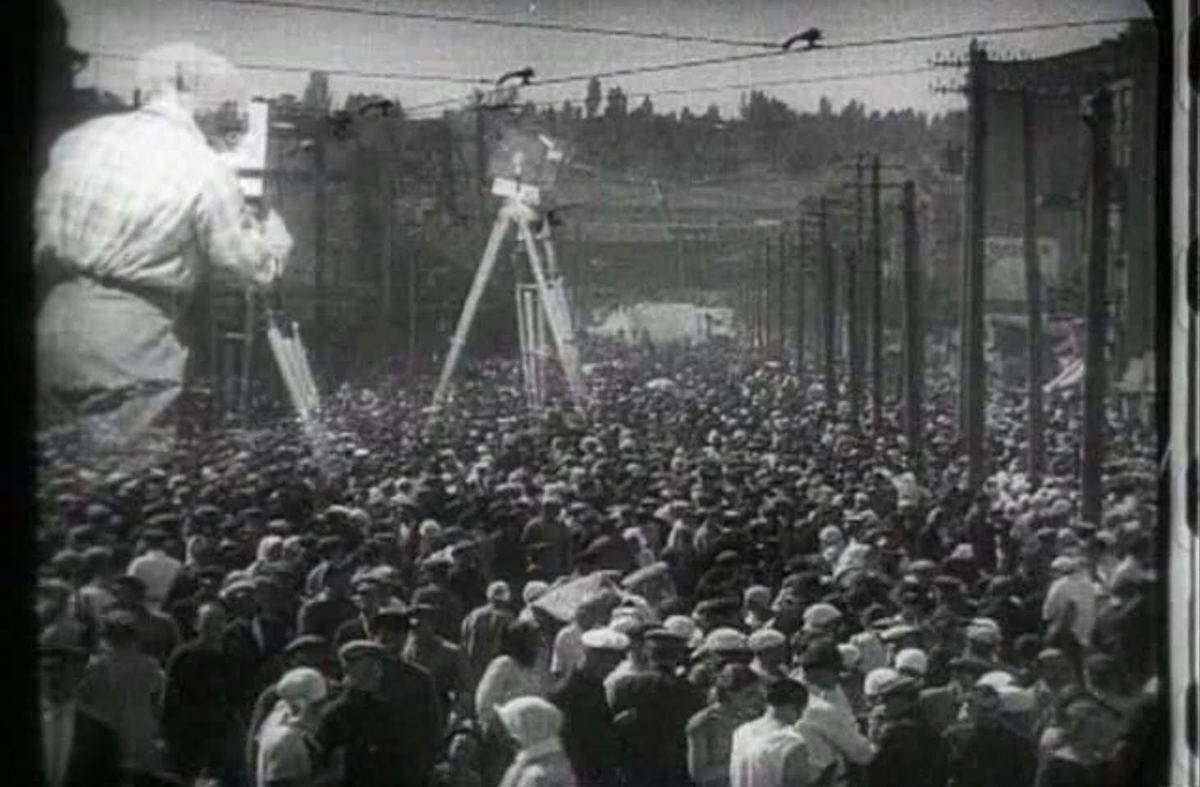 A still image from Dziga Vertov's 1929 film, "Man with a Movie
Camera." In the Prologue to The Language of New
Media, Manovich uses this film to talk about the
digital. This image shows Vertov's collage techniques —
highly innovative at the time. We'll be playing with this type
of composability in the examples below.
A still image from Dziga Vertov's 1929 film, "Man with a Movie
Camera." In the Prologue to The Language of New
Media, Manovich uses this film to talk about the
digital. This image shows Vertov's collage techniques —
highly innovative at the time. We'll be playing with this type
of composability in the examples below.
II. Some comments on theory & practice
Working with this material in the context of a hands-on theory/practice class such as this affords a unique opportunity to think carefully and critically about what the digital is on a conceptual level, and then hold up those theories to the scrutiny of hands-on work with these objects of conceptual inquiry.
The hands-on work this week will manifest in relation to our conceptual work in a few ways. First we might think of it as a kind of "test" of the theory. We might ask: do those theoretical ideas actually apply when we start looking closely at digital objects and lines of code? Perhaps you'll find that your own hands-on work offers you critical insights into blindspots in the theoretical ideas that we read this week. Notably, some of the scholars who we read this week themselves have technical backgrounds and have been known to conduct their own hands-on experiments in the process of their research and scholarship (cf. the coding work of Friedrich Kittler). Second, we might think of our hands-on work as examples that illustrate some of the theoretical ideas with concrete cases. And finally, I hope that this hands-on work shapes and informs your thinking about the theoretical work this week, allowing you develop even more sophisticated conceptual understanding by virtue of the hands-on exercises.
III. Homework review
But first let's start with some review and go over how to complete last week's homework.
I think the most interesting part of our review discussion was
in regards to part c of the homework assignment: Using the
modulo operator (%) to write code that finds the
smallest even number in a list.
The initial solution we dicussed (which is the same or similar to what most of you came up with) is the following:
from unit1_lesson2_data import *

smallest_even_number = number_list[0]

for n in number_list:
    if n < smallest_even_number and n % 2 == 0:
            smallest_even_number = n

print("The smallest even number in this list is: " + str(smallest_even_number) )
a. A bug in our code
But as we discussed in class, while this code works for the data
list that I provided (in unit1_lesson2_data) it has
a potential error if run on a different input.
b. Hua's test case
Hua offered us a sample list of numbers to illustrate this:
number_list = [ 3, 6, 8, 10, 7, 5, 9 ]
The key thing here is that the first number is an odd
number, and it is smaller than all the even numbers. In a case
like this, the above algorithm will not work because when it
initially sets smallest_even_number
to number_list[0], it will set it
to 3, and when the code loops through the list,
as it encounters small even numbers, those numbers will
never be smaller than 3, so the code will never consider them
to be smallest even number, and so when the loop finishes
running, smallest_even_number will still
be 3, which is wrong because this is an odd number.
c. Oliver's solution
We discussed a few possible solutions. One, which I'll call
"Oliver's solution" was to start by initially
setting smallest_even_number to a number guaranteed
to be larger than all the numbers in the list. As I wrote in the
homework assignment, number_list consists of
"a list of 1,000 numbers between 0 and 1000". So this
would be:
from unit1_lesson2_data import *

# Oliver's solution
smallest_even_number = 1000

for n in number_list:
    if n < smallest_even_number and n % 2 == 0:
            smallest_even_number = n

print("The smallest even number in this list is: " + str(smallest_even_number) )
This code will give us the correct answer because every number
we encounter will be smaller than the initial value, so when we
first encounter an even number, that will be set
to smallest_even_number (and as we continue
scanning through the list, we may find smaller even numbers).
d. Simarna's solution
The other solution we talked about was offered by Simarna and it
entailed first looping over the list to find an even number,
without checking whether it is greater or less than
anything. Once we find the first even number in the list, set
that to smallest_even_number, and then go on with
our code, looking for potentially smaller even numbers. My
version of that is here:
from unit1_lesson2_data import *

# Simarna's solution:
for n in number_list:
    if n % 2 == 0:
        smallest_even_number = n
        break

for n in number_list:
    if n < smallest_even_number and n % 2 == 0:
            smallest_even_number = n

print("The smallest even number in this list is: " +
str(smallest_even_number) )
This uses a new bit of syntax with the break
command. This command tells Python to exit out of any loop it
might be currently in. So this code finds the first even number
in the list, and then proceeds as before.
e. Michael's solution
Michael also offered a solution, and if I recall, it was
something like the below. (Update: Michael's own version of this
is available
as a Gist here. Thanks for sharing.) Start by
setting smallest_even_number to 0, the
smallest possible value in the list. Then as you loop through,
every time you encounter an even number, if that number is less
than smallest_even_number, or
if smallest_even_number is still zero, then
set smallest_even_number to the number.
from unit1_lesson2_data import *

# Michael's solution
smallest_even_number = 0

for n in number_list:
    if n % 2 == 0:
        if n < smallest_even_number or smallest_even_number == 0:
            smallest_even_number = n

print("The smallest even number in this list is: " + str(smallest_even_number) )
Great work everyone!
(jump back up to table of contents)IV. Variability: User input via the command line
To start with some new material, let's look at how you can leverage the power of variability within the command line interface to make your programs more dynamic, and able to respond to user input.
In the context of the command line, we process user input
as arguments: bits of text that follow after
the command that you type. You have already seen and
used arugments on the command line. For
example, cd Coding. In this case,
the string Coding is
an argument to the cd
command. It tells the cd command what
to do — which directory to change to. Without the
argument, the cd command would only
ever be able to do one thing. To be useful, we want to be able
to indicate to this command which directory we want to
change to. That is what command
line arguments are for.
Python makes it very easy to work with command line
arguments. By using the sys library, which is short
for "system". This is a library that contains various utilities
for dealing with the computer and operating system within which
your code is running.
To get started, make a new folder for this week. I recommend
calling it Unit 1 Lesson 3. Create a
new file in VS Code, name it
arguments.py, save it into this new
folder, and put the below code into it.
Start with these few lines:
import sys

print( sys.argv )

print( len(sys.argv) )
Now run this new program by clicking the 'Play' button in VS Code. You should see something like this in the terminal:
$ /usr/local/bin/python3 "/Users/rory/Code as a Liberal Art/Coding/Unit 1 Lesson 3/arguments.py"
['/Users/rory/Code as a Liberal Art/Coding/Unit 1 Lesson 3/arguments.py']
1
That is showing you the command that VS Code just ran, and the
results of the two print statements. In this
case, sys.argv (a list of all the arguments
specified on the command line) contains only the name of your
Python file. And you can see that the length of this list is 1.
Now, instead of clicking 'Play' in VS Code, try running the
program by typing the Python command on your system (the
thing underlined in orange above),
then the name of your file (probably arguments.py)
and then a few other words separated by spaces. You should see
something like this:
$ python3 arguments.py gritty sharkie gnash
['arguments.py', 'gritty', 'sharkie', 'gnash']
4
This is showing the sys.argv list, consisting of
the name of my Python file plus the three additional arguments
that I've typed. And the next line is showing that the length
of sys.argv is now 4.
Beyond just printing out the arguments, you can actually use
them in your code. Modify argments.py so it
includes this code, and run this to see that in action:
import sys

data = [ 643, 452, 230, 219, 962, 532 ]

index = int(sys.argv[1])

print( data[index] )
Output:
$ python3 arguments.py 1
452
$ python3 arguments.py 2
230
This code is taking the first argument, converting it to a
number (with int()), and using that as
the index to access a value in my list. Now
your code can change its behavior based on some user input.
Of course, if the user specifies an invalid value, you may get an error. In the first example below, I'm specifying a number that's too large, and in the second example below I'm omitting any argument entirely. These are the error messages you would see in those situations.
$ python3 arguments.py 9
Traceback (most recent call last):
  File "arguments.py", line 7, in <module>
    print( data[index] )
IndexError: list index out of range

$ python3 arguments.py
Traceback (most recent call last):
  File "arguments.py", line 5, in <module>
    index = int(sys.argv[1])
You can improve on this with some error handling code that checks for valid input and gives the user a helpful message if there's a problem:
import sys

data = [ 643, 452, 230, 219, 962, 532 ]

# check if the user did not enter an argument
if len(sys.argv) < 2:
    print("You forgot to type an argument")
    exit()

index = int(sys.argv[1])
# check if the user entered an argument that is too large
if index > len(sys.argv):
    print("You typed a number that's too large")
    exit()

print( data[index] )
$ python3 arguments.py
You forgot to type an argument

$ python3 arguments.py 10
You typed a number that's too large
Note that in the above error handling example,
if the user has entered an invalid value, the code uses
the exit() command. This tells Python to stop
running your program with executing any other commands.
We'll use this technique in more interesting ways later.
(jump back up to table of contents)V. Images in Python
One of the discussion points this week was about numerical encoding: the idea that all digital objects, in some sense or another, are represented within digital machines with numerical values. One way we can see this is by examining digital images.
In Python, probably the easiest way to work with digital images is to work with PIL (the Python Image Library). In coding, a library is a collection of commands bundled together under one name, that all work together. There are libraries for doing networking operations (cf. Code Toolkit), for working with human languages (cd. Coding Natural Language), and for other things like working with sounds, encryption, etc.
PIL is currently implemented by a project called Pillow, so that is the name we need to reference when installing this library. All of us should have this installed on our computers at this point. (If not, see the Homework 0 for how to do that.)
Now, let's try to use some command line arguments to access a digital image file from Python.
Create a new file in the same folder as above. Let's name
it images.py. Add the following lines.
import sys
from PIL import Image

img = Image.open( sys.argv[1] )

print("You typed the filename: " + sys.argv[1] )
print("This is a " + img.format)
print(img.format_description)
print("Size: " + str(img.size) )
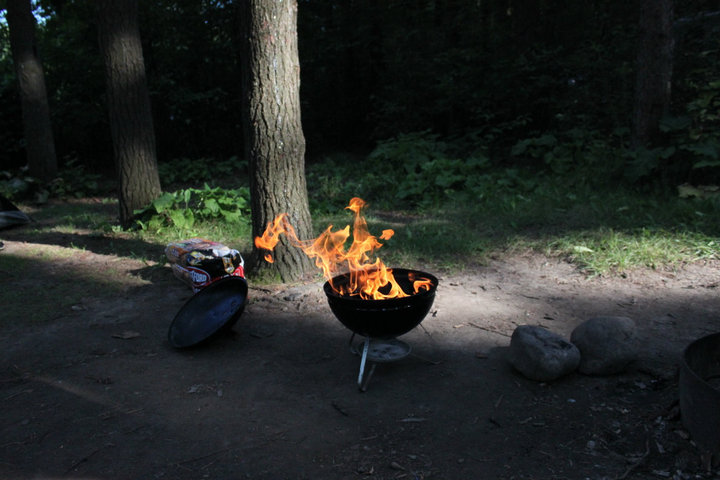
Now, add an image file to this directory. You can copy any image
from your computer into this folder. If you need an image to
work with, you can use this
one: fire.jpg. Just right-click on
that, click "Save Link As" (or your browser's equivalent) and
save the image into your Unit 1 Lesson 3 folder, or
whatever you called it.
Now run your Python program, but as above, don't click the
"Play" button. Instead, click into the Terminal (if you
don't have a terminal window open, from the menu click
Terminal > New Terminal) and then run the program manually by
typing your system's Python command and the name of the
above file (probably images.py). For me that
generates the following output:
$ python3 arguments.py fire.jpg
You typed the filename: fire.jpg
This is a JPEG
JPEG (ISO 10918)
Size: (720, 480)
This isn't too interesting but it is using the Python Image Library to access the image file and tell us some basic information about it.
What if the user forgets to specify an argument? You would see an error like the below:
 python3 arguments_image.py
Traceback (most recent call last):
  File "arguments_image.py", line 4, in <module>
    img = Image.open( sys.argv[1] )
IndexError: list index out of range
Let's add some error handling for this situation:
import sys
from PIL import Image

if len(sys.argv) != 2:
    exit("This command requires one argument: the name of an image file")

img = Image.open( sys.argv[1] )

print("You typed the filename: " + sys.argv[1] )
print("This is a " + img.format)
print(img.format_description)
print("Size: " + str(img.size) )
Of course, if the user types a filename that doesn't exist, you
will still receive an error. Or if you type a file that is not
an image, you will also receive an error. (Something
like No such file or directory.) We can talk about
how to handle this error later.
This is just a very brief sample of working with images using the Python Image Library, and all we had time for today. Next week we'll pick up right here and see some more sophisticated (and fun!) techniques for manipulating and generating images in Python.
(jump back up to table of contents)VI. Wrapping up & homework
The homework for this week builds on the above with some exercises that also will lead in to next week.