Code Crafting, Fall 2021, Week 9
Week 9 — Wednesday, October 27 — Class notes
Plan for the day
(Click each section to jump down.)
- The principles of digital media
- Working with randomized variable values in TurtleStitch
- Another randomized example
- An example of a randomized design pattern: buckshot brogues
- Homework
I. The principles of digital media
Today we continued our conversation from last week about chapter 1 from Lev Manovich's book The Language of New Media.
This week we focused on what Manovich identifies as five key principles of digital media (what he calles "new media"):
- Numerical representation
- Modularity
- Automation
- Variability, and
- Transcoding
In working through those key principles, we also addressed glitch art and various techniques for producing it. Glitch alters or degrades the operations and outputs of digital processes, but it does not break them or corrupt them to the point of interoperability. In doing this, glitch work oftens reveals the materiality underlying digital objects, causing us to be aware of the core principles that Manovich outlined, such as the numerical representation and modularity that lie behind the clean images on glossy screens.
Slide presentation. We reviewed the same slide presentation from last week, this time focusing on slides 8-31.
I also reviewed some points from the Prologue of this text, in which Manovich analyzes specific shots from Dziga Vertov's hugely influential film "Man with a Movie Camera" (1929). Manovich does this to draw connections between "new media" and "old media". While we might have some criticism of his use of these terms, what he means here specifically is digital machinery, and the apparatus of cinema: film and the movie camera.
Dziga Vertov, "Man with a Movie Camera," 1929
Doing this kind of analysis offers many benefits to our understanding of computational machinery, drawing connections and through-lines to older technologies — just like we have been discussing over the last few weeks in regards to computation and textile production. I've spoken about punch cards as being a key part of the history of both data processing technology and weaving machines. Manovich's analysis of this film elaborates on these connections in that he is focused on a similar historical moment: late industrial age in the early twentieth century, as manufacturing processes were about to cede their dominance to economies of information processing.
We watched an excerpt from the film (linked above): section 4, from 32:54 to about 37:35. This section includes some wonderful montage examples that create juxtapositions of different images to produce argumentation, ideas, and concepts. For example, the contrast of women getting eye shadow applied and a woman getting covered in coal soot, a man sharpening a razor to give a shave and a man sharpening an axe — both seem to offer some commentary on class in Moscow at this time. It also includes some representations of the specific technologies that we've been discusssing, like sewing machines, and also depicts the process of film-making, like cutting and splicing, which relate back to the Greg Climer film strip scarf example that I've spoken about quite a bit.
II. Working with randomized variable values in TurtleStitch
The technical work today is fairly straightforward. The goal is to take your work from last week (which added inputs to your custom blocks) and use the randomization functionality of TurtleStitch to create a piece that demonstrates variation on a theme within the structure of the composition that you create.
Start with the TurtleStich project that you were working on last
week. Buildin on my work from last
week, I will start
with this
project (pictured below), which includes a custom
block that I
called week08_rectangle_block, adds
two inputs to that block, and then invokes that
block multiple times with different values each time. This
particular example invokes the custom block in
a loop (a repeat block) and
uses variables as the custom block inputs, so
that the variables can change a little bit automatically each
time the custom block is invoked.
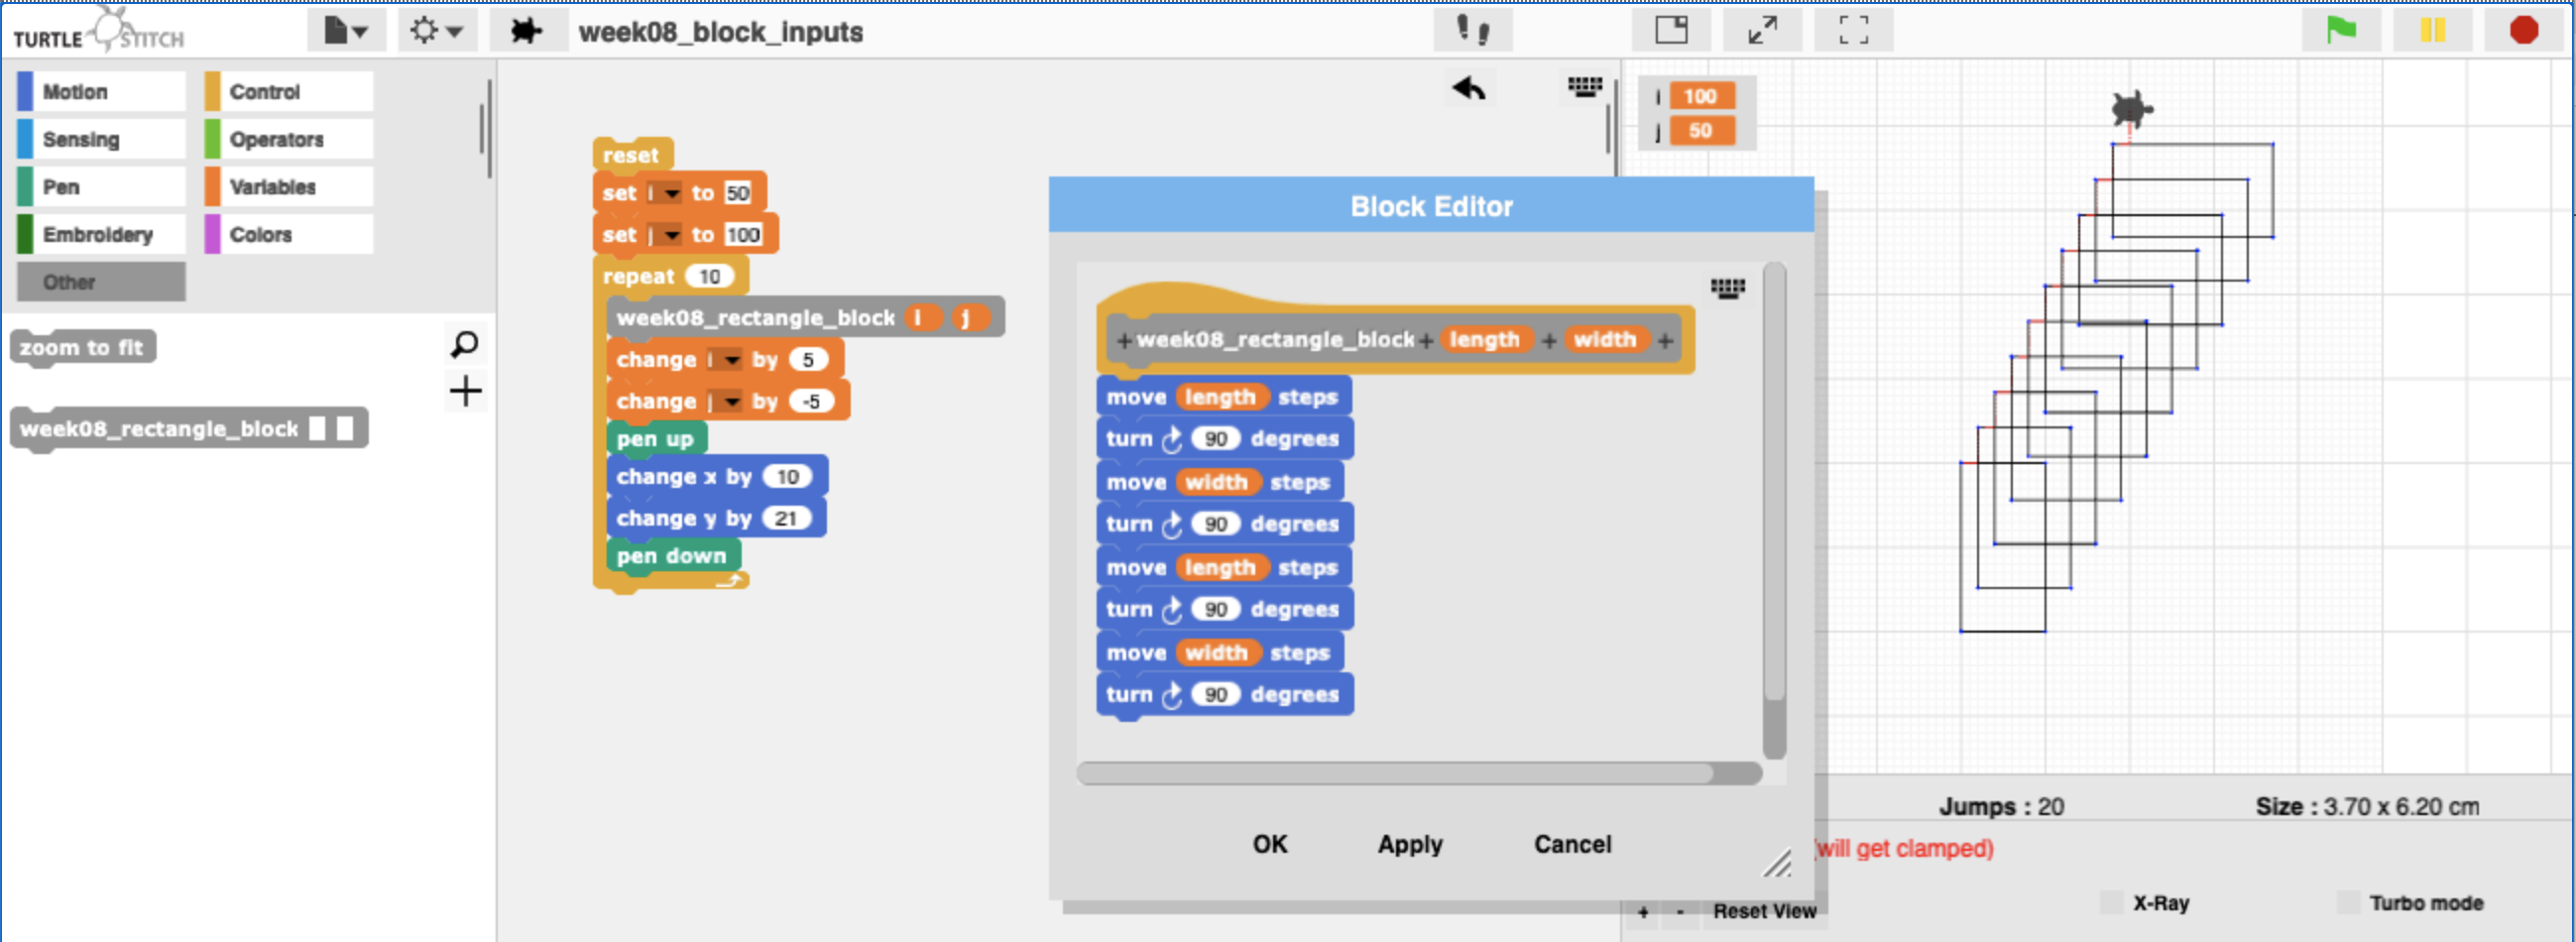 Recap of week 8. (Click to enlarge.)
To get started, simply open your work from last week, click "Save As", and save your project under a new name.
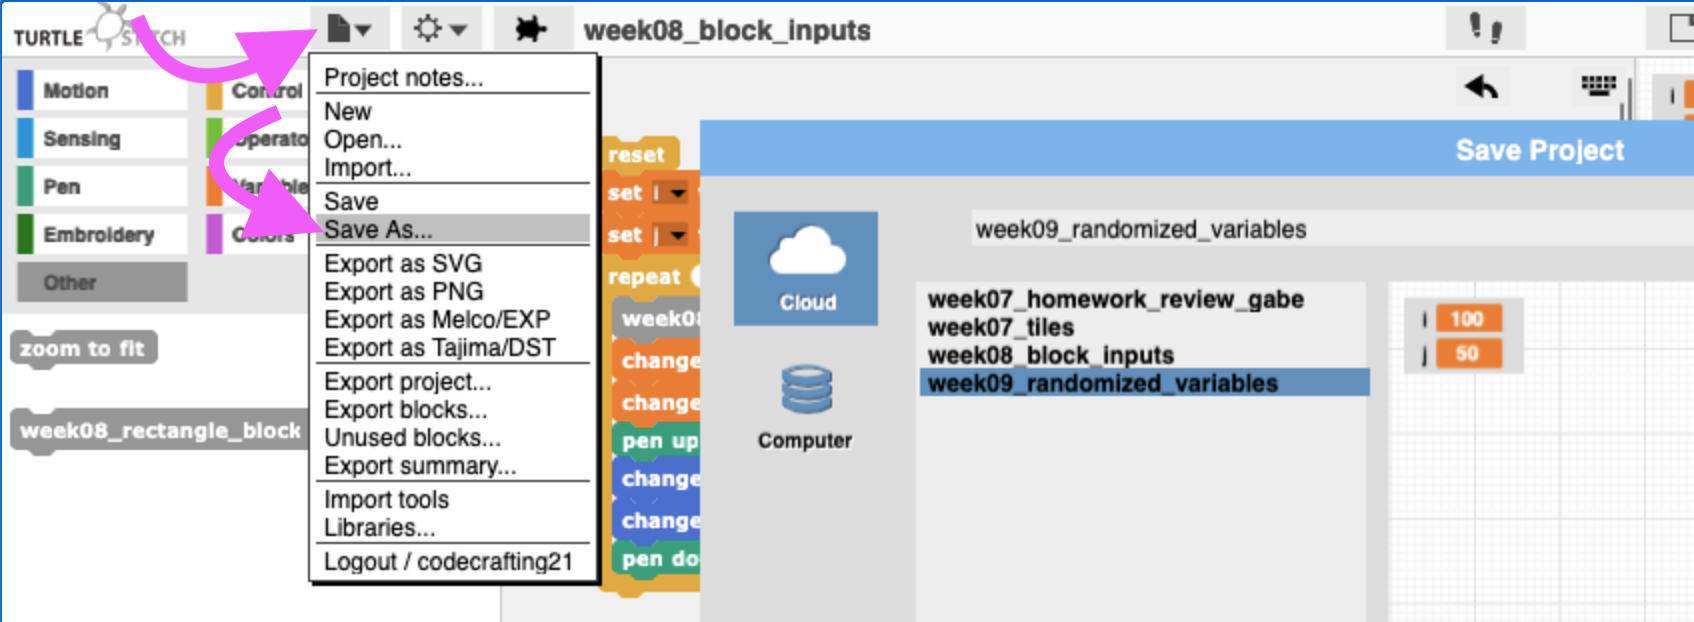 "Save As" to start a new project. (Click to enlarge.)
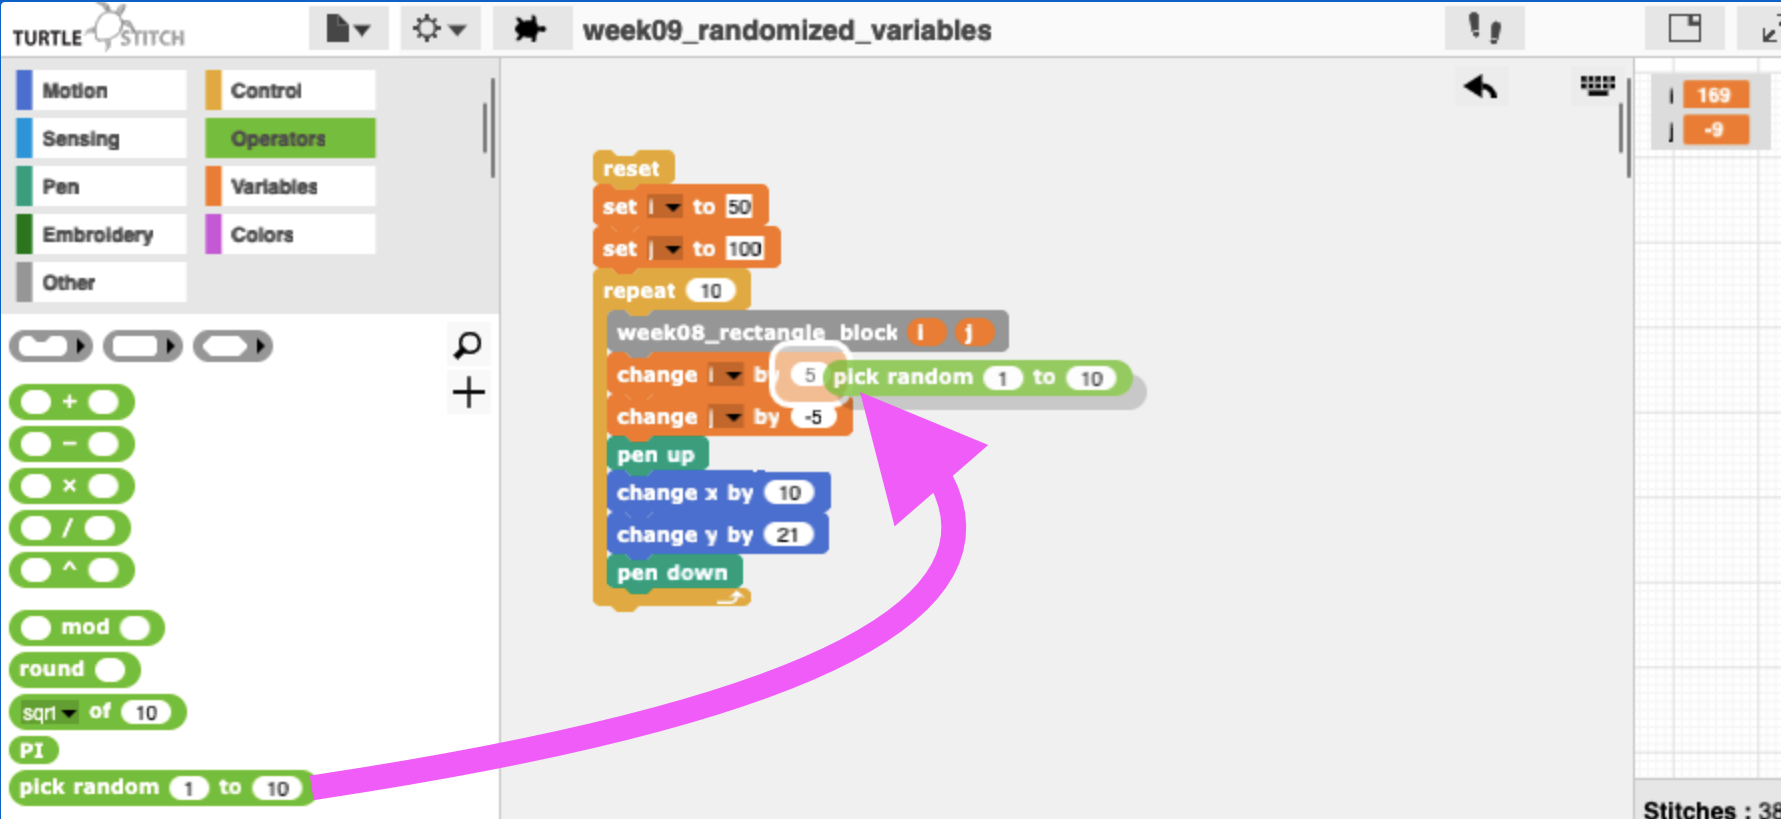
Next, click on the Operators
palette, and drag the pick
random to block in
to your composition. Replacing any values in the composition
— i.e., any numbers in the white ovals. Then, specify
numbers in the two white ovals within the
pick
      random  to
block. The two numbers that you specify
within
pick
	random  to
are low
and high values, and each time this block runs,
TurtleStich will pick a random number within
that low-high range.
So if you were using specific values before, when you
add
pick
	random  to
blocks, you could try to specify
a low-high range that spans the specific value
you had previously been using. How wide the range is depends on
how much variation you want to see in your
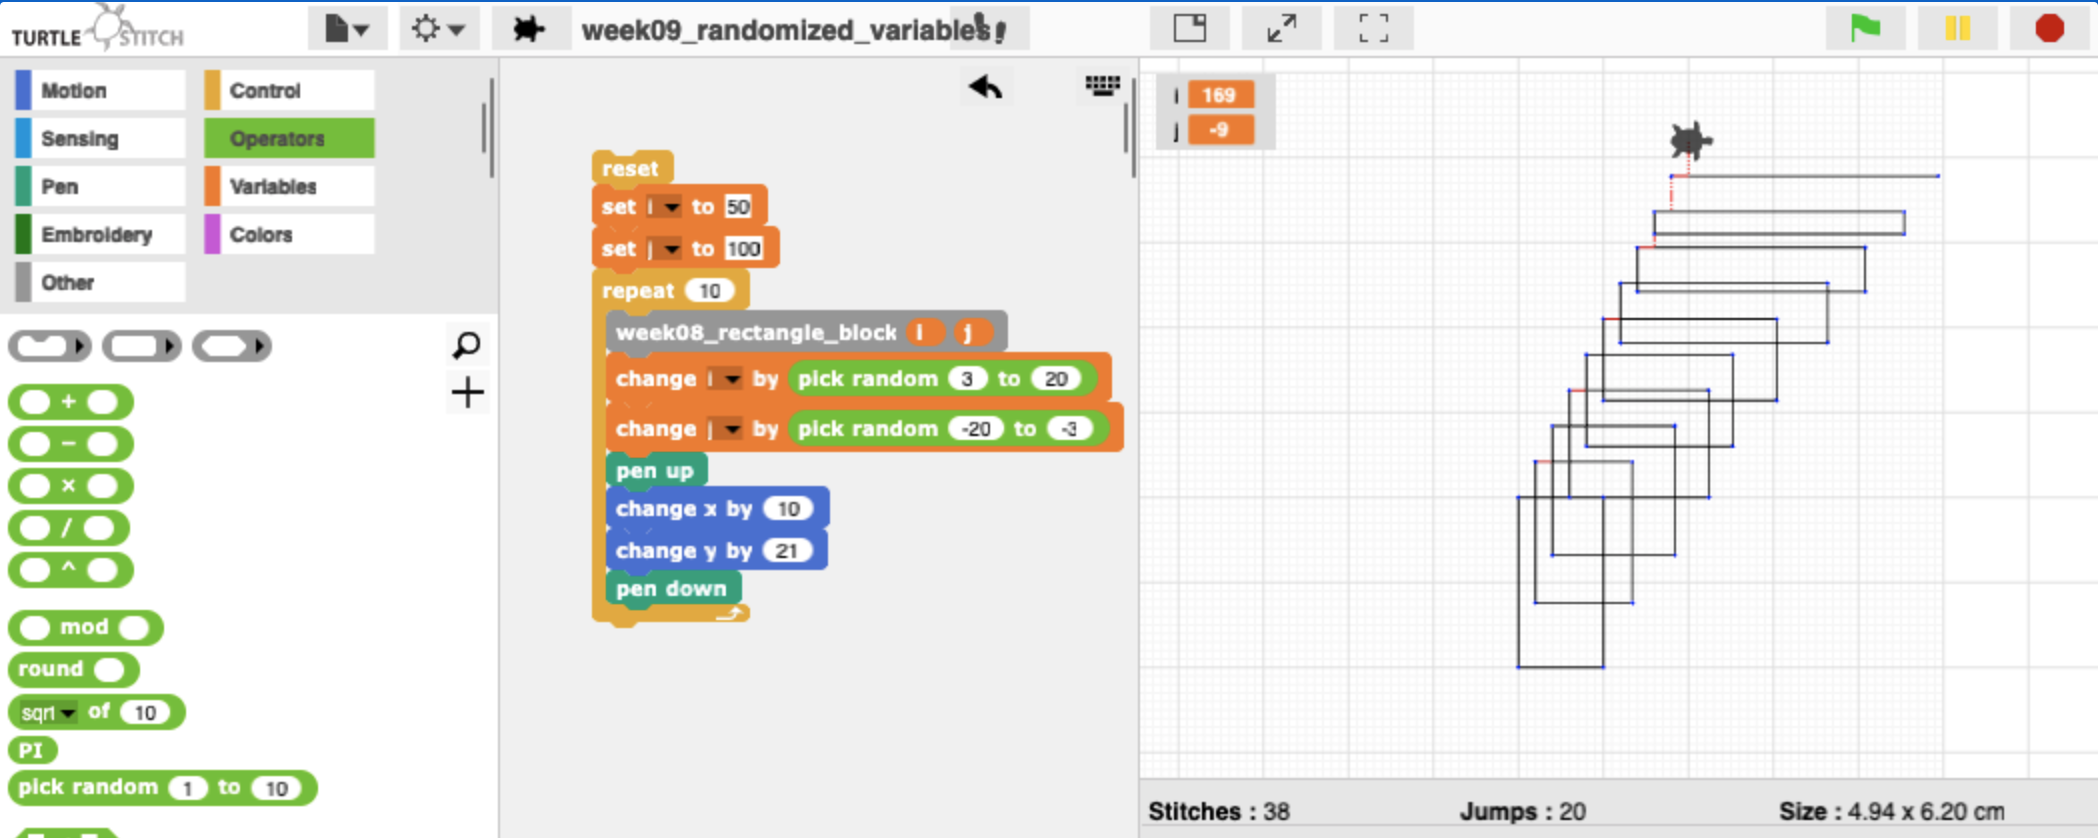
composition. Experiment! In my case, I was using the
number 5 before, so I picked 3
and 30 for my range. In the second instance, I was
using -5 as my value, so below I will
pick -20 and -3 as my range that spans
that.
Where should you drag this
pick
	random  to
block?
Well, you could either: (a) drag your
pick
	  random  to
blocks in to the inputs of your custom
block, or (b) you could drag your
pick
	random  to
blocks in to your change ... by blocks,
which control how the variables being used are changed a little
bit each time the loop runs. Option (a) would behave more like a
scattershot: each time your custom block is called,
the
pick
	random  to
blocks will pick a new number within the
range you specify. Option (b) would behave more like a shift
with some randomness — that is because with option (b)
we're using variables to add up the random numbers that are
picked each time.
To understand that, look at the below table. Imagine that we
have a repeat block
that repeats 5 times. Inside the
repeat block we
have
pick
	random  to
with a low-high
range of 0 to
10.
Imagine that the numbers that
pick
	random   to
picks are listed in the first
column. Putting
pick
	random   to
directly into your
custom block would cause the custom block to be called with the
values listed in the second column. But if you use a variable,
initially set it to 0, and then use a change ... by
block to change the variable by a random amount each time, the
value of the variable would accumulate as a sum of random
values, and the inputs to your custom block would be the values
in the third column.
Whichever technique you use depends on the composition that you are trying to create.
Putting this all together and running it, I get the following:
You can find this project posted in my TurtleStich account here: week09_randomized_variables
III. Another randomized example
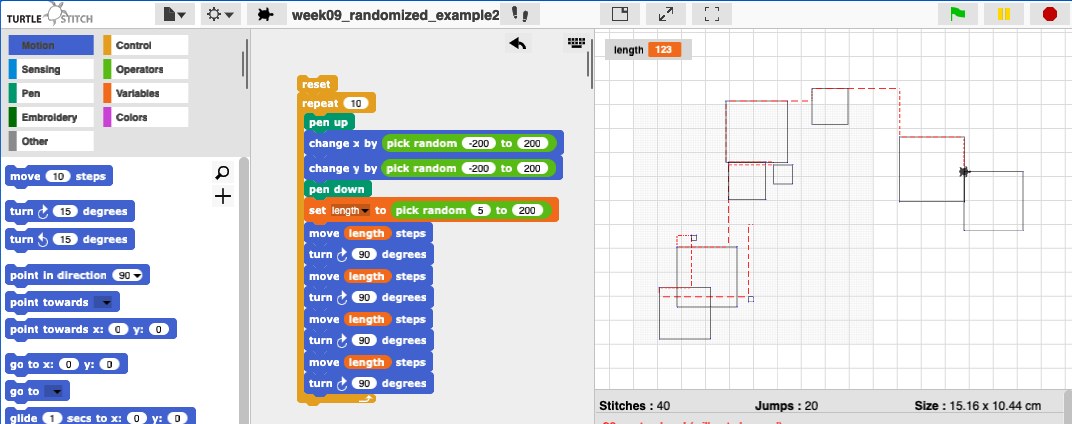
Here's another example that we looked at in class that
uses
pick
	random   to
. The above example behaves like
the third column in the above chart. This example is more like
the second column.
Note that in the previous example I used a
pick
	random   to
within a change ... by
block, so that a
variable was changed (increased) by a random amount each time
the loop repeated. In this example, I'm using
three
pick
	  random   to
blocks. The first two move the
turtle to a random x,y location after using
pen up. The
third
pick
	random   to
block is used inside a
set to block, so the
variable does not accumulate values, but is instead set to a
random value each time the loop runs. This creates more of a
"scattershot" effect.
Why did I even bother to use the variable
length in this
example? Why didn't I just put
pick
	  random   to
directly into the four
move blocks? The reason
is that I wanted to draw sqaures. If I had put
pick
	random   to
into each move block, my
code would have picked a different random number for
each move command, which
would not have resulted in a square. By picking a random number
once, saving it into the
length variable, and
then using that variable in each of the
four move commands, I'm
guaranteed to draw a square shape of a random size.
IV. An example of a randomized design pattern: buckshot brogues
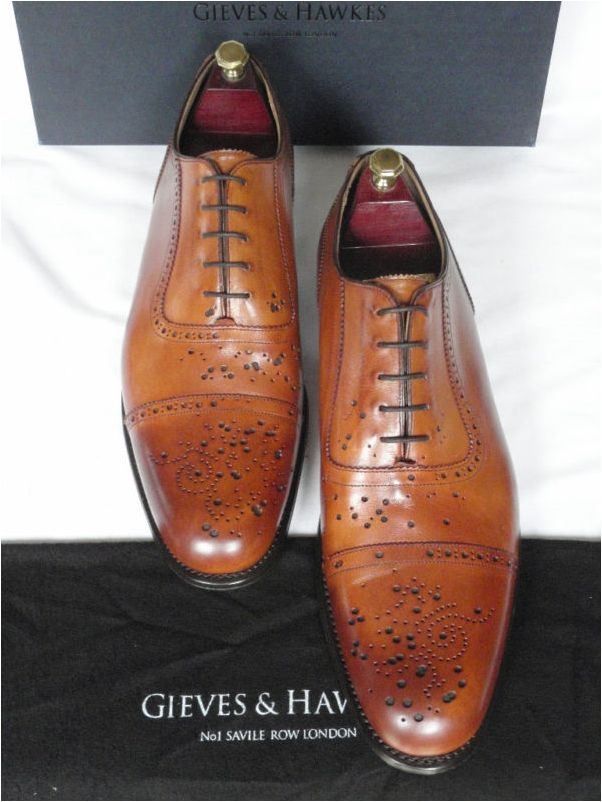
In class I talked about an example of a product that incorporates apparent randomness into its design: the buckshot brogue. A brogue is a type of shoe with ornamental perforated patterns in the leather. Buckshot is the type of projectile that typically gets fired from a shotgun and unlike a rifle it is not a single bullet but rather a cartridge full of small balls or pellets that comes out in a cluster pattern.
Traditionally brogues have perforations designed into a regular punch pattern, but the idea with this design is to incorporate randomness to look as if the shoe has been hit by buckshot. There is a kind of ironic humor here because, as the saying goes, it is as if the wearer shot themselves in the foot.
 As the
description here
states, "Instead of traditional brogue detailing this pair has
been designed with a random punch pattern to give the feel of a
buckshot blast." (Click to enlarge.)
I don't know the process for how this design was produced — whether it was actually generated from firing a shotgun or a design meant to look like that. Also I'm pretty sure each pair is made with an identical shot pattern. But using some of the techniques described above, we could imagine how the design could incorporate algorithmic randomness so that each object produced could contain a new randomized pattern. You could certainly do that with embroidery using TurtleStitch and our Brother PE770 machine.
V. Homework
-
Read the above tutorial. Start with your homework from last week, and create a new project that uses a custom block and at least two instances of
pick random toto create a sketch with some variation within a composition. Run the sketch at least five times taking a screenshot of each run to illustrate the amount of variation that you have been able to achieve.Make sure your project is saved into your TurtleStich account and cleary named with "week 09" somewhere in the name. Upload your screenshots to the Goolge Drive folder that I have created.
All work is due by Tuesday at 8pm.
