Code Toolkit: Python, Fall 2025
Week 13 — Wednesday, November 19 — Class notes
A text-based game: on the command line, and in the browser
Today we'll look at two things:
- How to use a dictionary to create a simple, interactive text-based game, playable from the command line, and
- How to present this game to a user through a browser rather than through the command line, by using the Python Flask library
Table of contents
(The following links jump down to the various topics in these notes.)
I. An interactive, text-based game
The goal here will be to make a "choose your own adventure" game, of the sort commonly presented in book form, implemented here as an interactive program with a text-based user interface (the command line).
The game will present the user with a passage of text describing a scenario, and will offer the user a few choices of action, from which they will select the next scenario to be presented with. This process will then repeat.
The game will thus keep track of which scenario the user is in, but aside from this there will not be any state that the game keeps track of. Additional state might be things like player "life", hit points, a score, or a list of items accumulated. Those all might be nice and not-too-difficult things to add, but will not be addressed here.
Also not discussed here are any techniques for making the user interface more visually appealing.
-
In the command line version, the text will span the width of the user's terminal window. If you want to work with this option further, I would suggest you think about how to make the text-based UI a little more enjoyable and visually pleasing. At the very least you might use the
os.system("clear")command (more info) to clear the screen from time to time. You might also want to think about manually adding line breaks so the text does not span the whole window. You can also look for text art, ASCI embelishments, and other little ways to craft a more enjoyable interface, even just out of text. - In the browser-based version, I will share a basic HTML layout that gives a simple presentation of the text, but does not add things like CSS, images, or other multimedia — all of which would be key for working this game technique into a project for presentation.
a. Planning things out with a game tree
Let's start by making a game tree that maps out the various stages of the game and the user choices that lead from one to another. I used a planning tool called Miro for this. You can find my Miro board linked here, and a sceenshot of that is below:
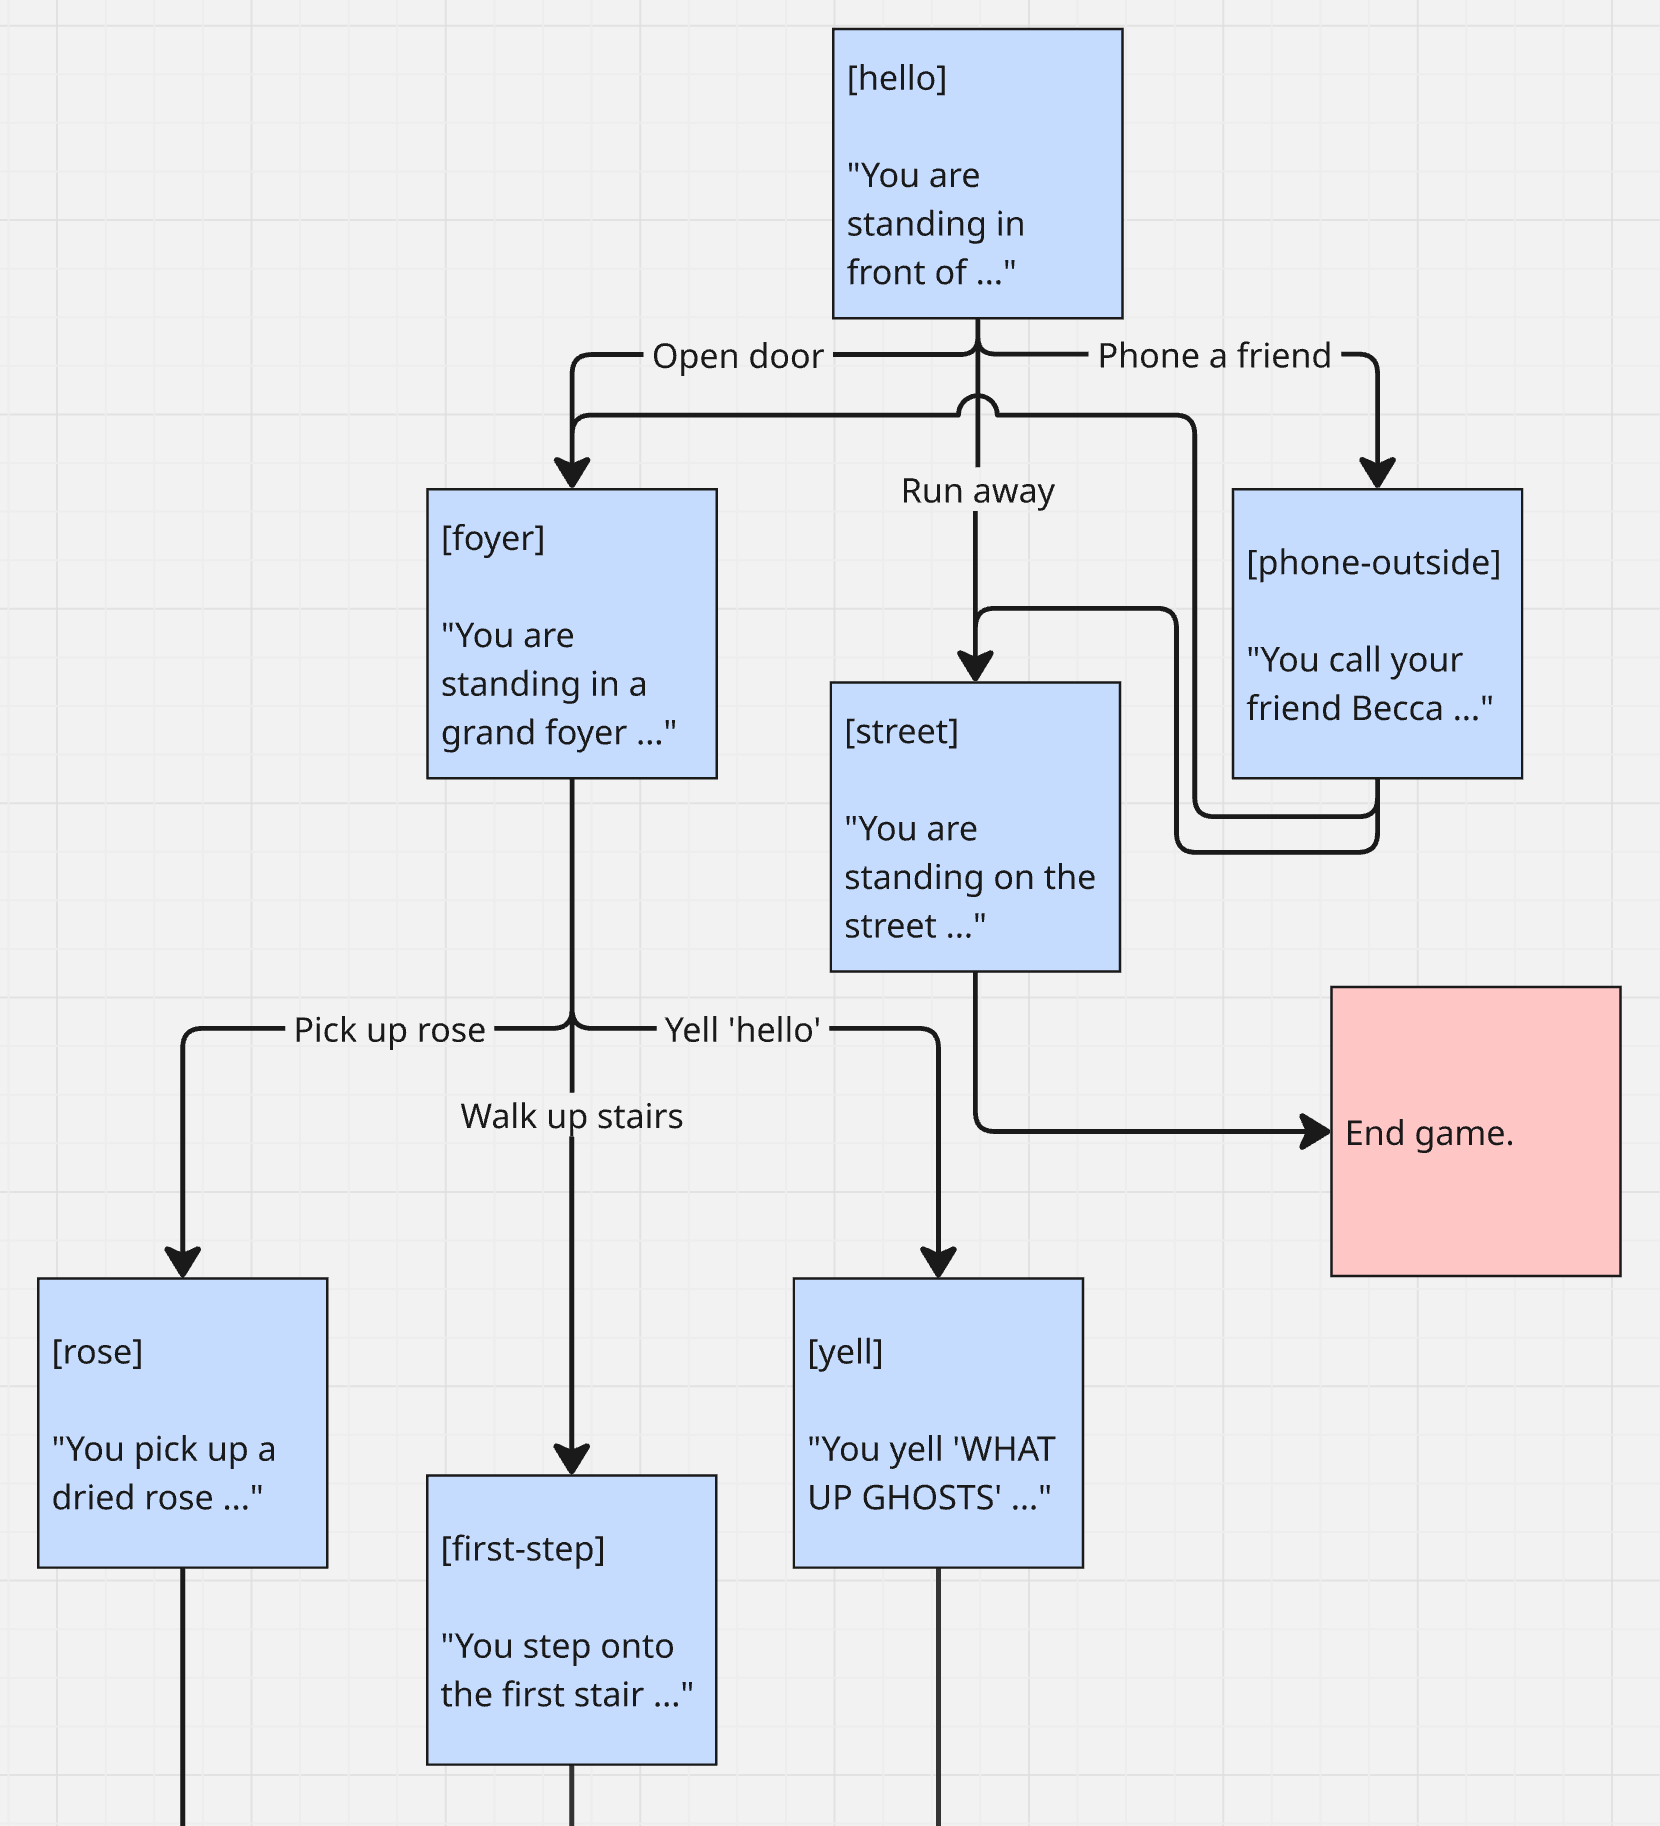
Let's pause here and think about what data structure (or combination of data structures) we would use to model this diagram ...
(jump back up to table of contents)b. A data structure for this diagram
Here is what I came up with, in JSON form:
{
    "hello": { "message": "You are standing in front of a haunted mansion with an old door.",
              "choices": { "A": ["Open the door", "foyer"],
                          "B": ["Run away", "street"],
                          "C": ["Phone a friend", "phone-outside"] } },
    "foyer": { "message": "You are standing in a grand foyer. There is a marble table with a vase of dried roses and a dangerous spiral staircase.",
              "choices": { "A": ["Pick up a rose", "rose"],
                          "B": ["Try to walk up the stairs", "first-step"],
                          "C": ["Yell 'hello'", "yell"] } },
    "street": { "message": "You are standing on the street at the end of the block. You have the impression you just escaped something really bad. You walk away and don't look back.",
               "choices": {} },
    "phone-outside": { "message": "You call your friend Becca. She says your voice sounds weird and tells you to follow your heart.",
                "choices": { "A": ["Open the door", "foyer"],
                            "B": ["Run away", "street"] } },
    "rose": { "message": "You pick up an old dried rose. A thorn pricks you. A drop of blood falls on a white lace doily. Suddenly you hear a voice yell 'WHO'S THERE?' You look up and see an old woman at the banister on the landing.",
             "choices": {} },
    "first-step": { "message": "You step onto the first stair. It lets out a loud creak. Suddenly you hear a voice yell 'WHO'S THERE?' You look up and see an old woman at the banister on the landing.",
             "choices": {} },
    "yell": { "message": "You yell 'WHAT UP GHOSTS?!'. Suddenly you hear a voice yell 'WHO'S THERE?' You look up and see an old woman at the banister on the landing.",
             "choices": {} }
}
(jump back up to table of contents)
c. Interactive text game implementation
Make a new folder for this work. I will call
mine week13. Open a new VS Code window,
and drag that folder into it. Create a new file in that folder
to work on this. I will call
mine game.py.
Let's start by adding our game tree data structure. Create
a variable called game_tree, and set it equal to
the above data structure. I won't repeat the whole thing
here, but you should copy/paste all the above JSON here:
game_tree = {
    "hello": { "message": "You are standing in front of a haunted mansion with an old door.",
              "choices": { "A": ["Open the door", "foyer"],
                           "B": ["Run away", "street"],
                           "C": ["Phone a friend", "phone-outside"] } },
# etc ...
}
Now let's set the value of the initial state of the game, and print the information about that state to the user. (I will omit the data structure JSON from my code here, but keep in mind that should remain where we copy/pasted it.)
game_tree = {
# JSON data structure goes here ...
}
state_id = "hello"

state = game_tree[state_id]

print(state["message"])

for c in ["A", "B", "C"]:
    if c in state["choices"]:
        choice = state["choices"][c]
        print(f"{c}: {choice[0]}")
Now let's prompt the user for their choice, and figure out which choice it was.
game_tree = {
# JSON data structure goes here ...
}
state_id = "hello"

state = game_tree[state_id]

print(state["message"])

for c in ["A", "B", "C"]:
    if c in state["choices"]:
        choice = state["choices"][c]
        print(f"{c}: {choice[0]}")

next_state_id = None

user_choice = input("Make your choice: ")

if user_choice in state["choices"]:
    next_state_id = state["choices"][user_choice][1]
At this point, the variable next_state_id should
hold the state ID for the next game state that the user has just
selected.
Now let's make it so it loops. We'll
set state_id to whatever the user chose,
(i.e. next_state_id) and then repeat
indefinitely. Note the indentation that has to be added on each
line that is inside the while loop.
game_tree = {
# JSON data structure goes here ...
}
state_id = "hello"

while True:
    state = game_tree[state_id]

    print(state["message"])

    for c in ["A", "B", "C"]:
        if c in state["choices"]:
            choice = state["choices"][c]
            print(f"{c}: {choice[0]}")

    next_state_id = None

    user_choice = input("Make your choice: ")

    if user_choice in state["choices"]:
        next_state_id = state["choices"][user_choice][1]

    state_id = next_state_id
Pay attention the last line. This sets state_id
to next_state_id, which is the next game state that
the user has just selected. This means that when the loop
repeats, state_id will be the next state
of the game, and when we get that next game state
with game_tree[state_id], that will retrun the
state data for that state, which will display the next message
and choices.
Last thing. We want this to repeat, but not forever. Let's add a stopping condition. Whenever the game tree data structure contains no choices, we'll consider that the end of the game.
game_tree = {
# JSON data structure goes here ...
}
state_id = "hello"

while True:
    state = game_tree[state_id]

    print(state["message"])

    if len(state["choices"]) == 0:
        print("The end")
        exit()

    for c in ["A", "B", "C"]:
        if c in state["choices"]:
            choice = state["choices"][c]
            print(f"{c}: {choice[0]}")

    next_state_id = None

    user_choice = input("Make your choice: ")

    if user_choice in state["choices"]:
        next_state_id = state["choices"][user_choice][1]

    state_id = next_state_id
(jump back up to table of contents)
d. Going forward from here ...
Now, as long as you understand the code & algorithm of that game structure, you should be able to expand this game simply by modifying the data structure — adding new states and transitions. You should be able to create a branching game tree structure, or even loops and other pathways.
This data structure is known as a finite state machine: a series of states, with transitions between them. In addition to games like this, you can model many other phenomena with this type of data structure & algorithm.
If you'd like to add some other enhancements, consider
possibly prompting the user for more input (using
the input()) command, before entering the
game's while True loop. You can save this user
input in variables, and integrate it into game play later. Like
say you asked the user for their name and saved it in a variable
called name. Then you could use a special string in
your messages, like say for example "$N", and then
before printing your message, you could write:
message = state["message"].replace("$N",name)
print(message)
There is nothing special about "$N", I just wanted to use some
combination of characters that would not otherwise occur in any
of my messages.
As another possible enhancement, you could some other property
to the game data structure, and then let that change something
about the user's status. For example, maybe you add another
property to each game state called like jewels, and
set it equal to a number for each state. Maybe for most states
it's 0, but for some states, it has a number. Then,
you could have a variable called jewels, and for
each state, you add the number of jewels for that state to the
user's total jewels variable. Maybe you could
even add code like:
    if state["jewels"] > 0:
	print("You found " + state["jewels"] + " jewels!"
	jewels = jewels + state["jewels"]
Then the game might have an "objective", which could be to move
around and try to get a certain number of jewels before reaching
a dead end in the story.
(jump back up to table of contents)
II. Introducing Flask
Now let's look at how to move this game into a web / browser based context using the Python framework Flask.
Here are some Flask resources that will be helpful in this:
- Flask quick start guide
- Full user's guide
- Blueprints (we won't use these) and views
- Templates
- Static files
Make a new folder to work on this. I will call
mine flask_game. (Don't call it
just flask because that will create
errors loading the Flask library.) Important: Open a
new VS Code window, and drag this new folder in to that window.
Inside that new folder, create a new Python file. I will call
mine haunted_mansion.py.
First we need to install Flask. You can find an installation guide here. For today we will be skipping over the part that talks about virtual environments. It's not that I don't thing these things are important — they are — it's but in the interest of time, we can skip over that for now and it should not create any issues for you. If you would like to learn more about what this concept is, I would be happy to discuss it with you, and help you get started using it.
To install Flask, you should be able to simply open a terminal, and type the following command:
$ pip install flaskIf you do not see any errors or warnings, then it should have worked. You can test if it worked by running the Python shell and typing the following:
$ python
>>> import flask
>>>
If you see no output in response, that confirms that the install was successful. (jump back up to table of contents)
a. Simplest version
Now let's start with the simplest possible version of a Flask implemention of this game:
from flask import Flask

app = Flask(__name__)

game_tree = {
# JSON data structure goes here ...
}

@app.route("/game/")
def game():

    state = game_tree["hello"]

    output = state["message"]
    for c in ["A", "B", "C"]:
        if c in state["choices"]:
            choice = state["choices"][c]
            output = output + choice[0]

    return output
Now, to run your Flask app, issue this command from the command line:
$ python3 -m flask --app haunted_mansion run
(Remember, the $ is here to indicate
that this is something to type at the command prompt. You do not
type the $
haunted_mansion has to match the name of your Python file.
Any time you make changes to your Python code, you have to kill this process by typing CONTROL-C in the command line pane, then run the above command again. For this, pressing the up arrow key at the command prompt is a userful shortcut.
Now, to access your game, visit this link in your browser:
http://127.0.0.1:5000/game/
You should see something that looks simply like this:
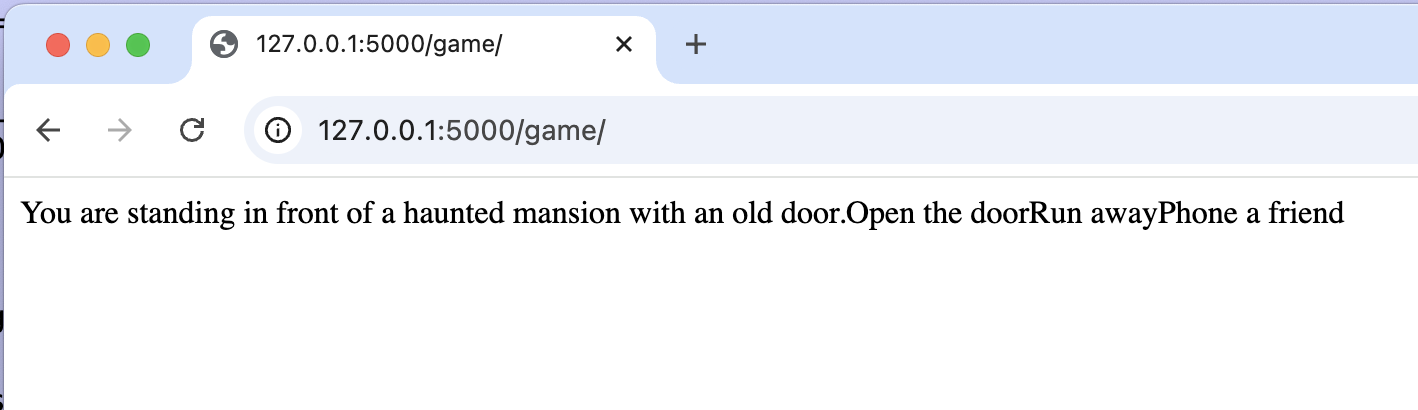
But wait! This isn't really the game. All the text is just plain in the browser window, and there is no way for the user to make choices. Also, the text is pretty ugly. OK, the next step will be to make the choices hyperlinks that the user can click on to make their choices.
(jump back up to table of contents)b. Loading game tree data structure from JSON
But first ... Let's look at a way to clean up the code a bit by moving all that JSON elsewhere.
Make a new file. I will call
mine game_tree.json. Copy all the JSON
code from haunted_mansion.py, paste it
in this file, and then delete it
from haunted_mansion.py. Now modify
that file as follows:
app = Flask(__name__)

# game_tree = { ... }

f = open("game_tree.json","r")
file_contents = f.read()
game_tree = json.loads(file_contents)

@app.route("/game/")
Make that change, save the file, kill the server process, run it again, and reload the page in the browser.
(jump back up to table of contents)c. Adding a game state variable
Before we can make the choices clickable, we have to make it so that this program will dynamically return any specified game state. Right now we don't have any way to specify a game state. Here is how you do that in Flask:
from flask import Flask
import json

app = Flask(__name__)

f = open("game_tree.json","r")
file_contents = f.read()
game_tree = json.loads(file_contents)

@app.route("/game/<game_state>")
def game(game_state="hello"):
    state = game_tree[game_state]

    output = state["message"]
    for c in ["A", "B", "C"]:
        if c in state["choices"]:
            choice = state["choices"][c]
            output = output + choice[0]

    return output
Again, make that change, save the file, kill the server process, run it again, and reload the page in the browser.
You probably got an error? Now you have to specify the state ID in the URL. Try going to these URLs:
-
http://127.0.0.1:5000/game/hello -
http://127.0.0.1:5000/game/foyer -
http://127.0.0.1:5000/game/rose
Now we are ready to make the choices clickable.
(jump back up to table of contents)d. Adding hyperlinks
Here is the HTML syntax for adding a hyperlink:
<a href="URL">visual text</a>
Let's modify our Flask game so that instead of displaying
just the choice message (choice[0]), it will make a link
out of the message and the state ID (choice[1]).
from flask import Flask
import json

app = Flask(__name__)

f = open("game_tree.json","r")
file_contents = f.read()
game_tree = json.loads(file_contents)

@app.route("/game/<game_state>")
def game(game_state="hello"):
    state = game_tree[game_state]

    output = state["message"]
    for c in ["A", "B", "C"]:
        if c in state["choices"]:
            choice = state["choices"][c]
            output = output + f"<a href='/game/{choice[1]}'>{choice[0]}</a>"

    return output
Again, make that change, save the file, kill the server process,
run it again, and reload the page in the browser. This time (and
from now on) you will want to go to this URL to start the
game: http://127.0.0.1:5000/game/hello
Now you should see all the choices as clickable links, and you should be able to click them to play the game.
It still looks pretty ugly though. Let's see how we can improve on that with some additional HTML markup.
(jump back up to table of contents)e. Adding some additional markup
Let's improve on the appearance a little by wrapping the
message in a HTML paragraph tag
(<p></p>) and the choices in an
unordered list tag (<ul></ul>), which
each individual choice inside a list item tag
(<li></li>).
from flask import Flask
import json

app = Flask(__name__)

f = open("game_tree.json","r")
file_contents = f.read()
game_tree = json.loads(file_contents)

@app.route("/game/<game_state>")
def game(game_state="hello"):
    state = game_tree[game_state]

    output = "<p>"
    output = state["message"]
    output = output + "</p>"
    output = output + "<ul>"
    for c in ["A", "B", "C"]:
        if c in state["choices"]:
            choice = state["choices"][c]
            output = output + "<li>"
            output = output + f"<a href='/game/{choice[1]}'>{choice[0]}</a>"
            output = output + "</li>"
    output = output + "</ul>"

    return output
That is starting to look much better. Of course, we'd probably want to make more improvements — adding more tags, and probably also using some CSS, which we can use to control the appearance of this text, adding color, spacing, etc.
We could continue working in the way that we were above, adding HTML into Python, but this is pretty tedious.
Instead, a much more enjoyable (and much more common) way to do this is with templates.
(jump back up to table of contents)f. Adding templates
A template is like an HTML file, but one that you can include variables in.
Add a new folder
called templates. Inside that make a
new file. I will call mine main.html.
Type the below code into main.html:
<!DOCTYPE html>
<html lang="en">
<head>
    <meta charset="UTF-8">
    <meta name="viewport" content="width=device-width, initial-scale=1.0">
    <title>Document</title>
</head>
<body>

</body>
</html>
This is sometimes referred to as HTML boilerplate: it is the stuff that you should type into any new HTML file that you are working on.
If you would like, VS Code offers a shortcut way to generate all the HTML boilerplate that you need. If you'd like to take advantage of this, you can follow these steps:
- Launch the command palette by using Ctrl-Shift-P (Windows, Linux) or Cmd-Shift-P (OSX)
- Type in Install Extension and select 'Extensions : Install Extensions'
- Type HTML5 Boilerplate
- Choose the extension from the drop down
Now, add some custom code in for the project we are working on:
<!DOCTYPE html>
<html lang="en">
<head>
    <meta charset="UTF-8">
    <meta name="viewport" content="width=device-width, initial-scale=1.0">
    <title>Document</title>
</head>
<body>

    <div>
        <p>
            {{ message }}
        </p>
        <ul>
            {% for c in ["A","B","C"] %}
            <li><a href="/game/{{ choice[c][1] }}">{{ choice[c][0] }}</a></li>
            {% endfor %}
        </ul>
    </div>

</body>
</html>
NOTE / UPDATE: This code introduces an error that we did not catch this week when we were working on it. The way to fix this error is explained in the class notes for next week.
Note how this looks a lot like the Python code that we were working with above, except that now, instead of writing Python code that has bits of HTML inside it, we are working within a file of HTML code that has small Python-like bits inside it.
Now, modify your Python code to look like this:
from flask import Flask
from flask import render_template
import json

app = Flask(__name__)

f = open("game_tree.json","r")
file_contents = f.read()
game_tree = json.loads(file_contents)

@app.route("/game/<game_state>")
def game(game_state="hello"):

    state = game_tree[game_state]

    msg = state["message"]
    ch = state["choices"]

    return render_template("main.html",message=msg, choices=ch)
A better way to make URLs in your templates is like this:
<!DOCTYPE html>
<html lang="en">
<head>
    <meta charset="UTF-8">
    <meta name="viewport" content="width=device-width, initial-scale=1.0">
    <title>Document</title>
</head>
<body>

    <div>
        <p>
            {{ message }}
        </p>
        <ul>
            {% for c in ["A","B","C"] %}
            <li><a href="{{ url_for('game', game_state=choices[c][1]) }}">{{ choices[c][0] }}
            {% endfor %}
        </ul>
    </div>

</body>
</html>
(jump back up to table of contents)
g. Adding CSS with static files
And finally, you can add CSS to this project using a concept from Flask (common to many other web frameworks like Django) called static files.
Make another subfolder
called static. That can hold all
your static files — things like images,
CSS files, JavaScript files, etc.
Inside that, make another subfolder
called css, and inside that, add a file
called style.css. Put whatever CSS
rules in there that you would like.
You reference this in HTML in the following way:
<head>
    <meta charset="UTF-8">
    <meta name="viewport" content="width=device-width, initial-scale=1.0">
    <link rel="stylesheet" href="{{ url_for('static', filename='css/style.css') }}">
    <title>Document</title>
</head>
If you also wanted to add images to this game, one way you could
do it would be to make one image for each state, and name it
with the state ID for that state. Make sure all images have the
same file extension, and put these all in
an images subfolder, within
the static folder. Then you could
reference them from within the template like this:
<img src="{{ url_for('static', filename='images/'+state_id+'.jpg') }}"/>
For this to work, you will also need to make sure that you
pass state_id to the template in
the render_template() function, like this:
return render_template("main.html",message=msg, choices=ch, state_id=state)
There is a lot within the above techniques that you can experiment with. I hope all this fires your imagination and gets you thinking about how you could use these technical fragments for a lot of creative and conceptual experimentation.
Have fun!