Code as a Liberal Art, Spring 2025
Unit 3, Bonus Lesson — Thursday, May 8
Mouse over word swapping
In response to a question today (Thanks, Virginia!) we looked at a technique for how to write code that would swap words on mouse over.
More specifically, the goal was to craft a webpage with CSS and JavaScript so that when the user moved the mouse over a certain word, it would be replaced by a different word.
The following lesson shows one way to do that, with an add-on question at the end about how to add more word options and make the swapping randomized.
Table of contents
- Getting setup
- Modifying the markup
- Modifying the CSS
- Adding the JavaScript
- Adding a little CSS decoration
- Testing with inline elements
- Adding more swappable text and randomizing it
I. Getting setup
To get started we will need a simple, sample web page with some
text. Let's get started by working with the
page article.html that we were working
with last lesson. To simplify
things for you, download this zip
file: unit3-bonus-lesson.zip.
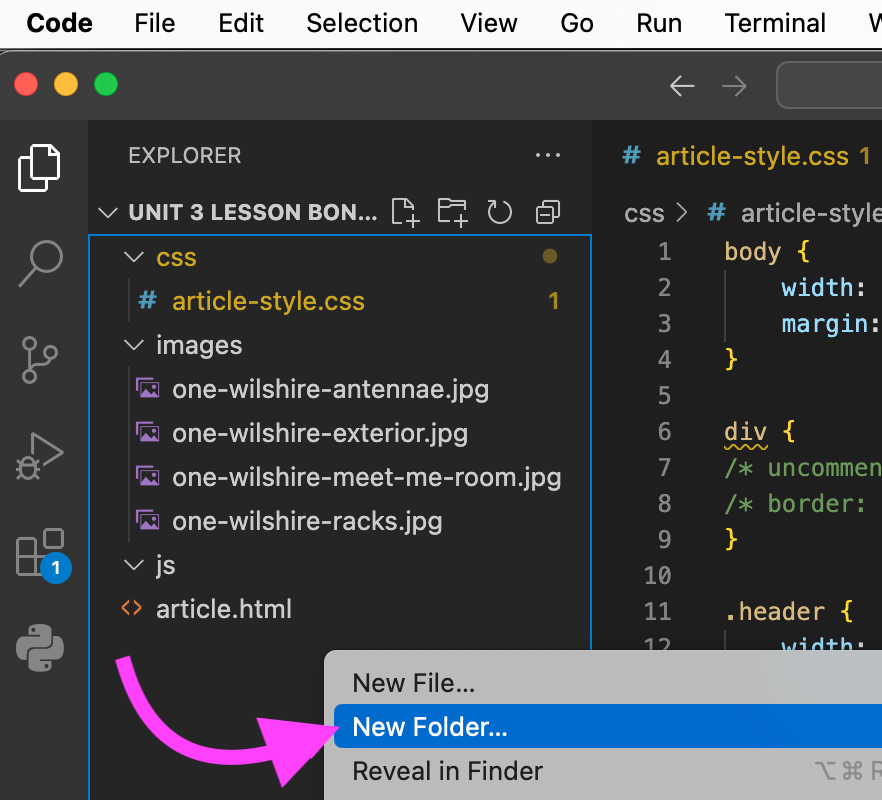
Double-click that to expand it which will produce a folder
called Unit 3 Lesson Bonus, drag that
folder into your code folder for this class, then open a new VS
Code window and drag the folder into that. You should then see
something like this:

II. Modifying the markup
The approach here will be to identify a bit of text that we want to be swappable, then make another bit of alternative text next to it which we will use JavaScript to swap.
Given the way that our JavaScript will work (which you will see in a minute), it will be useful to have an HTML element to act as a grouping element for this pair of alternative bits of text. But, what tag to use as this grouping element?
Remember that HTML tags are broadly divided into two categories: block tags and inline tags. Block tags are like sections of a document — columns, headers, footers. Inline tags are more like words in a paragraph in that they flow (by default, following English conventions) from left to right and top to bottom.
A commonly used block tag is <div>, and a
commonly used inline tag is <span>. Both of
these tags do not really do much on their own, but they are used
as organizational tags to group other elements at the block and
inline level, respectively.
To start, let's make the <h1> tag at the
start of our page our swappable text. To do that, let's add
an alternative <h1> next to
it. All <hX> tags are block tags, so to
create our grouping here, we will wrap these two bits of text in
a <div>, like this:
    <div class="header">
      <div class="swappable-text">
        <h1 class="option-a">An article</h1>
        <h1 class="option-b">Something else</h1>
      </div>
    </div>
Note that I have also added some CSS class
attributes here. On the "container" <div>, I
have added class="swappable-text", which
is how we will target the HTML tag to which we
will add our JavaScript event listener.
I have also added option-a
and option-b on the two HTML tags that we will swap
in and out with that event listener.
III. Modifying the CSS
Now we have added two bits of text here, but we don't both
visible to the user. We will use JavaScript to toggle which one
is visible. So for now, to start out when the page is loaded,
let's mark the second one as not shown. To do that, add the
following to article-style.css. You can
add it anywhere you want in the file but I will add at the end
of the file:
img.right {
    float: right;
}

.option-b {
    display: none;
}
(jump back up to table of contents)
IV. Adding the JavaScript
We are now finally ready to add the JavaScript that will actually do the text swapping.
The first step of that will be including jQuery in our HTML page, and including a new JavaScript file.
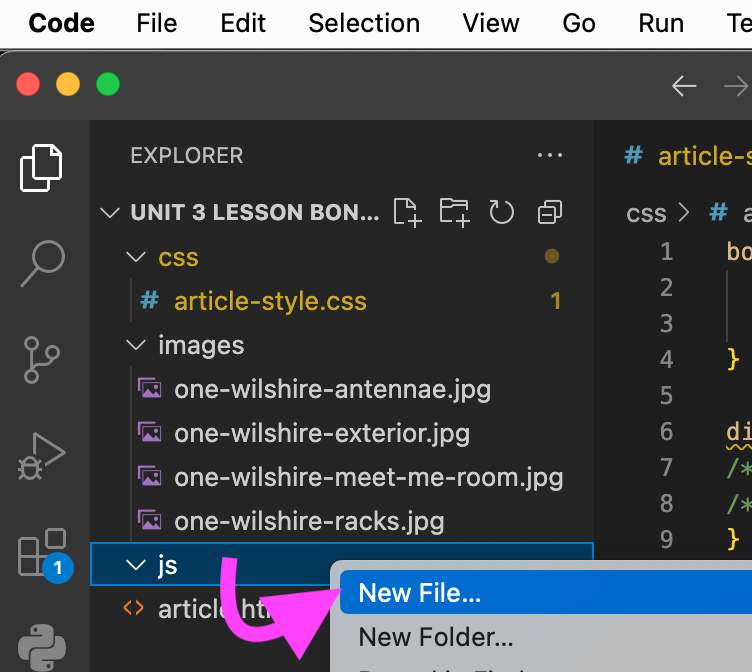
Start by creating a new folder for JavaScript in our
project. Right-click (or CONTROL-click) anywhere in the
"Explorer" pane in VS Code, then click "New folder", and name
it js.
Then right-click (or CONTROL-click) on that
new js folder, click "New File", and
name that something that ends in .js. I
will name mine article.js.
Now let's include the jQuery library in our HTML page by
referencing the CDN
link, and also include our
new article.js file. I will add these two lines into the <head> section of article.html.
<head>
    <meta charset="UTF-8">
    <meta name="viewport" content="width=device-width, initial-scale=1.0">
    <link rel="stylesheet" href="css/article-style.css">
    <script src="https://code.jquery.com/jquery-3.7.1.min.js" integrity="sha256-/JqT3SQfawRcv/BIHPThkBvs0OEvtFFmqPF/lYI/Cxo=" crossorigin="anonymous"></script>
    <script src="js/article.js"></script>
    <title>Document</title>
</head>
Now we can finally open up article.js
and work on the JavaScript code.
Remember that we start all jQuery coding work by including it
inside a $(document).ready(); block, like so:
$(document).ready( function(){

});
Now let's add an event handler for when the mouse moves
over any element that we have labeled with the
class swappable-text.
Personally I often forget the exact syntax for things like mouse movement event handlers. I encourage you to do a web search for such things. But I also highly encourage you to look for answers to your query in the official documentation and practice reading programming language manuals, rather than relying on forums or AI helpers. In this case, the jQuery documentation will help you a lot — in fact I think one of the strongest things about jQuery is that its documentation is so thorough, clear, and reliable. In this case, hopefully you will land on: api.jquery.com/mouseenter
Following that, an event handler that would be triggered by the
mouse moving over each swappable-text element would
look like this:
$(document).ready( function(){

     $(".swappable-text").on( "mouseenter", function() {

     } );
});
And what goes in that handler? The idea is that every time the
mouse moves over the text, we will hide() the
element labeled option-a and show()
the element labeled option-b.
But we don't want to hide and show all elements
labeled with those classes, we only want to hide and show the
elements with those classes that are "inside" the
element that the mouse moved over. Remember that this is
indicated with the this keyword. You can get the
elements "inside" an element with
the children() command, which can also take all the
regular CSS filters. Putting that altogether would look like
this:
$(document).ready( function(){

     $(".swappable-text").on( "mouseenter", function() {
        $(this).children(".option-a").hide();
        $(this).children(".option-b").show();
     } );
});
And now let's reverse it: when the mouse moves away from
the element (the mouseleave
event), show() option-a
and hide() option-b:
$(document).ready( function(){

    $(".swappable-text").on( "mouseenter", function() {
        $(this).children(".option-a").hide();
        $(this).children(".option-b").show();
      } );
      $(".swappable-text").on( "mouseleave", function() {
        $(this).children(".option-a").show();
        $(this).children(".option-b").hide();
      } );

});
(jump back up to table of contents)
V. Adding a little CSS decoration
Hopefully that's now working for you!
At this point I would suggest also adding a little bit of CSS
text decoration to signal to the user that this text is
interactive in some way. What about a wavy underline?
Modify article-style.css to add the
following:
    img.right {
    float: right;
}

.swappable-text {
    text-decoration: wavy underline;
}
.option-b {
    display: none;
}
(jump back up to table of contents)
VI. Testing with inline elements
Because of the general way that we have written this, you should be able to use this same CSS and JavaScript code to add this functionality to inline elements as well. Try modifying the first paragraph of the page as follows:
    <div>
        <p>
            <span class="swappable-text">
                <span class="option-a">Lorem ipsum,</span>
                <span class="option-b">dolor sit amet,</span>
            </span>
          consectetur adipiscing elit. Etiam molestie blandit pellentesque ...
Reload the page and try mousing over this text!
(jump back up to table of contents)VII. Adding more swappable text and randomizing it
The question came up in class of how you might add more bits of text here and randomize the swapping behavior. Here is how you could modify the above code to achieve that effect.
Let's start by
modifying article.html to include more
bits of text into our swappable-text group:
    <div class="header">
      <div class="swappable-text">
        <h1 class="option-a">An article</h1>
        <h1 class="option-hidden">Something else</h1>
      </div>
    </div>

    <div>
        <p>
          <span class="swappable-text">
            <span class="option-a">Lorem ipsum,</span>
            <span class="option-hidden">dolor sit amet,</span>
            <span class="option-hidden">consectetur adipiscing elit.</span>
            <span class="option-hidden">Etiam molestie blandit pellentesque.</span>
            <span class="option-hidden">Vivamus at ultrices risus.</span>
            <span class="option-hidden">Vestibulum lacus arcu,</span>
        </span>
            ultricies quis blandit ac, posuere id libero ...
Notice that I have added more elements
into <span>s inside
the swappable-text group, and I have also modified
the CSS classes used there. I have deleted the CSS class on the
first one, and used a CSS class that I
called option-hidden on all the rest. Let's
modify our article-style.css CSS file
accordingly:
.swappable-text {
    text-decoration: wavy underline;
}
.option-hidden {
    display: none;
}
Now modify the JavaScript. This code starts by using the
jQuery .length attribute to determine the number of
swappable text elements within this element (i.e.,
the moused over element).
Then, it picks a random number between 0 and numElements.
Finally, it gets all the children()
of this and calls hide() on them, and
then uses the jQuery function .eq() to select a
random one indicated by n, and show()
just that one.
$(document).ready( function(){

    $(".swappable-text").on( "mouseenter", function() {
        numElements = $(this).children().length
        n = Math.floor(Math.random() * numElements);
        $(this).children().hide();
        $(this).children().eq(n).show();
      } );

});
Make those changes, and hopefully that works for you.
Experiment with it by repeatedly mousing over the element and note that the code appears to be replacing it with randomly selected bits of text.