Code as a Liberal Art, Spring 2024
Unit 1, Lesson 5 — Wednesday, February 22
Randomness; probability distributions; working with files
Today we're going to build on the reading discussion this week about the aleatory in computation by learning some techniques in computer program code for working with randomness. One of the things that we read and discussed was where the aleatory comes from within the rigid, formal strictures of digital machinery; how can randomness be generated from deterministic processes?
Today we will not be going into the technical details today around how to generate random and pseudo-random numbers. This topic involves complicated mathematics and we could spend an entire semester (or more!) just talking about those mathematic techniques. Instead, we will start with the fact that random numbers are in fact possible to generate, and we will learn the commands that Python provides to generate them.
Building on this, we will look at techniques for working with algorithms that incorporate randomness, or in other words, algorithms that are probabilistic: step-by-step procedures that incorporate and use values that are unpredictable, but within various ranges and likelihoods, which we can shape and control.
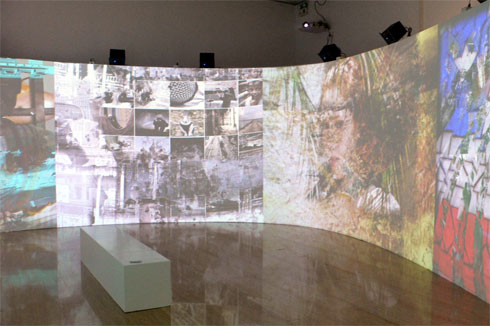 This image is an installation shot of a project called
"Noplace" by Marek Walczak, Martin Wattenberg, and
collaborators. Hundreds of images were gathered and grouped
together by topic keywords, then algorithmically selected and
collaged together in a way that slowly shifted over
time. Pictured here are collages for "utopia", "revolution", and
"rapture". You
can read
more here.
This image is an installation shot of a project called
"Noplace" by Marek Walczak, Martin Wattenberg, and
collaborators. Hundreds of images were gathered and grouped
together by topic keywords, then algorithmically selected and
collaged together in a way that slowly shifted over
time. Pictured here are collages for "utopia", "revolution", and
"rapture". You
can read
more here.
Table of contents
The topics for today: (Click each to jump down to the corresponding section.)
-
Getting random:
random.random() -
Reproducible randomness:
random.seed() - Probabilities
- Probably distributions: More nuanced randomness shaping
- Random choices
- Random choices: files
- Postscript: Working with HSV color
I. Getting random: random.random()
In spite of all the discussion in your reading responses and in
class about the complexity of generating random numbers, Python
implements various random number generating algorithms and
provides them to us as a collection of easy-to-use
commands. These are provided by a library aptly
called random.
To get started, simply import this library:
import random
Python documentation. So far, I have been sharing with you all the various commands and functions that you have been working with. But I want to point you to the Python documentation itself, so that you may explore by accessing it directly:
This is the authoritative standard for all things Python. It is comprehensive and accurate, describing all aspects of the language. There are many other guides out there (w3schools.com is good, as is this guide called Automate the Boring Stuff with Python, by Al Sweigart) and these can be great. But if you want to go straight to the source for definitive information, the official Python docs cannot be beat.Official programming language documentation like this can be hard to read. I often need to read slowly and carefuly, and think hard about the precise meanings of the terms that are used here. I usually have to read an explanation a few times before I completely wrap my head around all of its details and implications. But since this is the official documentation, that scrutiny is usually worth it for the thorough understanding that it can offer.
At your stage of learning to code, I know that it can be tempting simply to Google a problem: an error or a task you're trying to accomplish. But keep in mind that the results you will find will be unreliable or simply wrong. Even when the advice is correct, it may not be relevant — it may reference complicated techniques you have not learned yet, or it may be describing a problem subtly different from your own. In any case, reading and interpretting this advice is very difficult, and determining if it is correct and relevant is a very complicated task. Think of it like seeking medial advice from "Dr Google."
Thus, I would like to challenge you this semester to seek advice from reliable sources like the three above, and practice getting accustomed to how to navigate these resources for the information you seek.
In particular, I recommend you look at (a) the tutorial for an instructive introduction, and most powerfully, (b) the "Library Reference", which will tell you everything that you need to know (and more) about Python and its commands.
Let's experiment with using the official Python documentation today. Click on the "Library Reference", scroll about 1-2 screens down, and in the "Numeric and Mathematic Modules" section, find the entry labeled: "random — Generate pseudo-random numbers" (or, click here to go straight there). This section explains how to generate random numbers using Python.
To get started, let's look at the function
called random(),
which is essentially the heart of this module. To get
acquainted, let's experiment with this in the Python shell:
>>> import random
>>> random.random()
0.5536582109886334
>>> random.random()
0.519728888240708
>>> random.random()
0.21552893690804353
As you can see,
random() returns an unpredictable
decimal number between 0 and 1.
There are numerous other shortcuts to make working with randomness easier. But let's start by spending some time with this one.
Using only this function, if you wanted a random integer (a number with no decimal places) between 0 and 9, what might you do? Have a look at this code and think about what it's doing:
>>> int( random.random() * 10 )First of all, taking a decimal number between 0 and 1 and multiplying it by 10 is going to give us another number that is at minimum 0, and at maximum 10. Think about what you would get if you multiply 10 times .9999 (close to the largest value of
random()). You'll get 9.999.
To summarize this: when you are starting with a number in the
range of 0 to 1, multiplying scales a
range. (To Ella's question from a couple weeks
ago, this is similar to the map()
command that you may have encountered in Code Toolkit.) You
are expanding that range of 0 to 1, into the range of 0 and
whatever you multiply it by. random.random() * 100
is going to give us a random decimal number somewhere between 0
and 100. This is a useful principle to keep in mind.
But I said I wanted an integer (whole
number). That is what the int() command does. It
truncates (or cuts off) the decimal part of the number,
returning a whole number from a decimal point. If you'd prefer,
you could also use round(), which doesn't simply
truncate, but actually rounds:
>>> int(.1)
0
>>> int(.6)
0
>>> round(.1)
0
>>> round(.6)
1
OK. Now, what if I wanted a number that was between 50 and 100?
What is the range here? 50. So I could use my scaling technique
like this: random.random() * 50. But that is going
to give a number between 0 and 50, not between 50 and 100. What
can I do here? I could simply add 50: 50 + random.random()
* 50. Now I'm taking a random number scaled to the range
of 0 to 50, and adding 50 to it, shifting that range to 50 to
100. To summarize this principle: when working with numbers like
this, addition shifts a range.
Multiplying scales a range, and addition shifts the
range. Using these techniques, you can shape the range
of values we get from random.random() and
manipulate them to span whatever range of randomness we
wish. These are very useful principles for creative coding.
Fortunately, Python gives us some commands that we can use directly to achieve the same principles. (I think it is important and valuable later on to understand what is going on here, hence the above explanation before this reveal.)
If you want a randomly generated whole number (integer) from
within some range, you can
use: random.randrange(start,stop). (Python
docs for this.) This takes two arguments and returns a
random integer in between those arguments. So for example:
>>> random.randrange(5,10)
6
>>> random.randrange(5,10)
8
>>> random.randrange(5,10)
5
Note that this returns values that include the first arugment,
but that are less than the second argument. In other
words, random.randrange(5,10) will randomly return
numbers from the list: 5, 6, 7, 8, and 9. In the language of
mathematics (you may remember this from algebra or calculus) we
say that the first argument is "inclusive" and the second is
"exclusive", sometimes written
as [5,10).
If you only pass in one argument, it returns a number between 0 and that argument:
>>> random.randrange(10)
8
>>> random.randrange(10)
3
>>> random.randrange(10)
1
Similar to with two arguments, when passing in one argument, the
value is 0 is inclusive, and the argument is
exclusive. So random.randrange(10) yields values in
the range: 0, 1, 2, 3, 4, 5, 6, 7, 8, and 9.
II. Reproducible randomness: random.seed()
Another very useful idea in working with randomness is the idea of a random sequence of numbers that are reproducible. This can be useful for testing for example, or if you were creating a game and you wanted some behavior that appeared to have been randomly generated but that was always the same, like say some natural terrain or something else from nature.
In other words, you might want to draw something that looks
random, but you want it to look random the same way each time
you run your code. You don't want it to be different each
time. There is a command for this: random.seed()
When you call random.seed() with one numerical
argument, every time you call random() after that,
it will always return the same random-looking sequence. For
example, if I run Python twice, I get two different random
numbers each time:
$ python
>>> import random
>>> random.random()
0.9998781067887237
$ python
>>> import random
>>> random.random(1)
0.6638400757429336
But if I call
random.seed(), I still get a random number,
but it is the same each time:
$ python
>>> import random
>>> random.seed(42)
>>> random.random()
0.7534071414623441
$ python
>>> import random
>>> random.seed(42)
>>> random.random()
0.7534071414623441
This is called a pseudo-random number (it was discussed in the 10 PRINT book) because the numbers are drawn from a uniform distribution, so they appear random, but they are in fact deterministic.
This is very very useful in game development. If a character has
a name or ID number, you could use that as the seed. Then, each
time you want to render that character, you could
call seed() with their ID number, and the calls
to random() that come after will seem random, but
will be random in the same way each time.
You might be familiar with this term because it is used in many games, such as Minecraft.
(jump back up to table of contents)III. Probabilities
What if I want to generate some kind of digital object, say an
image with randomly placed colored pixels on a white background,
and I want to control how many colored pixels there are? You can
ask if statements about random choices to control
the probability.
For example, have a look at this code, which creates a new blank image, loops over all the pixels, and sets some of them to a color based on a random value:
Example 1
from PIL import Image
import random

# let's make a 100x100 white image

width = 100
height = 100

img = Image.new("RGB", (width,height), (255,255,255) )

for y in range(height):
    for x in range(width):

        r = random.random()

        if r > .5:
            img.putpixel( (x,y), (0,0,0) )

img.save("rando.png")
With this code, I'm using the nested loop
technique for looping over an image, meaning I'm looping over
the image as a square, in two dimensions, rather than only using
one loop to iterate of the image as one single list of data.
I could just as easily have used the single loop method here and
the internals of the loop would have been nearly identical
except that instead of using putpixel() I would
have used append() to add values to a list, and
then used putdata() to save that list into an
image. See Lesson
4, part II for an example of how to do that.
As a reminder, in this nested loop style, the
outter loop (y) will repeat once for each row, and
each time it repeats, the inner loop (x) will
repeat for each pixel in that row.
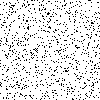
For each pixel (i.e., for each x,y pair) this code picks a random number between 0 and 1 and if that number is greater than .5, it assigns that pixel to be black — otherwise the pixel will be white.
In other words, it loops over each pixel and assigns it to be black with 50% probability.
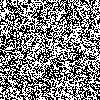
 The results of running Example 1 three times.
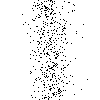
And what if I simply want there to be less black pixels in that image? Have a look at this:
Example 2
from PIL import Image
import random

# let's make a 100x100 white image

width = 100
height = 100

img = Image.new("RGB", (width,height), (255,255,255) )

for y in range(height):
    for x in range(width):

        r = random.random()

        if r > .9:
            img.putpixel( (x,y), (0,0,0) )

img.save("rando.png")

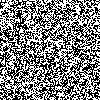
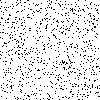 The results of running Example 2 three times.
In Example 1, a pixel is drawn about 50% of the time: assuming a uniform distribution, a random number between 0 and 1 will be greater than .5 about half of the time. In Example 2 however, I am now only drawing the pixel if the random choice is greater than .9, so this will draw a pixel about 10% of the time. Notice the more sparse image.
(jump back up to table of contents)IV. Probably distributions: More nuanced randomness shaping
The above two examples loop over every pixel in the image and decide with some probability whether that pixel should be black or not. What if we wanted to have a little more control over where those random pixels were placed?
Instead of looping over every pixel, we could loop some number of times, and each time we could pick random numbers to use as pixel coordinates.
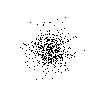
Let's start by looping 500 times, each time randomly selected a pair of coordinates to use to place a black pixel:
Example 3
from PIL import Image
import random

# let's make a 100x100 white image

width = 100
height = 100

img = Image.new("RGB", (width,height), (255,255,255) )

# loop 500 times, and each time, pick a random x and a random y
# and draw a pixel there
for n in range(500):

    x = int( random.random() * 100 )
    y = int( random.random() * 100 )

    img.putpixel( (x,y), (0,0,0) )

img.save("rando.png")
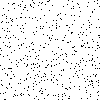
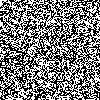
 The results of running Example 3 three times, each placing
500 pixels randomly in the image.
The results of running Example 3 three times, each placing
500 pixels randomly in the image.
Using this technique, you could achieve similar probabilites as the above examples by deciding how many pixels to place. For example, Example 1 above picked a random numberrand then checkedif r > .5:, creating a 50% probability that each pixel would be drawn. If you wanted to achieve something similar using the technique of example 3 here, you could adjust the loop to run 5,000 times (for n in range(5000):). That's because the image is 100x100 and thus has 10,000 pixels, so repeating 5,000 times would give you 50% coverage. It's not precisely the same, since Example 1 could produce images with less or more pixels drawn (it could even theoretically produce an image with no pixels, although the odds of that would be 1 in 210,000!) but in an average sense, it will achieve the same behavior. Similarly, to replicate Example 2 above, you could repeat the loop 1,000 times (since Example 2 drew a 100x100 image of 10,000 pixels, with each pixel haivng 10% likelihood of being drawn, creating about 1,000 drawn pixels).
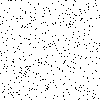
But what if we didn't want the pixels evenly spaced out. What if we wanted them randomized, but clustered in some kind of way?
When we use random.random(), it is what's called
a uniform distribution. Every single possible
value is equally likely as the others. This creates an effect of
total noise, like static on a broken TV.
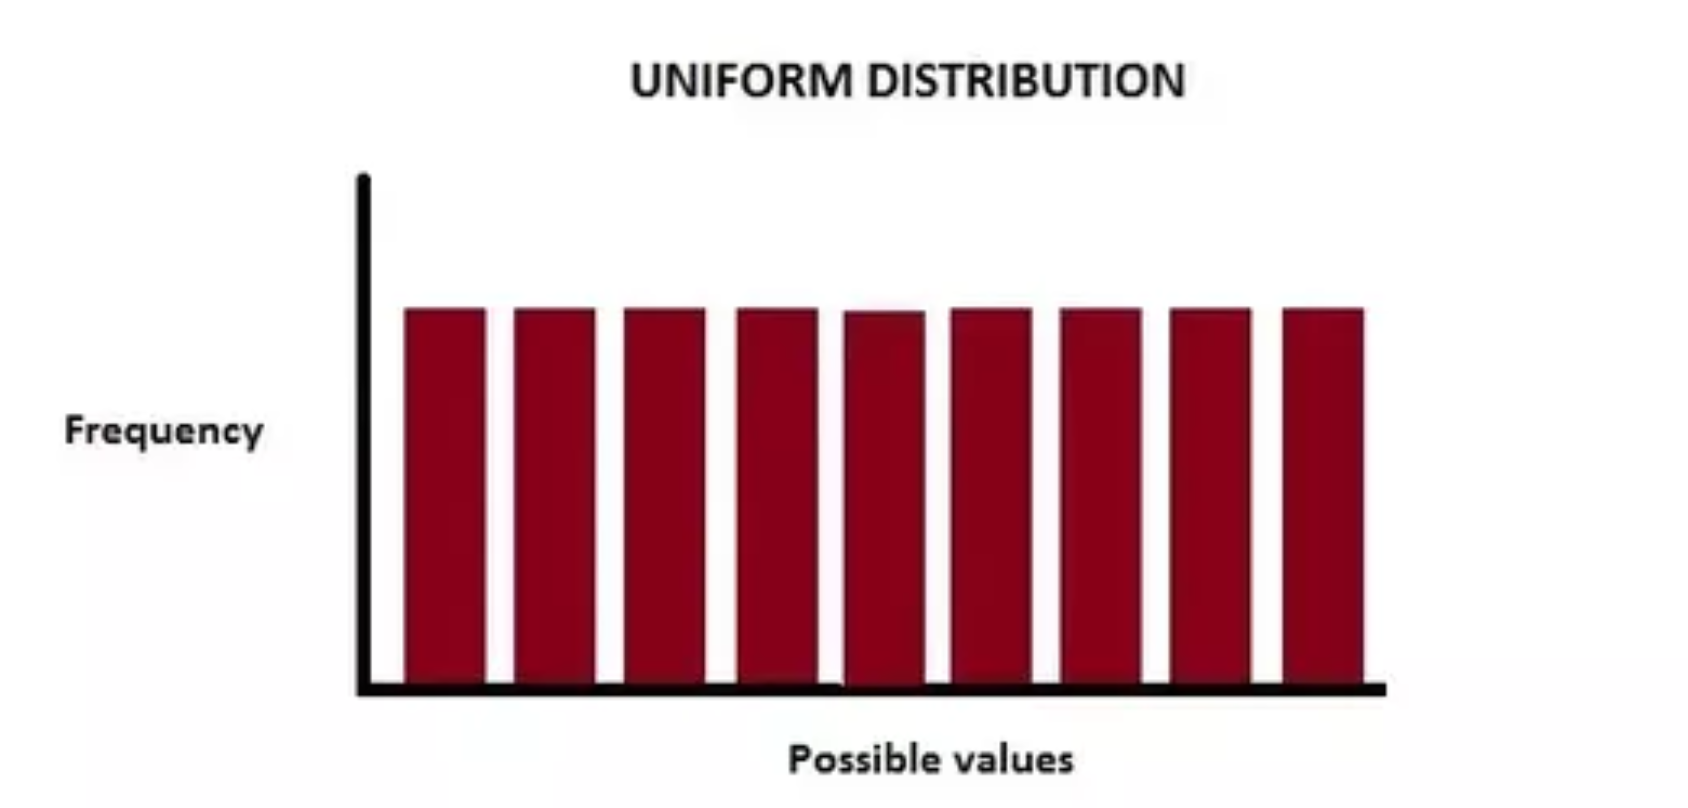
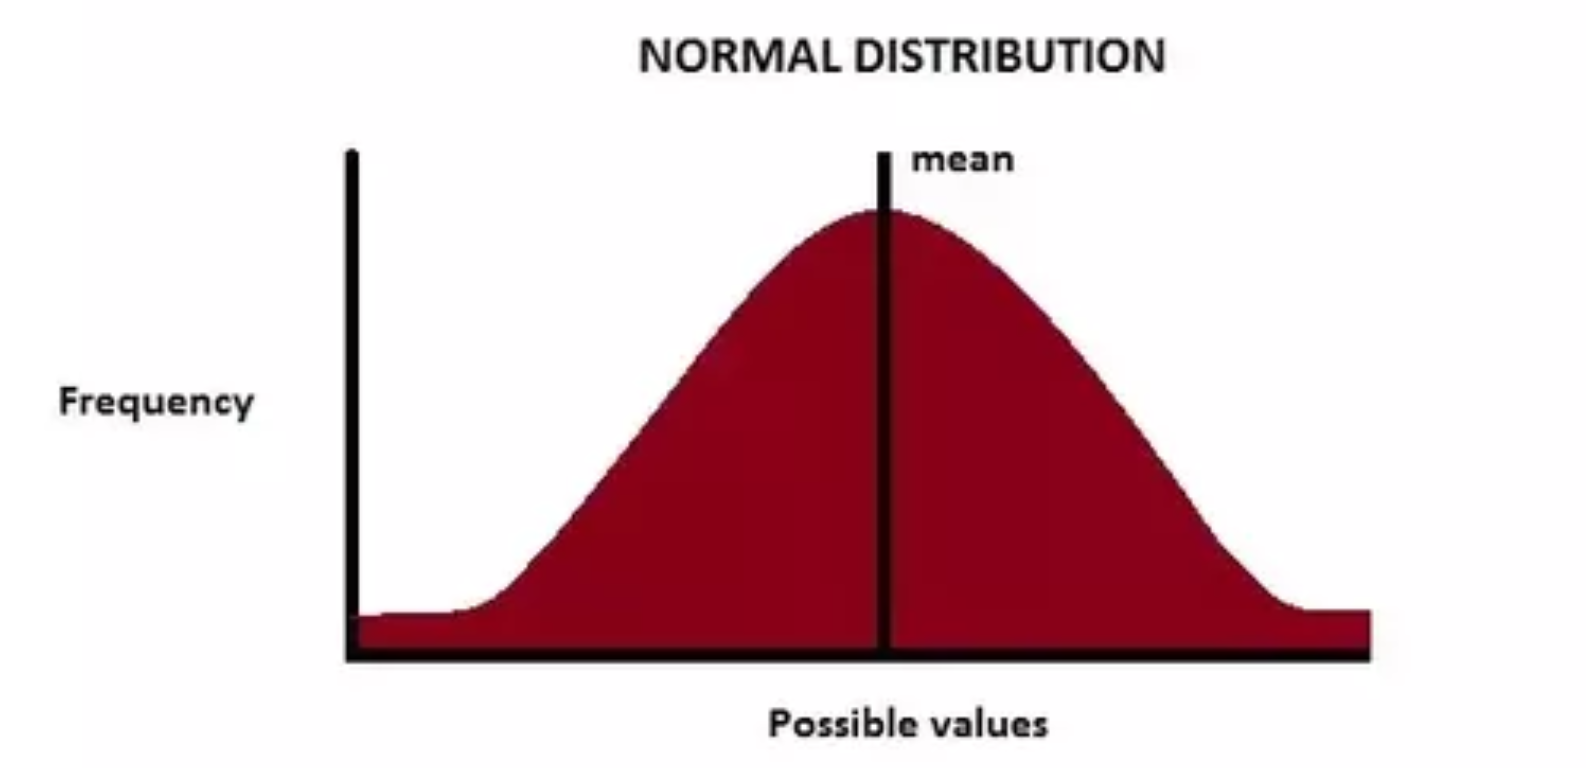
On the left, a graph of a uniform distribution in which each possible value has an equal likelihood, or "frequency"; each has an equal chance of being chosen. On the right, we have a normal distribution, a.k.a., a Gaussian distribution, values in the middle are more likely to be chosen.
If we want to create something that is random, but clustered in certain ways, we can use what's called a normal distribution, also known as a Gaussian distribution. You may have seen this depicted as a bell curve: values can still be chosen randomly within some range, but there is a greater likelihood that values will be chosen in the middle cluster than at the extremes. This type of probability distribution is used to model many things in the natural and social world, and we can use it for our purposes here.
Fortunately, Python provides a command for us to use
here: random.gauss().
As the
docs explain, this command takes two arguments. The first is
the mean which corresponds to the middle point
of the cluster, and the second corresponds to
the standard deviation, which defines how
tightly or widely flared out this distribution is. The below
images illustrates some different values.
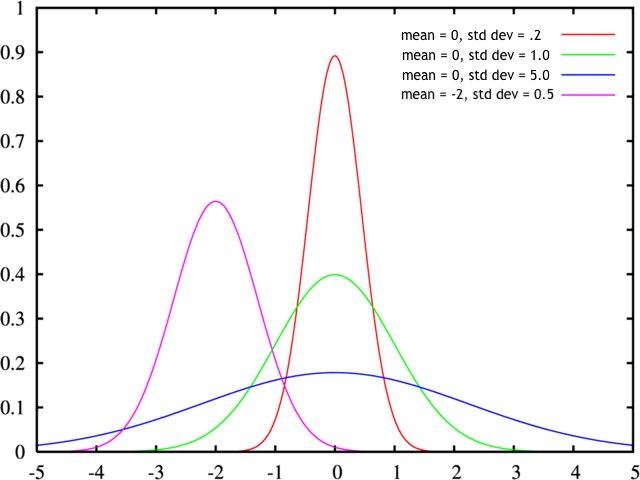 Some examples of probability distributions for a Gaussian
distribution (a.k.a. normal distribution) for several
different mean and standard
deviation
values. Thanks Tyler
Hobbs for this diagram.
Some examples of probability distributions for a Gaussian
distribution (a.k.a. normal distribution) for several
different mean and standard
deviation
values. Thanks Tyler
Hobbs for this diagram.
Now instead of using random.random() and getting a
completely uniform distribution, we can use
a Gaussian distribution and shape the
probabilities somewhat.
Example 4
from PIL import Image
import random

# let's make a 100x100 white image

width = 100
height = 100

img = Image.new("RGB", (width,height), (255,255,255) )

# loop 500 times, and each time, pick a random x and a random y
# and draw a pixel there
for n in range(500):

    x = int( random.gauss(50,10) )
    y = int( random.gauss(50,10) )

    img.putpixel( (x,y), (0,0,0) )

img.save("rando.png")

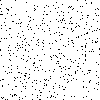
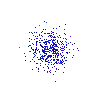
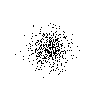 The results of running Example 4 three times, each placing
500 pixels randomly in the image.
The results of running Example 4 three times, each placing
500 pixels randomly in the image.
By changing the mean (the 50s in orange above)
you could move the cluster around in the x
or y dimension. And by changing
the standard deviations (the 10s in orange
above) you can change how tightly clustered the values are.
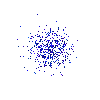
You can also mix and match these techniques. So for example here
I'm using a Gaussian distribution for x (horizontal
clustering), and a uniform distribution for y
(evenly spaced out vertically).
Example 5
from PIL import Image
import random

# let's make a 100x100 white image

width = 100
height = 100

img = Image.new("RGB", (width,height), (255,255,255) )

# loop 500 times, and each time, pick a random x and a random y
# and draw a pixel there
for n in range(500):

    x = int( random.gauss(50,10) )
    y = int( random.random() * 100 )

    img.putpixel( (x,y), (0,0,0) )

img.save("rando.png")
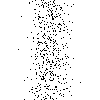
 The results of running Example 5 three times, each placing
500 pixels randomly in the image.
The results of running Example 5 three times, each placing
500 pixels randomly in the image.
I hope from this you might see how you could use these exact
techniques for more than just x,y values. You could
use similar techniques for choosing random numbers to generate
color patterns, letters, or any time you need a value in a
creative coding context.
V. Random choices
What if I want to do something with randomness that is not just generating a number, but rather randomly selecting something from a list? I could do that like this:
>>> import random
>>> lyric = ['Birds', 'flying', 'high', 'you', 'know', 'how', 'I', 'feel']
>>> i = random.randrange( len(lyric) )
>>> lyric[i]
'know'
>>> i = random.randrange( len(lyric) )
>>> lyric[i]
'Birds'
What I'm doing here is creating a list called
lyric,
then remember that len(lyric) gives me the length of
that list. So I'm passing the length of the list in to the
command random.randrange(). That will always give
me a value between 0 and the length of the list. I then use that
value as the index to my list.
Turns out this is such a common operation that Python makes a
shortcut for it: choice(). If you pass a list to
this function, it will randomly select one item from the list:
>>> random.choice(lyric)
'know'
>>> random.choice(lyric)
'how'
Keep in mind that random.seed() also applies
here. So if you ran the above command in a Python program, it
would make different choices each time. But if you preceded it
with random.seed() passing in a fixed number, it
would make the same apparently random choices each time you ran
the program.
VI. Random choices: files
Let's use this principle to randomly select a file from a folder of many files.
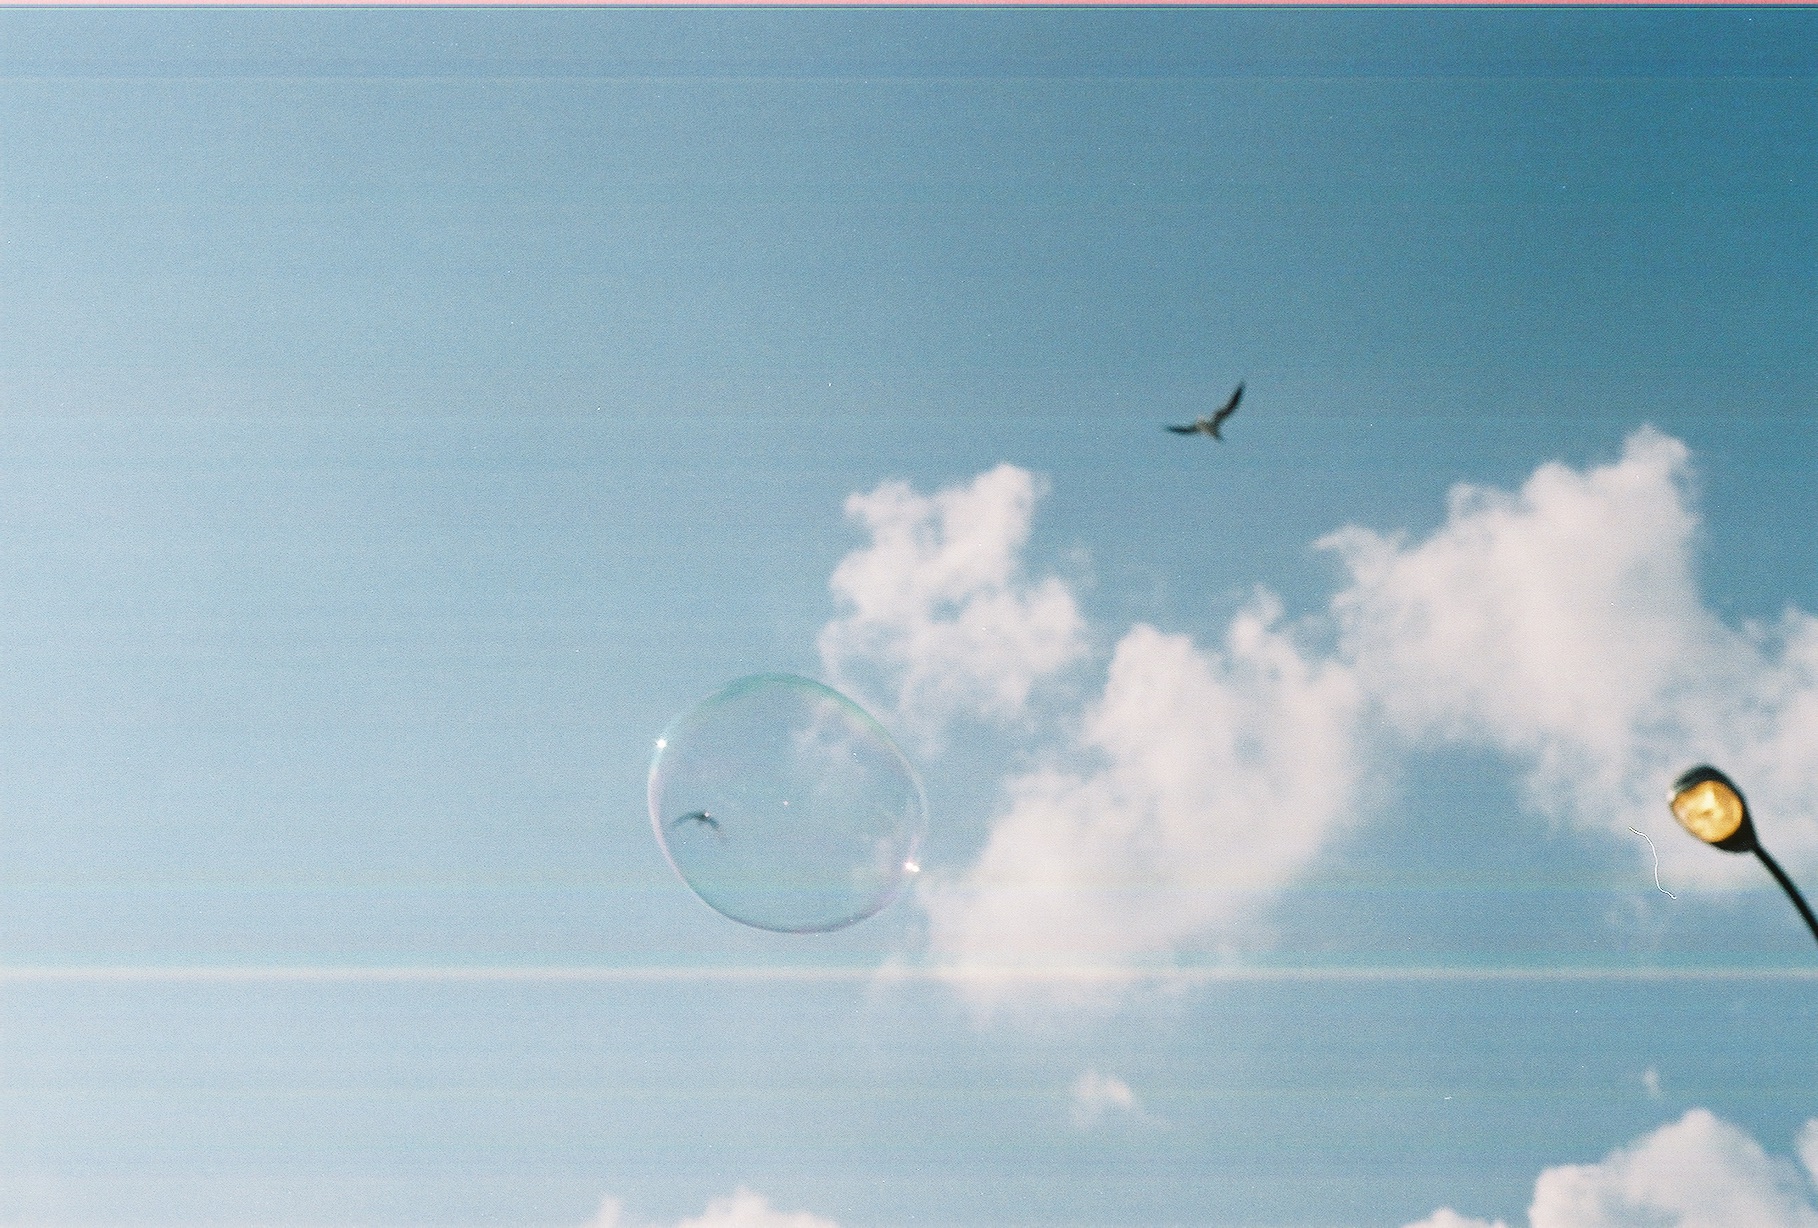
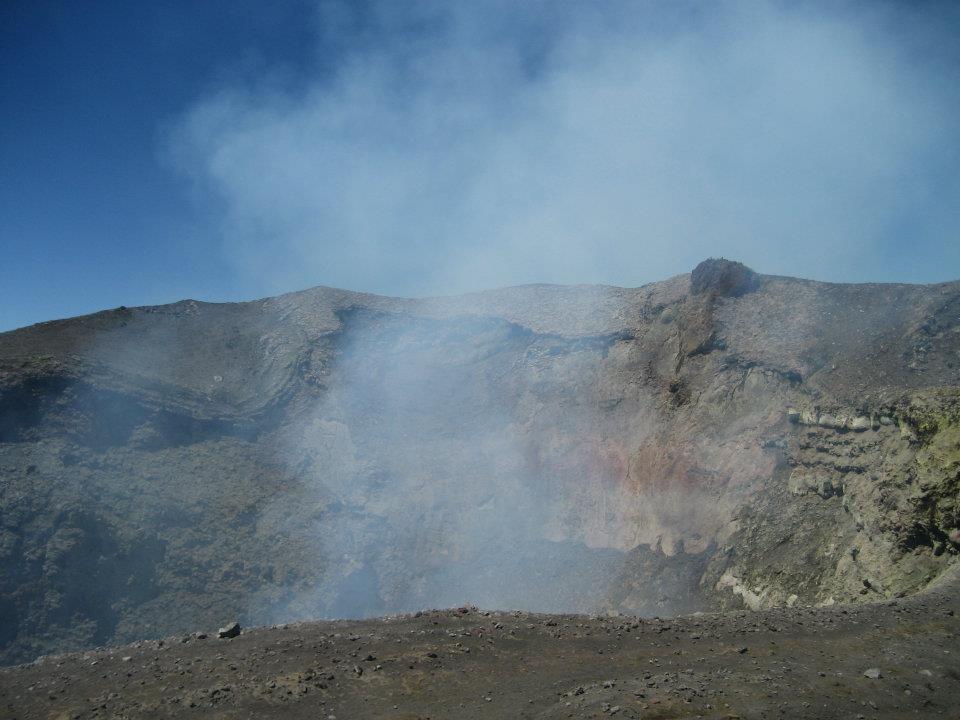
For this step, I'll be working with a few images. You can work with any images that you'd like as you work through these notes. But if you'd like to use the same images as me, you can download them here:
Let's say that I am in a directory (folder) called "Unit 1, Tutorial 4", and that it contains a subbolder called "images", like this:
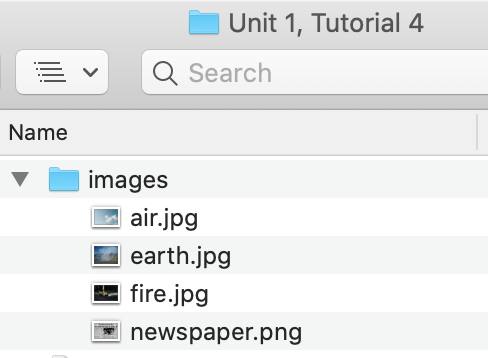
From the command line, I can use ls to
view the contents:
$ ls
images
$ ls images/
earth.jpg	fire.jpg	newspaper.png	smoke.jpg
Now I'm going to run Python and use a function called
listdir(), which takes the name of a
directory, and returns a list of all the files in that
directory. This is in the os library, so I must
import it first:
>>> from os import listdir
>>> listdir("images")
['newspaper.png', 'fire.jpg', 'earth.jpg', 'smoke.jpg']
Here I have passed in the name images,
the name of my subfolder, and listdir() gives me an
array of all files within that. Then I could choose a random
file in that list like this:
>>> from os import listdir
>>> import random
>>> files = listdir("images")
>>> random_file = random.choice(files)
Now I could go and use random_file as I would any filename
— for example to open that file with Pillow.
Here is how you would do this in a Python program — and there is one more key step to the process:
from os import listdir, path
import random
from PIL import Image

files = listdir("images")
files.remove(".DS_Store")

random_file = random.choice(files)

img = Image.open( path.join("images",random_file) )
Note that I'm importing path, and then
using path.join() in the last
line. This is taking the directory name and the filename and
joining them together into the path needed to
access this file. If you tried to access the file without the
directory name you'd get an error since the file is not in your
current folder, but rather in a
subfolder. (Remember the
discussion about paths two weeks ago.)
This technique will be crucial in working on the Unit 1 Project, as is explained in the Gist I created to help you get started.
Warning. If you try the above technique, you may get an error message that looks something like this:
PIL.UnidentifiedImageError: cannot identify image file '.DS_Store'If you see this error, it is because your directory contains a hidden file called
.DS_Store. These are
hidden files that Mac OS uses to store information about how
your folder is displayed in Finder. Obviously it is not an image
file, so PIL gives an error message when trying to open
it. Wikipedia
has some additioinal useful explanation of what these files are
and what they contain.
Mac OS tries to hide these files from you, but you can see them
if you type ls -a from the command
line:
$ ls -a
.		.DS_Store	earth.jpg	newspaper.png
..		air.jpg		fire.jpg
(Note: this is from the command line, not the Python shell. Remember that you can always tell which shell you're in from the prompt. If you see
>>>, then you are in
Python. If you see $
or %, then you are in the command
line. You can always enter the Python shell by
typing python, and you can exit it by
typing exit() or CONTROL-D.)
To verify the existence of .DS_Store
from within a Python program or the Python shell, you could
simply print the return value of listdir(), like
this:
>>> from os import listdir
>>> files = listdir("images")
>>> files
['newspaper.png', 'air.jpg', '.DS_Store', 'fire.jpg', 'earth.jpg']
Fortunately, the solution for you is easy, simply remove them from your list of filenames:
>>> from os import listdir
>>> files = listdir("images")
>>> files
['newspaper.png', 'air.jpg', '.DS_Store', 'fire.jpg', 'earth.jpg']
>>> files.remove(".DS_Store")
>>> files
['newspaper.png', 'air.jpg', 'fire.jpg', 'earth.jpg']
That should prevent the PIL.UnidentifiedImageError.
VII. Postscript: Working with HSV color
Note: This section was added after class.
We didn't cover this material together, but at the end of class we were experimenting with some techniques involving HSV color and things weren't quite working right, so I wanted to write-up some clear explanation in case anyone would like to work with this in their project. Working with color in HSV mode is a very powerful technique when writing computer programs because ranges of hue values are often easier to work with algorithmically than working with blends or red, green, and blue.
Refer back to Lesson 4, section I(c) for explanation of RGB versus HSV color spaces.
Here is a properly functioning version of the code we were working on in class, which continues from Example 4 above, with new and modified sections indicated:
Example 6
from PIL import Image, ImageColorimport random# let's make a 100x100 white imagewidth = 100height = 100img = Image.new("HSV", (width,height), (0,0,255) )# loop 500 times, and each time, pick a random x and a random y# and draw a pixel therefor n in range(500):x = int( random.gauss(50,10) )y = int( random.gauss(50,10) )h = random.randrange(155,185)s = random.randrange(235,255)v = random.randrange(100,255)img.putpixel( (x,y), (h,s,v) )img = img.convert(mode="RGB")img.save("rando.png")
Line 9 creates a new image as before (compare with Example 4 above), but now it does so in "HSV" mode, meaning that the three components of any pixel color will be hue, saturation, and brightness (rather than red, green, and blue).
The last argument (0,0,255) specifies the
background color of this new image. This is where we got tripped
up in class. As
explained here,
we usually think of HSV as consisting of: hue spanning from
0-360, representing degrees around the "HSV cone", saturation as
a percentage from 0-100, and value meaning brightness also as a
percentage from 0-100. However, as
explained here,
the three components of every pixel value are always specified
as 0-255. So we have to kind of "map" 0-360 into the range of
0-255. For example, 0 degrees would be 0, 360 degrees would be
255, and 180 degrees would be 128 (half of 255 is 127.5, rounded
up). Similarly, for saturation and value, 100% would be 255 and
50% would be 128.
So here, I'm setting the background color of this new image to be 0% hue (which is red), although that doesn't matter since I'm setting saturation to 0% which will give a grayscale color, and brightness is 100%, giving white.
Next, on lines 18-20 I'm using random.randrange()
to randomly select the values that I will use for hue,
saturation, and brightness. Here is where using HSV can be a
really effective technique. For hue, I'm
specifying random.randrange(155,185) which is going
to give me a range of shades of blue. Doing this would be much
trickier in RGB mode. For saturation I'm specifying 235-255,
which is going to give me numbers in the range of 80-100%
saturated, and for brightness I'm using 128-255, which is going
to give me about 50-100% brightness.
Running this three times gives me the below output:
 The results of running Example 5 three times, each placing
500 pixels randomly in the image.
The results of running Example 5 three times, each placing
500 pixels randomly in the image.
If you wanted to specify different hue ranges, you could experiment to find the values you're looking for, or check a color picker tool. Once you know the approximate color you want to build a range around you can try randomly picking values that are +/- 10 or so above and below that value.
Hope this is helpful. There are lots of ways that I could imagine this technique being useful in your Unit 1 Projects.